
Pantry And Ingredients
Softening butter and making a simple garlic butter
Recognise softened butter, safely prepare one clove and make a measured small batch, with separate bread, oven and vegetable finishes.
Before you begin
- Read food labels before you cookRead the actual pack, its ingredients, date and storage instructions.
- Clean and set up your kitchen before cookingPrepare a clean ready-to-eat area before handling butter.
- Knife confidence: the safe claw gripSet up the board and safe clove holds before chopping.
- Measuring accurately without stressWeigh 50 g and use a level marked 5 ml spoon.
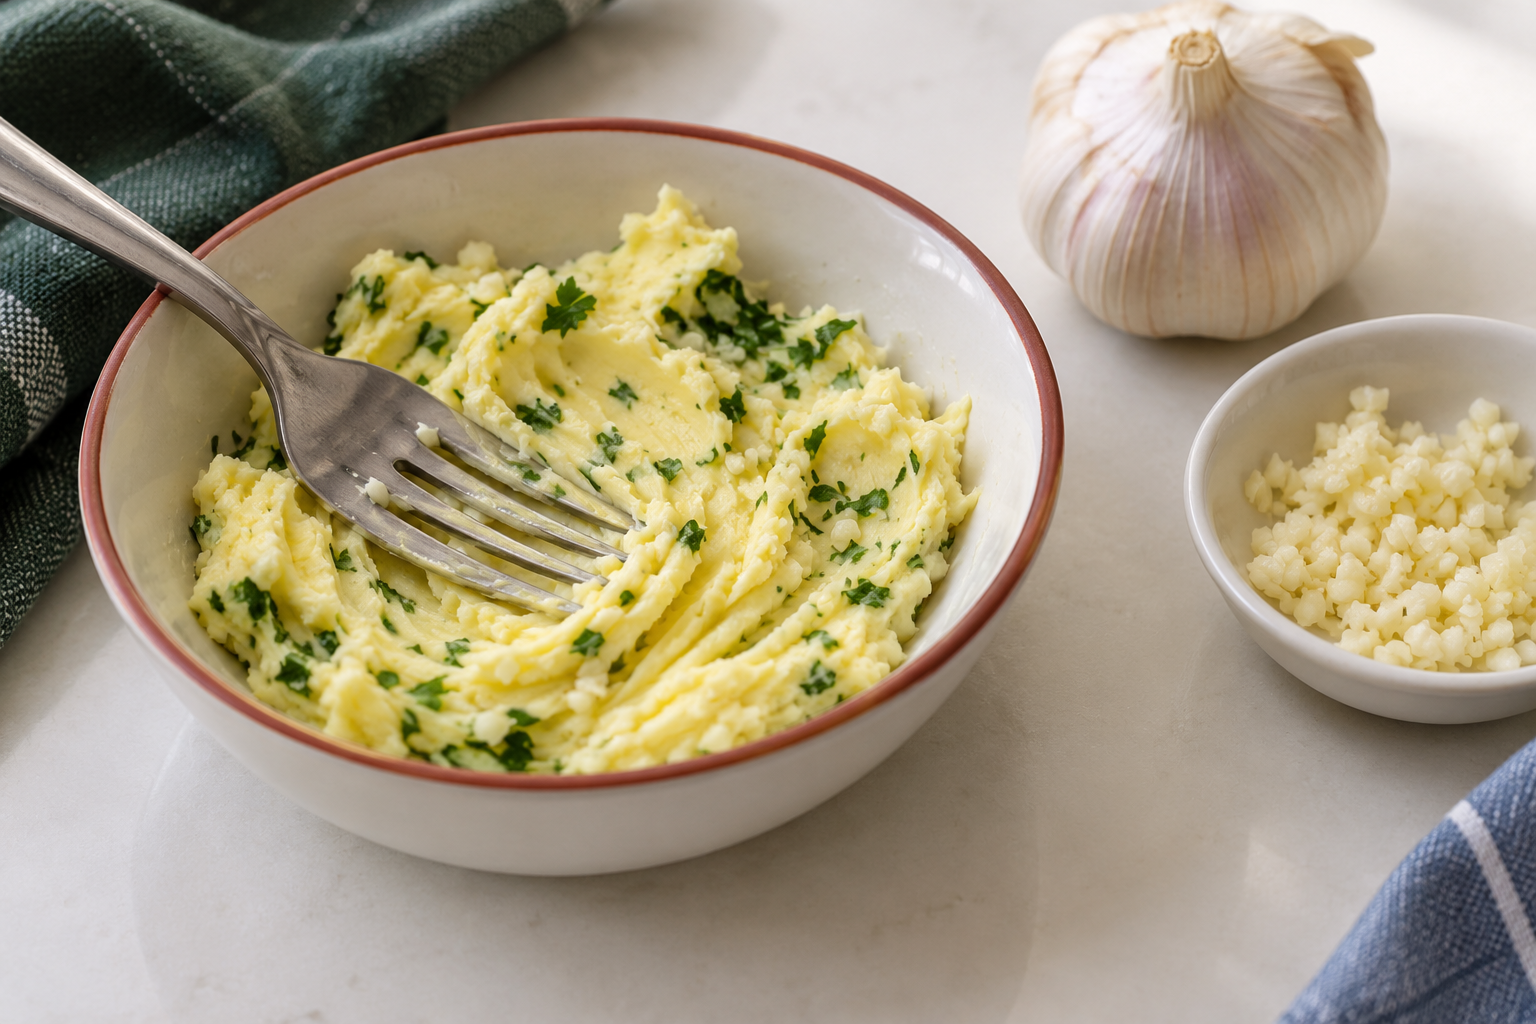
Softened and melted are different states
- Read food labels before you cookRead the actual pack, its ingredients, date and storage instructions.
Softened butter yields to the back of a spoon but still holds a mound. Melted butter runs or forms a liquid puddle. For this garlic butter, you want the first state so the garlic mixes through and the butter spreads rather than pours.
Butter is a milk product. Use ordinary labelled butter for the first practice, not an unidentified spread; an alternative can behave differently. Check suitability, dates and opening instructions before weighing. Salted or unsalted butter works here, with no extra salt needed for the first attempt.
The cold mixing task makes 50 g butter into a small flavoured batch. Serving it on ready-to-eat bread finishes that task without heat. The later oven and vegetable options are separate attempts, not jobs to juggle alongside the first knife practice. Softening time varies with room temperature and piece size; allow time to observe rather than rushing.
Soften a small amount
- Measuring accurately without stressTare the weighing plate and measure 50 g, not 50 ml.
- Use a microwave and check for even heatingIdentify microwave-only power and pause/cancel before the optional route.
- Use a microwave and check for even heatingCheck the actual dish and remove foil and utensils.
- Wash hands and prepare the clean work area. Weigh 50 g butter using the scales lesson. Remove all wrapper, including foil. Use a table knife on a stable clean board to divide it into roughly 1 cm pieces. If a hard block needs force, wait a little; do not push a sharp knife through an unstable lump.
- Spread the pieces on a clean plate, away from the hob and raw-food preparation, and protect them from contamination. Put the rest of the pack back in its labelled storage. Check the small pieces after 10 to 15 minutes with the back of a clean spoon; in a cool room they may take longer. A dent with no puddle is the endpoint. Do not leave them out all day.
- Optional microwave route: first read its linked control and container sections. Use only a supported butter-softening program for THIS quantity, following your exact manual. A preset measured in larger sticks is not automatically suitable for 50 g. If using manual power instead, select the model's permitted low softening power, not grill or combination mode, and a microwave-safe dish with all foil and utensils removed.
- For a controllable manual low-power attempt, start with a five-second burst ONLY if the appliance supports that time at the chosen power. Pause as its manual directs, inspect with a clean spoon outside the appliance, move the pieces and stop as soon as they yield. Remove the spoon before any repeat. Very short bursts can still melt a spot; no universal number of repeats applies. If those controls are unavailable or unclear, use the room-temperature method instead.
- If butter begins flowing, stop heating and chill it briefly until it becomes spreadable for THIS garlic-butter task. Do not claim that chilling melted butter restores every baking property: a creaming recipe may need fresh butter softened correctly. If the dish feels hot, use dry protection as directed and let it settle before handling.
For a small garlic butter
- Use an oven: settings, preheating, shelves and the grillFor the later oven option, practise the cold loaded tray and use an ordinary oven function, not the grill.
- Boil and steam vegetables without guessingPrepare and fully cook its 200 g fresh batch before the butter finish.
- Use the softened 50 g butter and ONE sound small garlic clove, not a bulb. Optional: 1 level marked 5 ml teaspoon finely chopped washed and dried parsley. Do not add an unexplained handful or extra oil. Garlic tastes sharp when raw; use a modest clove for the first batch.
- Have a small clean mixing bowl, separate plate for softening, clean spoon for checking the dent, fork, table knife for butter and spreading, scales, stable board with non-slip support, suitable preparation knife, small garlic dish, scraper or spoon, 5 ml measure, clean serving plate and two slices of ready-to-eat bread. Check the bread's ingredients too. Have a clean cover, storage container, label and pen ready.
- For the LATER oven attempt, add a sound oven-suitable tray, timer, two dry oven gloves, full stable trivet and suitable turner. Use two ready-sliced crusty bread pieces about 2 cm thick; no bread-cutting task is required. Rehearse the loaded cold tray movement and read the exact oven instructions before heating.
- For the LATER vegetable attempt, use the complete 200 g fresh carrot OR broccoli batch and all equipment in its linked lesson. That makes two small side portions; do not substitute raw or partly thawed vegetables at the finishing step.
Mix it evenly
- Knife confidence: the safe claw gripRead the full stable board, bridge and tucked-finger holds before the clove.
- Garlic colour: fragrant, golden or burntUse ONLY its safe clove preparation, not the sauce-base cooking.
- Fresh herbs: storing them and using them upUse its clean wash/dry/chop procedure but measure 5 ml parsley here.
- Boil and steam vegetables without guessingFor the later warm side, finish its 200 g fresh batch and draining first.
- With all heat OFF, separate one clove with your fingers. Peel its papery skin; if tight, gently press it on the stable board with the heel of your hand to loosen the skin, never hit a knife. Put the clove on its widest stable side, trim only the hard base using the safe hold, then halve lengthways with a bridge hold clear of the blade. Stop if it rolls or is too small to hold safely; get help or choose ready-peeled garlic.
- Rest each half flat-face-down. Use tucked fingertips to slice across into roughly 2 mm pieces, stopping before an awkward end. Park the knife before arranging a small pile; make controlled downward cuts while the other hand stays clear, until pieces are a few millimetres across. Move them with a scraper or spoon, not fingers along the blade. This is ONLY the preparation part of the garlic lesson: do not make its onion-and-tomato sauce for this task.
- If adding parsley, follow the herb lesson's washing, drying and safe chopping steps, but prepare only enough for ONE level 5 ml teaspoon, not its 15 ml yoghurt quantity. No yoghurt is needed. Leave parsley out when you do not have it or cannot confidently prepare it.
- Transfer the soft butter into the bowl with the table knife. Add the chopped clove and optional measured parsley. Mash with the fork, fold the edges towards the centre and scrape the sides with the table knife until the garlic is spread evenly and there are no hard butter lumps. Do not work a knife towards your fingers.
- For the cold first finish, take one level 5 ml teaspoon of mixture with a clean measure and spread it thinly on each bread slice with the table knife. Eat from the serving plate; do not return a bitten piece or mouth-used utensil to the bowl. Cover and refrigerate the remaining untouched mixture promptly by the storage steps below.
- For a separate later warm side, complete the 200 g vegetable method, including its tenderness check and safe draining, but pause before its optional butter or oil seasoning. Switch the ring OFF. With the drained vegetables in their standing serving bowl, add ONE level 5 ml teaspoon garlic butter and fold gently with a clean serving spoon until melted through. Serve promptly, cooling mouthfuls before eating. This is a fresh garlic flavour finish, not a claim that a brief melt cooks the garlic thoroughly.
Use a little on oven-warmed bread
- Use an oven: settings, preheating, shelves and the grillFollow the full controls, loading and removal routine before this option.
- Kitchen cuts, burns and emergenciesFor an injury, stop the cooking task and use the urgent actions first.
- Do this on a later attempt with garlic butter still within its storage limit. With the oven cold, identify the normal conventional or fan setting, shelf arrangement, start and OFF controls by the manual and linked lesson. Put the shelf around the middle as permitted. Rehearse carrying the cold tray with the two bread slices, using both gloves and the clear trivet.
- Preheat to 200 C conventional or 180 C fan on the appropriate ordinary oven function, following the maker's preheat cue. Do not select grill or guess a conversion for an unfamiliar oven. Place the bread flat on the ROOM-TEMPERATURE tray and spread 1 level 5 ml teaspoon butter thinly on each piece with clean utensils. Cover and refrigerate the rest immediately.
- Use both dry gloves to hold the tray firmly. Open the door standing back from escaping heat, slide the tray onto its supported shelf and close the door. Set a reminder to inspect at five minutes and remain nearby. You are warming ready-to-eat bread with a thin spread, not cooking raw chicken or proving food safety from browning.
- Inspect without touching food or metal. Usually a small batch takes about five to eight minutes, but bread and appliance vary. Butter should have melted into the bread and edges may be lightly golden. Stop earlier if garlic darkens or edges scorch; if still firm, check again after another minute. Do not leave it until the image colour matches.
- Switch the heating function OFF as the manual directs. Use both dry gloves, take the tray firmly at its designed sides and land it fully on the trivet. Close the oven door; residual heat remains even after switching off. Use the turner to move bread onto the standing serving plate. Let it cool to comfortable eating warmth before biting. Leave the tray to cool before washing.
- For ordinary over-browning, stop and remove the tray only if handling is safe. If there is fire, leave the door closed and do not investigate the food; leave, warn others and call 999, switching off only if safely reachable. A burnt bread slice is replaceable.
Store the remainder deliberately
- Decide whether food is still safe to useCheck known dates, storage and contamination before choosing food.
- Storage and reheating basicsUse the complete covered fridge-thaw routine for a permitted frozen portion.
- This is fresh garlic butter, not a shelf-stable preserve. Put untouched mixture in a clean covered food container, label its preparation date/time and any earlier butter or herb deadline, and refrigerate promptly at 0 to 5 C. For this beginner batch plan to use within 48 hours OR the earlier applicable ingredient deadline. That is a deliberately short home-use plan, not a tested preservation process.
- The garlic preparation lesson's same-day plain-clove plan is for that separate exercise. Here use a freshly prepared sound clove and follow this fresh-mixture plan; do not retrieve an anonymous old dish of chopped garlic. Any actual shorter pack or storage limit still wins. Never return butter from raw-meat contact, bitten bread or a used plate to the clean batch.
- For a freezer option, check that the butter pack permits freezing. While the fresh batch is still suitable, use small clean freezer-suitable lidded containers, one portion per container. Spoon a level 5 ml portion into each, close and label garlic butter, preparation and freezing dates, ingredients and 5 ml portion. Freeze promptly around -18 C. This avoids prying apart a frozen lump with a knife. Aim to use within about three months for quality, or a shorter pack instruction.
- Thaw only the portion needed, covered in the fridge; do not warm it on the worktop or microwave-defrost it for storage. Wait until no frozen centre remains, note when fully thawed and use within 24 hours or a shorter applicable instruction. For bread, allow just the brief softening required to spread it, then use by the stated method. Do not keep taking the whole batch in and out beside the hob.
- Wash the cooled equipment and clear skins and crumbs. If the mixture's history becomes uncertain, discard it rather than tasting to decide or assuming the next hot meal makes it safe.
What the practice teaches
Record how long the pieces took to dent and whether the mixture spread without tearing the bread. Hard lumps need more gentle softening and mixing, not force with a sharp tool. Very large garlic pieces need smaller safe cuts on the next attempt, not a knife waved inside the bowl.
If the raw garlic flavour is stronger than you enjoy, leave the portion rather than trying to mask it with salt. Next time choose a smaller clove or make plain softened butter; no one needs to eat an unpleasant sample to complete a lesson.
For baking later, read the actual recipe's requirement. Softened and melted are not interchangeable simply because both started as butter. Today's useful skill is recognising a spreadable state and making a small mixture with a known storage plan.
Sources and further reading
- KitchenAid: recognising softened versus melted butter
- KitchenAid: model-dependent softening power and settings
- Good Food: garlic butter and quality storage example; our bread finish uses an ordinary oven, not its grill method
- Food Standards Agency: chilling, freezing and defrosting
- GOV.UK: use-by and best-before dates
- Food Standards Agency: preventing cross-contamination
- Food Standards Agency: cleaning equipment and using suitable cleaners