
Guided Practice
Learn a pan sauce with mascarpone chicken pasta
Choose the chicken and plan the session
Use fresh or fully fridge-thawed boneless, skinless chicken thighs within their use-by and opening limits. No bones, skin, rolled joints or still-frozen centres for this task. Open by the packet's designed tab in the raw area. Never rinse chicken. A thawed pack must be used within 24 hours of complete defrosting or any stricter label limit; use the full storage lesson for a future thaw, not an improvised warm-water defrost now.
Choose plain short dried pasta such as penne and read its complete method. Check wheat/gluten in pasta, milk in mascarpone and all actual seasoning labels with the people eating. Follow any stricter product cooking direction. Prepare all cold work and equipment before switching on, allowing a calm uninterrupted session rather than a fixed dinner deadline.
A suitable thin-tip probe must fit its complete sensing area in the centre of a small chicken piece. Read its manual and care lesson. If your device only reads the surface of these pieces, arrange a suitable probe before beginning; do not stack pieces or measure hot sauce to pretend you have checked their centres. The bean route below is a separate alternative with its own can-opening prerequisite.
Practise chicken doneness, a tomato sauce base and gentle dairy finishing in one measured two-portion meal.
Before you begin
- Clean and set up your kitchen before cookingPrepare clean components first, keep raw bowls/tools separate, and wash hands before handles.
- Knife confidence: the safe claw gripPractise a secure handle grip and tucked supporting fingers before cutting ingredients.
- Measuring accurately without stressUse grams on scales and marked metric measures for the smaller quantities.
- How to dice an onion without stressPrepare the onion before handling chicken; use this meal's onion quantity.
- How to use hob heat without guessingIdentify the controls, safe handles and heatproof pause places.
- Kitchen thermometer basicsFit the whole sensing area in the meat centre and complete continuous temperature holds.
- Thermometer cleaning and carePrepare the complete compatible washing and food-contact disinfection method before heat.
- Garlic colour: fragrant, golden or burntUse the clove-peeling/chopping instructions only, not that lesson's different onion and sauce quantities.
- Pasta doneness: why tasting mattersApply the two-portion and actual packet directions to 160 g, not the 80 g practice.
- Drain food and save cooking water safelyRehearse the loaded cold lift or supported scoop route before any heating.
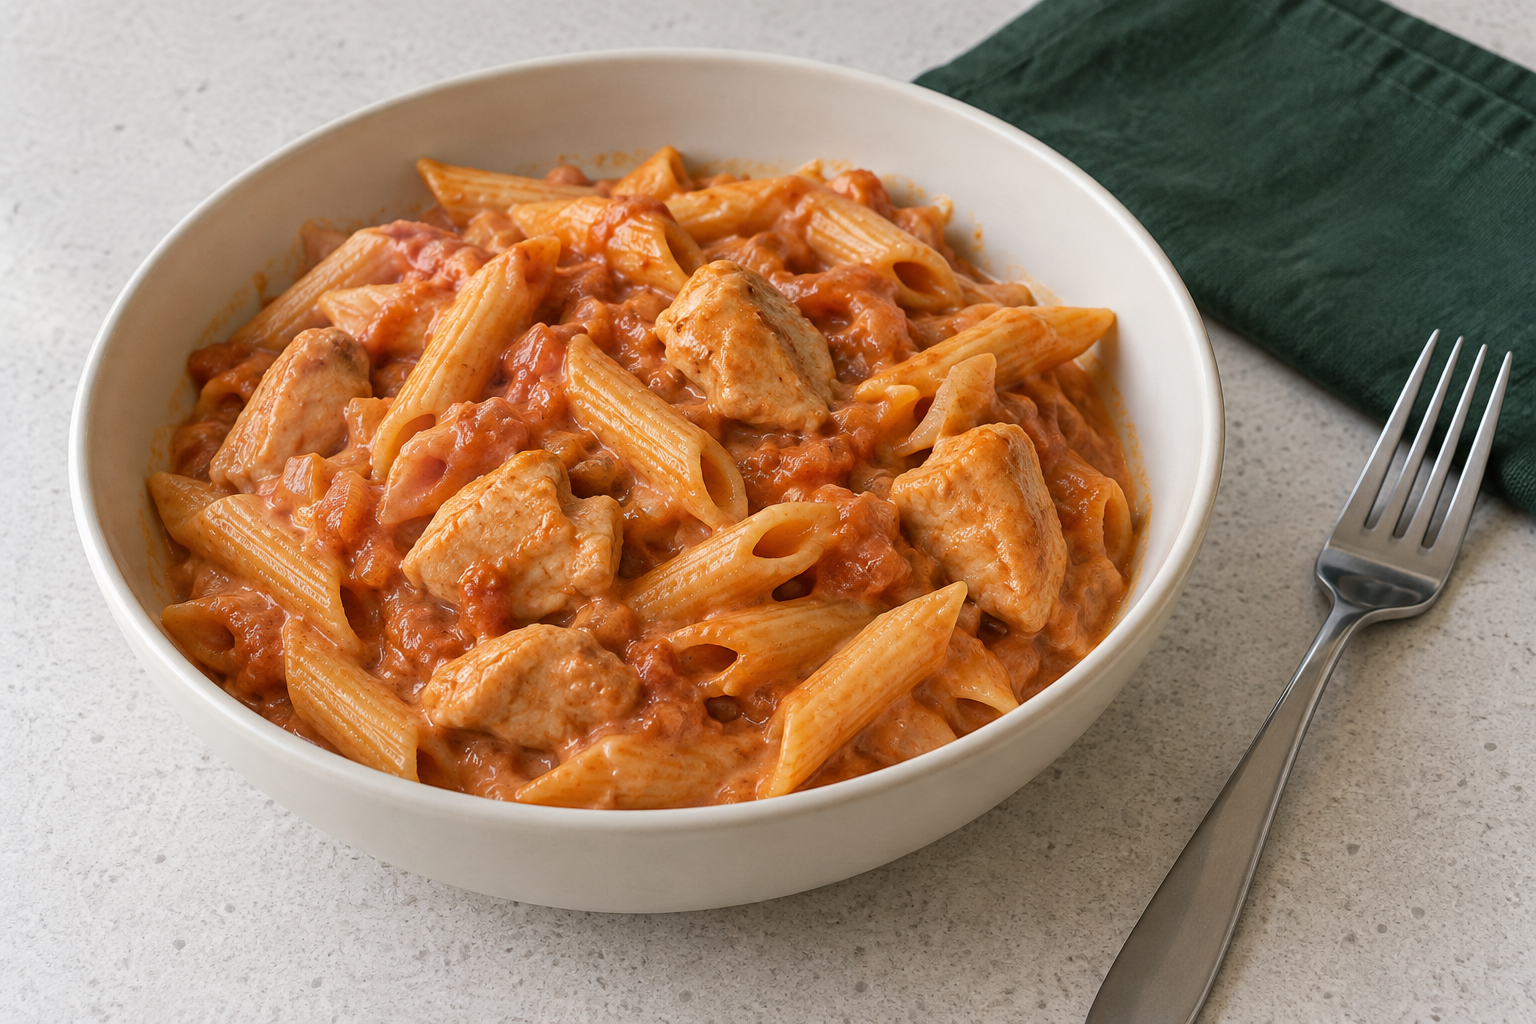
Three skills in one meal
This two-portion practice teaches small chicken pieces, a gentle pan sauce and a pasta finish. Make and check the chicken sauce first, pause it briefly while cooking pasta, then combine. You do not need to learn two new hot tasks at once.
The linked Good Food recipe demonstrates that chicken, tomato and mascarpone work together, but it is a different baked dish. This sequential KINALO teaching formula, its amounts and reminder intervals have not been physically kitchen-tested here. Watch the actual texture, follow product directions and make the centre checks below; the photo is not a promise of a tested result.
For two portions
- Measuring accurately without stressUse marked metric spoons, not an unmarked eating spoon.
- Drain food and save cooking water safelyArrange the supported scoop and cooled-water emptying route if required.
- 160 g dried penne; 300 g the suitable chicken above; 75 g peeled onion, diced roughly 5 mm; one small garlic clove, peeled and finely chopped; 200 g plain passata; 100 ml drinking water for the sauce; 60 g mascarpone; two level 5 ml teaspoons cooking oil, kept separate. Optional: one level 1.25 ml quarter-teaspoon dried oregano and a little black pepper. No salt is needed initially.
- Pasta water: follow the packet. If it permits, use 1.5 litres in a saucepan holding at least 3 litres with generous headroom; otherwise use its amount and a suitably larger pan. Also set out a separate supported jug of 150 ml drinking water for small sauce adjustments, not part of the initial 100 ml. You will later save approximately 150 ml pasta water in another heatproof jug.
- A deep approximately 24 to 26 cm saute pan with a fitting lid, suitable for the finished pasta and sauce, plus the pasta saucepan; secure handles, two full-base trivets, a heatproof lid-rest, dry heat-resistant gloves, timer and probe with compatible cleaning/disinfection kit and clean rest. Identify both controls while off.
- Scales; clear measuring jug; marked 5 ml teaspoon, optional 1.25 ml measure and heat-safe long-handled 15 ml tablespoon; clean bowls for weighed onion, garlic, passata, mascarpone and pasta, and a clean bowl for softened onion. Keep cheese covered/chilled. A stable non-slip vegetable board and comfortable knife; a separate raw-chicken board/non-slip support, raw bowl and designated partly cooked chicken plate.
- Raw-contact tongs for chicken and a heat-safe raw-stage cooking spoon, each with a separate rest. Distinct clean finishing spoon, clean supporting tongs for probe checks and clean serving spoon/rest. A clean saucer, sample spoon and eating fork, two serving bowls and normal cutlery. Raw-stage tools must not become serving tools merely because the food later cooked.
- A heat-safe standing colander in the clear draining sink, ladle, supported heatproof reserve jug with readable 150 ml mark, and, if the loaded lift is unsuitable, a heat-safe pasta spider/slotted scoop that retains penne. For saved food, clean shallow containers, covers and date labels. Optional bean version needs a suitable can opener, draining sieve/bowl and clean measuring bowl from its linked lesson.
Prepare the cold pasta and raw chicken
- Both rings stay off. Complete the setup lesson, set out the sink/colander and rehearse the actual saucepan's cold loaded weight using your chosen water amount. Set out trivets and a clear path. Choose the linked scoop route or help now if lifting/tilting is uncomfortable. Refill the pasta saucepan with its measured cold water and leave it off.
- Using the onion and garlic preparation sections, make the stated small pieces. Weigh onion, pasta, passata and cheese in separate tared clean bowls. Measure the 100 ml sauce water and separate adjustment water. Measure oil/oregano before raw work, cover the cheese and refrigerate it, and promptly store unused ingredients by their opening limits. Clear the clean preparation tools away.
- In the separate raw area, unfold one cold thigh on the stable raw board, spreading its soft flaps without stretching. Set the knife aside while repositioning; do not invent a flat cut face as if meat were a cucumber. Hold one broad area gently with tucked fingers beside and behind the intended blade path, with thumb tucked, never across it.
- Use short controlled drawing cuts down to the board to make strips roughly 3 cm wide. Keep the edge ahead of the tucked fingertips. Put the knife down, turn a strip across the board, hold its broad end similarly and make crosswise cuts roughly 3 cm apart. Repeat, moving the holding hand back between cuts. Irregular pieces are fine; do not force through a tough tendon or chase a tiny slippery end. If it cannot be held without fingers in the path, stop and arrange a suitable ready-cut product with its own directions rather than cutting harder.
- Transfer pieces with the raw tongs into the raw bowl. Cover and refrigerate them until the pan stage. Chill unused raw meat by the label. Wash hands; safely clean/disinfect the affected raw board, visible knife and surfaces by the setup lesson before clean handles. Do not leave a knife hidden in washing-up water. The raw tools and rest remain separate from finishing/serving tools.
Prepare and brown
- Put the first measured 5 ml oil in the cold deep pan and use medium-low heat. Add the onion, stir slowly across the base every minute and watch for gradual softening, approximately 8 to 10 minutes. If it starts catching without smoke, lower heat; add one measured 15 ml spoonful from the 100 ml sauce water to this small onion mixture, not to smoking hot oil. Spoon softened onion into its clean bowl.
- Add the remaining 5 ml oil and use medium heat. Put chicken into the pan with raw tongs, low and away from you, with gaps. Keep hands clear of splashes. Do not pour raw juices over the hob. Let one face colour for approximately 2 to 3 minutes, then use the tongs to roll small pieces onto other faces for a further 2 to 3 minutes. Brown is a flavour cue, not a centre safety result.
- If the pieces cannot fit with gaps, brown two batches. Put the first partly cooked batch on the designated raw-status plate only while immediately browning the second. Waiting unstarted raw chicken stays refrigerated. Return every partly cooked piece immediately for the following sauce cooking; do not refrigerate or save partially cooked meat for another session. Handle that plate as raw-contact equipment.
- Lower heat, return the onion and add garlic. Stir with the raw-stage cooking spoon for about 30 seconds without blackening. Pour in passata and remaining initial sauce water slowly from low beside the pan, with face out of steam/splashes. Add optional oregano. Gently move the spoon along the base to loosen golden deposits only. For black deposits or smoke use the stopping section below, not a tasting test on raw-chicken sauce.
- Adjust to gentle small bubbles, not a rolling boil. Cook approximately 10 to 15 minutes as a reminder, stirring across the whole base every minute or two. If sauce thickens before the meat passes its check, use one measured 15 ml addition from the adjustment jug, stir and continue. Keep the jug supported and do not empty it at once.
- If splashes need a lid, use dry protection on its handle and partly cover only as the lid/pan permit safely; do not balance an unstable lid. Lift by the handle with its opening tilted away from your face, let condensation drip into the pan and put it on its heatproof rest before stirring. Keep watching the pan, rather than going to wash tools while it is on.
Finish cooking and build the sauce
- Move the controlled pan off the ring to the trivet for checks, using dry handle protection as needed. With clean supporting tongs, steady a thick chicken piece without lifting it high or touching it with fingers. Insert the cleaned probe from the side so its complete sensing area reaches the centre without touching the pan. Start with the largest/thickest pieces from different parts and both batches, checking other potentially cooler or differently sized pieces too. A sauce reading alone cannot clear the chicken.
- Wait for a settled display. Each potentially cold checked centre must stay at or above 75 degrees C for the full 30 seconds, or 70 degrees C for the full 2 minutes. Time a continuous hold with the correctly positioned probe as its instructions permit. If the result is low or drops during a hold, restore gentle cooking and recheck after another 2 to 3 minutes, restarting incomplete holds and cleaning/disinfecting probe and any contaminated supporting utensil before the next check. Do not average hot and cold results.
- Once all required chicken checks pass, switch the sauce ring off, put the lid on and immediately begin the pasta stage. Retire raw-contact tongs, spoon and rests. Wash hands before the clean finishing spoon. Note when chicken cooking first finished for any later leftover cooling clock. This is a short covered pause during one continuous meal, not a long warm hold or advance cooking for tonight.
- Cook all 160 g pasta using the linked two-portion guidance and your actual packet, stirring early to separate pieces. Near its end lift a piece with a clean spoon onto the saucer, let it cool, then bite using the eating fork; it should not have a hard chalky middle. Mouth-contact cutlery does not return to the pot. If needed give another 30 to 60 seconds and test again.
- When ready, switch the pasta ring off, ladle roughly 150 ml cooking water into the supported heatproof reserve jug and follow the rehearsed drain or scoop route. Keep face out of steam and put the saucepan safely down before uncovering the sauce pan. Leave the drained penne briefly in its secure colander while immediately rewarming the sauce below; for the scoop route leave pasta in the stationary off pan until the sauce is ready, then transfer directly by the prepared scoop. Do not carry an overloaded dripping colander.
- Before adding penne, return the sauce to low-to-medium-low heat and stir the base and centre with the clean finishing spoon until steaming throughout. This is finishing the same fresh session. If it has fully cooled or the session was interrupted, do not briefly warm and pretend it stayed hot: use the separate safe-history thorough reheat route below, or choose a fresh meal if its cooling/history cannot be established.
- Turn down to the lowest suitable heat or move the controlled pan off the ring. Add the 60 g mascarpone in two or three spoonfuls, stirring gently until the colour is even. Add drained penne and sweep the spoon under small portions, folding them over within the pan until coated. No high tossing. If too thick, add one measured 15 ml reserved-water spoonful, mix, then reassess before another.
- Use only gentle controlled warmth to finish the whole fresh dish hot; no hard boiling to make dairy smooth. Switch both controls fully off. Spoon a small sample onto the saucer, cool it and taste with the eating fork. Only now add a little pepper or an optional small salt addition, mix and taste another cooled sample. Divide into clean bowls with the clean serving spoon and eat promptly; let your own bite cool.
A bean version uses a different cooking sequence
- Open a can and use cooked beansRead the complete setup and sharp-lid handling for this optional route.
Read the entire linked can-opening lesson before choosing this route. Use ready-cooked canned beans, not dried beans. A nominal 400 g can includes liquid and does not promise 400 g beans: open and drain by that lesson, then weigh about 240 g drained beans in a tared clean bowl. Use actual label cooking, opening and suitability instructions. If you want a vegetarian dish, check the mascarpone and other labels rather than assuming.
Do the same cold setup, onion/garlic measures and pasta/draining rehearsal, but omit all raw meat work and its raw tools. Soften onion in the first 5 ml oil and leave it in the pan; the second 5 ml chicken oil is not needed. Add garlic for about 30 seconds, then 200 g passata, 100 ml water and optional oregano. Simmer gently for about 10 to 15 minutes, stirring the base and adding measured adjustment water only if thick.
Add the drained ready-cooked beans and complete their actual label heating method, stirring until hot throughout. Switch off and cover for the same immediate pasta stage. Follow the pasta, sauce-rewarming, mascarpone, folding and serving stages above, without pretending there are chicken centres to check. Any leftover cooling reminder starts when this bean sauce first finishes cooking, not after pasta assembly. Follow the full storage/reheat lesson for saved bean meals.
Read and correct the texture
- How to use hob heat without guessingRead the full smoke/fire response before beginning.
A paste-like coating gets one more 15 ml water addition and gentle mixing. For a watery puddle, first fold/mix a little longer; if still loose, use gentle uncovered warmth while stirring, stopping when it clings. The dairy may become grainy with excessive heat: stop heating and gently fold in a small measured water addition if dry. Firm curds will not become perfectly smooth again. Do not chase the photo with repeated hard boiling or reduce an already salty sauce.
Rapid blackening without smoke means lower heat and safely pause the controlled pan on its trivet. Smoke means switch off if safely reachable and leave the pan stable to cool; never carry a smoking pan or splash water into hot oil. A pan fire means leave, close the door, warn others and call 999 from safety, following the hob lesson. Do not rescue the meal.
For a black, acrid base, do not scrape it into sauce or taste raw-chicken sauce to assess it. This beginner setup does not include a second clean suitable sauce pan and full transfer routine, so stop rather than improvising a hazardous transfer. Do not save partially cooked chicken to restart later. Choose a new safely prepared meal; next time use gentler heat and smaller batches. Pale chicken that steamed rather than browned can still finish safely in the sauce: centre checks matter more than colour.
Use the remaining ingredients
- Save time and use up ingredients across mealsChoose a complete next meal while retaining ingredient limits.
- Storage and reheating basicsPreserve the original clock and earliest ingredient limit.
- Storage and reheating basicsUse a full supported fridge thaw for eligible frozen portions.
Label and refrigerate unused passata and mascarpone promptly with their real opening date and after-opening/use-by limits. Plan their next use while the limits still permit it; adding them to a second dish does not grant extra days. The linked use-up lesson gives a complete next task rather than an unexplained instruction to make soup.
For untouched eligible spare pasta, use clean tools to divide into small shallow containers and cool/refrigerate within one to two hours of the original chicken-sauce cooking completion, before the pasta stage. Use within 48 hours of original cooking or any earlier ingredient limit; label that original time. Freeze promptly only as the full storage lesson and ingredients permit. Fully fridge-thawed portions have a 24-hour use limit or stricter label guidance. Missed cooling, unknown history or a no-reheat label is a reason to discard, not heat harder.
Reheat one eligible pasta portion
- Storage and reheating basicsCheck eligibility before heating.
- Kitchen thermometer basicsUse sensing depth, cold areas and timed continuous holds.
- Thermometer cleaning and careClean/disinfect between incomplete and finished checks.
- Only use properly cooled/stored food that has never been reheated and whose labels permit it. Take only the portion to eat; leave other eligible portions chilled. Have the deep pan, clean spoon, lid/rest, trivet, dry gloves, clean serving tools/bowl, supported drinking-water jug, heat-safe 15 ml measure, suitable probe/cleaning kit and seconds timer ready. Read the full storage and probe lessons first.
- Put the chilled portion into the cold pan with two measured 15 ml spoonfuls drinking water. Use medium-low heat and move the spoon through the base and centre frequently, gently separating compact pasta. Add one more 15 ml only if catching. If using the lid briefly to retain moisture, uncover away from yourself on its safe rest, and keep stirring between covered intervals. There is no universal two-minute reheating time.
- Heat until steaming throughout, then make properly positioned probe checks in potentially cooler centres of the mixed portion and the thick chicken pieces separately, off the ring on the trivet. Require each checked cold centre to stay at or above 75 degrees C continuously for 30 seconds. Clean/disinfect after inadequate checks; return to controlled heating and restart failed holds. A hot spoonful of sauce at the edge is not proof of the whole portion.
- Only after the complete portion passes, remove the probe, switch off and serve with clean tools. Accept that dairy texture may change; preserving gloss is not a reason to underheat. Eat promptly and do not cool/freeze this reheated portion for a second reheating. Mixing it into a later dish would not reset that history.
Reset the chicken pasta station
Check both controls are off. Leave pans and remaining cooking water stable until fully cool, respecting cookware instructions before washing. Do not pour cold water into a very hot pan or fat down the sink. Raw bowls/plate, knife/board, cooking tools and rests need the full separate cleaning and appropriate disinfection in the setup lesson; clean/disinfect and dry the probe after use.
Wash hands after contaminated cleanup and store knives visibly and securely. Finish chilling eligible portions within their original clock while doing this: washing up does not add cooling time. Resetting the station is part of finishing the task, not a separate mystery after the meal.