
Mistake Recovery
Dry chicken rescue
Slice and sauce freshly cooked chicken, reheat a chilled portion thoroughly once, or make a separate safe cold filling.
Before you begin
- Cook a plain chicken breast in the ovenLearn the complete boneless first cook and its verified centre check.
- Kitchen thermometer basicsPut the whole sensing area in the coldest thick centre and time the hold.
- Knife confidence: the safe claw gripPrepare a stable clean board and make controlled cuts.
- Make a simple tomato sauce from passataComplete the 250 g tomato, 5 ml oil and 30 ml water method.
Improve the bite without reversing cooking
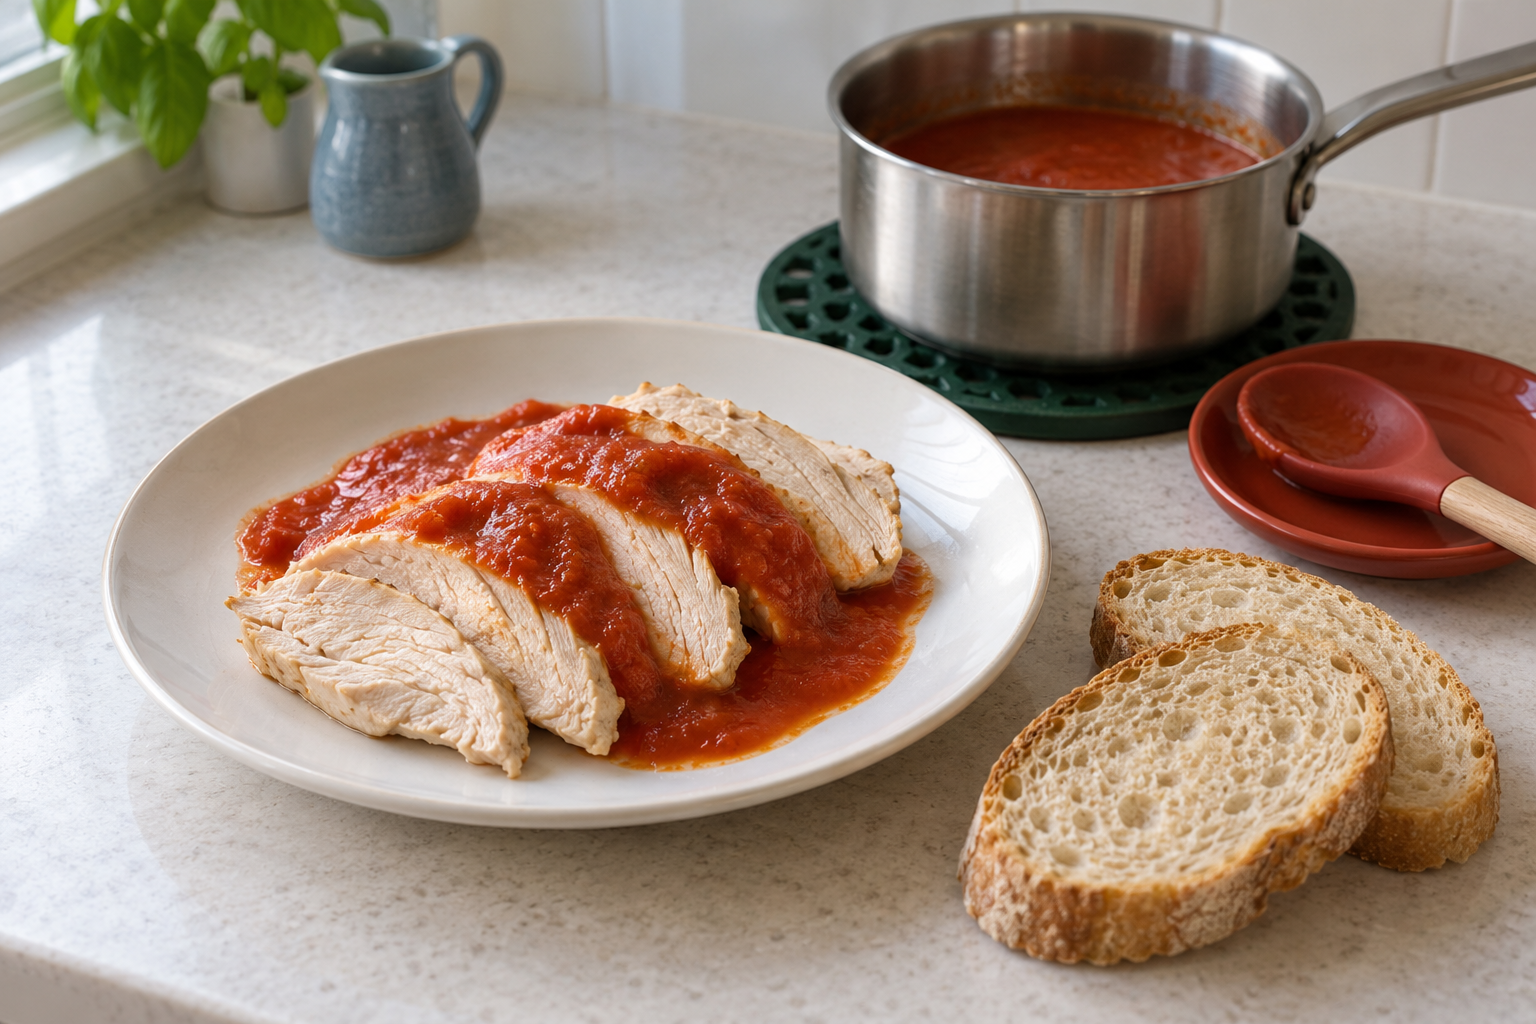
An overcooked lean breast can feel firm and dry. Small slices with a moist sauce are often easier to eat, but the coating does not turn cooked muscle back into its earlier state. Another long simmer will usually not help in the same way that slow cooking can help a different tough cut.
Check history before texture: the original cooking endpoint, cooling, fridge time and any previous reheating. Dryness is not proof of doneness; a brown outside or pale slice is not the centre-temperature check. Sauce cannot make undercooked meat or badly stored leftovers safe. Do not taste suspect meat to decide.
For the first practice, use the linked plain boneless, skinless oven breast. There is no need to overcook it deliberately: the slicing and coating work with a normally cooked breast too. Fresh hot meat, chilled reheating and cold filling are three separate routes below, not stages to do one after another.
Choose a use and set out the tools
- Make a simple tomato sauce from passataComplete the 250 g tomato, 5 ml oil and 30 ml water method.
- Bring a simple meal together without rushingPlan the order before managing more than one prepared food.
- Cook red lentils and make a simple soupComplete the soup before a later chicken addition.
- Pasta water and sauce clingFinish a separately cooked pasta meal, not raw pasta in rescue sauce.
- Freshly cooked now: thin slices with the finished plain tomato sauce and ready-to-eat bread. Make the sauce first in this continuous preparation, switch off and cover it, then complete the oven-breast method straight away. Bring the sauce back to steaming hot while the verified cooked breast rests. Do not start another long task while the finished chicken waits.
- Set out a stable clean board with non-slip support, suitable sharp knife, fork for holding hot cooked meat, separate clean serving tongs, heat-safe sauce spoon, 15 ml tablespoon, heatproof measuring jug holding at least 500 ml, scales for a cold portion, seconds timer, clean sample bowl and tasting spoon, plate on the counter, dry gloves and a trivet. Set up the probe and its cleaning supplies. Keep all this away from raw chicken, its packet and its transfer tools.
- For the sauce, complete the full 250 g passata, 5 ml oil and 30 ml water method. Its finished amount is not necessarily 250 ml. You will use about 100 to 125 ml on a single breast; keep a clean heatproof ladle and receiving jug ready to measure gently from the supported pan. Begin cooling any unused sauce promptly rather than repeatedly warming it with later meals.
- For a later soup or pasta use, have that complete dish already prepared. Fresh fully cooked chicken needs only gentle coating near serving; refrigerated chicken still needs its full single reheating through every centre. A sauce bubble is not a cooked chicken centre. Use the dedicated cold-filling route if you do not want another heat task.
Rescue a just-cooked dry breast
- Cook a plain chicken breast in the ovenFinish the real centre check before treating dryness.
- Kitchen thermometer basicsPut the whole sensing area in the coldest thick centre and time the hold.
- Knife confidence: the safe claw gripPrepare a stable clean board and make controlled cuts.
- Make a simple tomato sauce from passataComplete the 250 g tomato, 5 ml oil and 30 ml water method.
- Storage and reheating basicsKeep the original cooking time and earliest ingredient deadline.
- Complete the oven-breast lesson, including its lowest thick-centre reading of at least 75 degrees C continuously for 30 seconds. Once satisfied, switch the oven off and use separate clean serving tongs to put the breast low onto the clean stable board. Rest about 5 minutes; this rest is separate from, and cannot replace, the verified temperature hold.
- While it rests, stir the prepared plain sauce on medium-low until the whole stirred pan is steaming hot. Lower heat if it spits; use the sauce lesson's lid precautions if needed. Switch off and support the pan on its trivet. Ladle 100 to 125 ml low into the standing heatproof jug, with dry gloves for a hot handle; do not lift and tip the full saucepan one-handed. Set the ladle on its clean rest. Begin cooling the unused sauce in a shallow clean container now.
- Keep the board supported. Look for the long muscle lines along the breast and cut across them where visible. Hold the hot meat with the fork in the uncut part, clear of the intended blade path; never grip hot meat in your fingers. With the knife hand on its safe handle, make one short controlled slice about 3 to 5 mm thick, stop, reset the fork farther back, then repeat. If the grain is unclear, controlled manageable slices still help. Stop if the breast rolls or a last small end cannot be held safely; serve that end as a larger piece rather than forcing the blade.
- If an unexpected hard fragment is found, stop and put the knife down safely. Set that affected piece aside with the fork or tongs for careful inspection once cool enough to handle, rather than digging into hot meat near a moving blade. Do not serve a piece with an unresolved bone or hard cartilage. This first task is not deboning a whole chicken.
- Use the clean tongs to move the slices low onto the standing plate. Spoon the measured hot sauce over and between them, then put the spoon down. This fresh hot serving needs no extra prolonged simmer. Eat promptly with bread, letting your own first bite cool. If the meat had not completed its cooking check, this coating cannot replace it: return to the full original cooking method first.
Reheat refrigerated chicken thoroughly once
- Storage and reheating basicsKeep the original cooking time and earliest ingredient deadline.
- Kitchen thermometer basicsPut the whole sensing area in the coldest thick centre and time the hold.
- Thermometer cleaning and careClean before checking and after an insufficient centre reading.
- Use a microwave and check for even heatingFor a different appliance, follow its full cover, turn, standing and centre-check routine.
- Storage and reheating basicsFully thaw a frozen cooked portion in the fridge first.
- Use one plain cooked boneless breast portion, about 150 to 200 g, kept whole or in large pieces thick enough for your probe's complete sensing area. It must have been cooled and refrigerated within one to two hours, be within its original 48 hours or a shorter instruction, and not already reheated. Keep it chilled during setup. If it is already very finely sliced, do not stack slices to invent a centre reading: use the complete linked microwave/food checking method or a probe suitable for thin food. Unknown history means discard.
- Measure 125 ml safely prepared tomato sauce while cold, plus 30 ml water and a separate 60 ml drinking-water reserve. Use sauce that is safely cooled and chilled and not already reheated. Put ONLY the 125 ml sauce, original 30 ml water and cold chicken into a clean saucepan holding at least 1 litre, while the hob is off; keep the separate 60 ml reserve beside it for later small additions if needed. Have its fitted heat-safe lid, dry gloves, trivet, clean tongs, spoon and cleaned food probe ready. For this route use plain chicken and sauce, not a frozen core or a dish with unknown rice-storage history.
- Start medium-low, stirring the sauce across the base and gently turning the chicken with the tongs about every minute. Cover loosely as the lid design permits to retain warmth without sealing pressure, then lower heat once the sauce bubbles gently. Open the far lid edge first with a dry glove as needed so steam escapes away, tilt condensation back and land the lid on its heatproof place. Stay beside the pan; gentle describes heat control, not the serving temperature.
- If sauce is catching or no longer flows, switch off, let bubbles settle and add 15 ml drinking water from the prepared separate 60 ml reserve. Stir and return to gentle heat; add only as needed up to that reserve. Begin checking the chicken centre after about 5 minutes, but a thick fridge-cold piece may need appreciably longer. No fixed minute count proves it is ready.
- Switch off and put the pan securely on its trivet for each check. Use clean tongs to steady a piece without lifting it. Insert the cleaned probe from the side into the thickest centre, away from the pan, with the full sensing area inside meat; wait for its response and check another thick point and every separate large piece. Use the lowest relevant result. Once at least 75 degrees C, hold that coldest checked centre at or above 75 for the full 30 seconds using the timer. If below target or it falls below during the hold, clean/disinfect the probe, return the pan to gentle heat with stirring/turning and repeat a full check. The sauce also needs to be steaming throughout, not merely bubbling at the edge.
- Once satisfied, confirm the ring is off. Use the clean tongs to transfer the meat to the stable board and slice as in the fresh route, then move it onto the standing plate and spoon the hot sauce over. Serve now with bread and let a bite cool. This used the chilled food's one reheating; do not cool the serving for another hot meal. Clean and dry the probe and tools, and leave the pan supported to cool.
Make a separate cold sandwich filling
- Knife confidence: the safe claw gripPrepare a stable clean board and make controlled cuts.
- Read food labels before you cookCheck dressing, bread, dates and actual ready-to-eat permission.
- Storage and reheating basicsKeep the original cooking time and earliest ingredient deadline.
- Use 100 g plain safely cooked boneless chicken, promptly cooled and refrigerated, still within its original 48-hour or shorter limit. For this first cold filling choose a portion that has not been reheated. Read labels for the ready-to-eat mayonnaise or plain yoghurt and bread, checking egg, milk and other allergens, after-opening dates and suitability. This is not raw chicken, homemade raw-egg mayonnaise or an unknown take-away portion.
- Before taking food out, have scales, stable clean board and knife, bowl holding at least 500 ml, clean mixing spoon, a marked 15 ml tablespoon and 5 ml teaspoon, and serving plate ready. Measure 1 tablespoon mayonnaise OR yoghurt and a separate 1 teaspoon reserve while cold. Return their packs to the fridge. Keep the chicken away from raw-contact tools.
- On the stable board, lay the cold chicken on its broad flat side. Use tucked fingertips behind the blade or a fork clear of the cutting path to hold it; make controlled strips about 1 cm wide, then park the knife before turning a few strips across and cutting short pieces about 1 cm long. Stop with an unsafe small end rather than chasing it. No hot-food fork grip is needed for cold meat. Park the knife safely before moving the pieces into the bowl with the spoon.
- Stir through the measured 15 ml dressing with the clean mixing spoon. If pieces still look uncoated, add up to the reserved 5 ml and stir again. Spoon onto ready-to-eat bread on the standing plate and eat promptly. For a wrap instead, choose one explicitly ready to eat or complete its labelled warming method separately; do not assume every flatbread is ready.
- If not serving immediately, cover in a clean food container, label and return to the fridge promptly. Use by the earliest of the chicken's original deadline and the dressing/bread instructions; adding fresh dressing does not start another 48 hours. Keep chilled until serving and make only the portion needed. A pleasant smell or a thick coating does not establish safety.
Prevent dryness next time
- Cook a plain chicken breast in the ovenRepeat the plain first method with the same size and full checking sequence.
Use a similar plain breast thickness and the complete oven method's first reminder. Check the thickest centre before adding an unnecessary long extra bake, then stop once the full temperature-and-time combination has been met. A brief display of 75 degrees C is not its continuous 30-second hold, and a rest does not substitute for that hold.
Rest about 5 minutes before the optional serving slices, keeping raw-contact tools separate. Note the size, oven mode and checking point that worked. Do not solve dryness by serving an unchecked centre or treating one successful minute count as a rule for every breast.