
Vegetables And Pulses
Cook cauliflower spinach cabbage and kale
Separate florets from a cauliflower, prepare delicate or tougher leaves, then cook and drain one small batch with checks suited to that vegetable.
Before you begin
- Knife confidence: the safe claw gripPractise the bridge, flat face and slow claw slicing before cutting vegetables.
- Washing vegetables and keeping prep cleanWash fresh produce and keep it away from raw-meat equipment.
- Measuring accurately without stressWeigh prepared food and use marked 5 ml and 15 ml spoons.
- How to use hob heat without guessingControl the matching ring and find its off position.
- Drain food and save cooking water safelyRehearse the full cold weight or choose a no-lift draining tool.
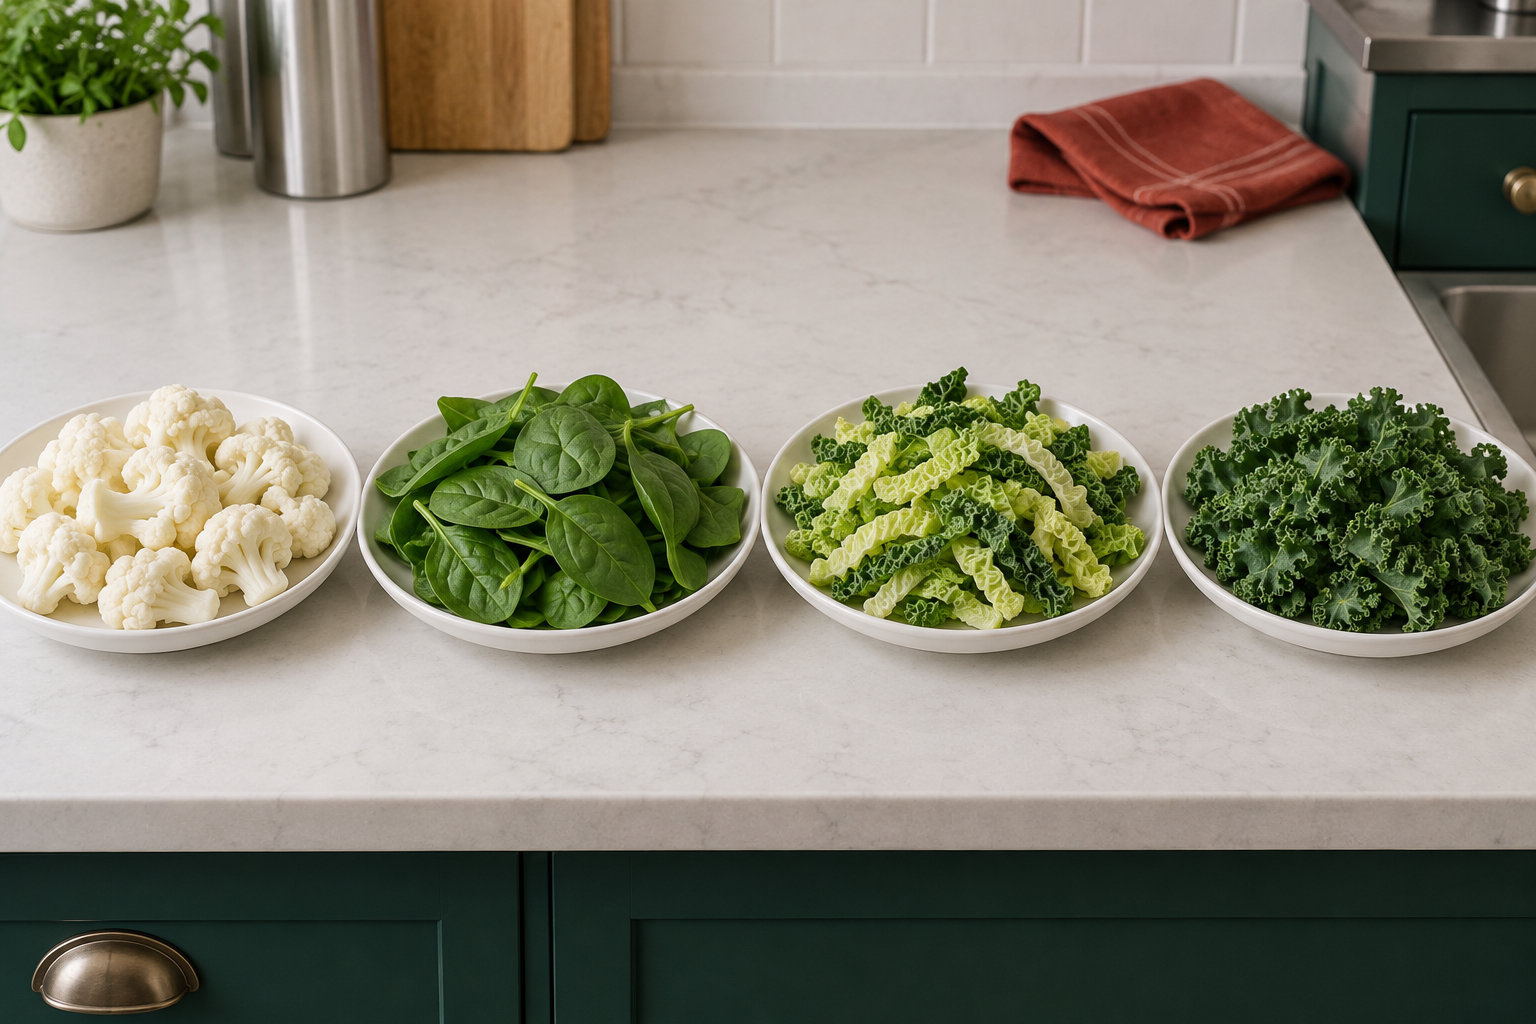
Florets and leaves need different checks
- Read food labels before you cookFind the food's cooking, use-by and storage instructions.
A floret is a small branching piece cut from the main cauliflower head. Its stem takes longer to soften than a thin spinach leaf. Cabbage and kale leaves have tougher central ribs; remove those first for a quicker small batch. Wilting means leaves losing their stiff shape as they heat, not a universal safety or tenderness test.
Choose just one practice: 200 g prepared fresh cauliflower florets, 100 g fresh baby spinach, 100 g prepared Savoy cabbage leaves, or 100 g prepared curly kale leaves. Ordinary adult spinach with thick stalks, a whole cabbage core and frozen leaf blocks are not interchangeable with those examples. For frozen or ready-prepared packs follow their complete cooking instructions, including standing times; do not shorten required cooking just because leaves have collapsed.
Prepare the pan and draining tools
- Drain food and save cooking water safelyRehearse the full cold weight or choose a no-lift draining tool.
- How to use hob heat without guessingControl the matching ring and find its off position.
- Have a stable clean board, suitable sharp knife, scales, measuring jug, clean cold preparation bowl, a colander for rinsing loose produce, a 3 litre saucepan suited to your hob, heat-safe spoon, timer, testing plate, checking fork, separate clean tasting spoon, small sample bowl, serving bowl, dry oven gloves and trivet. For these small batches start with about 1 litre drinking water, without salt for the first texture practice. While cold, check that this will cover cauliflower florets after loading, and add water if needed while retaining several centimetres of headroom. Rehearse the adjusted full cold weight before heating; pan shape changes the water depth. Take any cold test florets out with the slotted spoon into the clean preparation bowl before bringing water to a boil. Keep mouth-used tasting tools out of shared food and replace with a clean one for the next sample.
- Choose draining before heating. A heat-safe standing colander in a clean empty freely draining sink must have holes small enough to retain the food. Rehearse carrying and slowly tipping the full cold water quantity with the linked draining lesson. Leaves can slip through coarse holes; choose a suitable fine-hole standing tool or the no-lift route.
- For the no-lift route, have a slotted spoon retaining cauliflower, or long heat-safe tongs or a fine-mesh heat-safe scoop retaining the leaves. Keep the pan standing securely on the trivet while lifting small portions low into the supported serving bowl; let each drip above the pan. Do not balance a handheld sieve while tipping a heavy saucepan. Leave water to cool before emptying.
- Prepare all the food while the hob is off. Use the 3 litre pan for headroom, not as an instruction to fill it: the water and food must leave several centimetres clear below the rim. If a loose leaf pile does not fit without packing above the rim, halve the batch before heating and cook the halves separately with the same checking routine. Have somewhere to serve or promptly cool the first portion.
Prepare cauliflower florets
- Washing vegetables and keeping prep cleanWash fresh produce and keep it away from raw-meat equipment.
- Knife confidence: the safe claw gripPractise the bridge, flat face and slow claw slicing before cutting vegetables.
- Wash hands and rinse the intact cauliflower. Put it on a clean stable board and park the knife while pulling away loose outer leaves by hand. Set unused sound leaves aside for a separate task; the tough stalks are not part of this first floret cook.
- Turn the head so you can see the small branching stems underneath. Rest it securely on the board and cut an exposed small floret stem with short controlled cuts, holding the head away from the blade path. Rotate only with the knife parked. Do not try to drive a knife through the whole hard central core. If you cannot find a stable hold, start with ready-cut fresh florets.
- As florets separate, lay a larger one on a stable side and split its small stem from the base with the bridge hold, fingers on opposite sides clear of the cut. Gently pull the top apart with the knife parked if needed. Aim for pieces about 3 to 4 cm across, with no very thick long stalk; small natural variation is fine. Stop rather than force a hard or rolling piece.
- Rinse the separated florets in a clean colander to remove trapped dirt and check for spoiled parts. Follow the produce lesson; washing does not rescue mould. Weigh 200 g prepared florets into a clean bowl and park the knife before heating.
Boil cauliflower florets
- Drain food and save cooking water safelyUse the prepared standing colander or a suitable no-lift scoop.
- Butter, oil and finishing fatLearn a separate measured vegetable finish.
- Make a white sauce, then a cheese sauceMake the complete sauce separately before planning cauliflower with sauce.
- Put the rehearsed water quantity, starting around 1 litre, in the 3 litre pan on a matching ring, handle safely turned in. Bring to a boil. Lower the prepared florets in small spoonfuls without dropping the bowl from a height; keep hands clear of splashes. Once bubbling returns, lower to a controlled steady boil and start the timer. Leave the lid off for this practice.
- Begin checking around 5 minutes. Use the slotted spoon to lift a thick-stemmed floret onto the testing plate, then push the fork through its stem centre. You want the centre tender enough to eat, not a hard stalk hidden below a soft top. Cool a little sample before tasting with the separate spoon. Many small florets take around 5 to 10 minutes, but their actual thickness and your preference decide.
- If too firm, continue for a minute and retest. Stir only gently if needed; rough boiling and repeated stirring can crumble the tops before the stems finish. Once tender, switch off and drain by the chosen prepared method or put the pan securely on its trivet and lift small spoonfuls, letting them drip back.
- Serve plain from the standing bowl. A later measured fat finish or sauce is a separate linked task, not necessary for this first cook. Do not keep boiling the batch just because a photograph looks softer. Leave the hot water to cool before emptying.
Prepare baby spinach
- Washing vegetables and keeping prep cleanWash fresh produce and keep it away from raw-meat equipment.
Choose 100 g sound fresh baby spinach. Follow the washing lesson and the packet: a product explicitly ready to eat and pre-washed has different handling instructions from loose muddy leaves. Remove spoiled leaves. For loose spinach, separate the leaves and rinse gently with drinking-quality water, using fresh water and a final rinse if soil remains. Drain the cold washed leaves; keep them away from raw-meat boards.
Fine baby-leaf stems can stay. If an unusually tough stalk is present, park the knife and pinch or tear the soft leaf away from it; discard that stalk for this task. A bag containing thick mature spinach needs its own preparation rather than pretending those stalks are baby leaves. Have the tongs or fine scoop and the leaf-retaining colander ready before heating.
Boil baby spinach briefly
- Drain food and save cooking water safelyPrepare the hot pour before cooking, or choose tools that lift leaves safely.
- Bring the rehearsed 1 litre water in the 3 litre pan to a boil. Use the heat-safe spoon to ease the prepared 100 g leaves into the water in small amounts, without dropping a pile or reaching into steam. Stop before overfilling; do not press food down with your fingers. Lower heat to keep controlled bubbling once it returns and start timing.
- Gently turn the leaves through with the spoon so no dry raw leaf pile stays on top. Begin checking after about 1 minute; baby spinach often takes around 1 to 2 minutes in boiling water. With tongs or the fine scoop, lift a small leaf onto the testing plate, let it cool and taste with a clean fork or spoon. It should be soft and wilted with no unwanted tough stalk; colour alone is not the check.
- Switch off once it is as tender as wanted. Use the prepared standing colander or put the pan on the trivet and lift small amounts with tongs or the fine scoop, letting them drip back. Do not squeeze hot leaves in your hands. If using a colander, let the first steam clear, then gently press with the back of the spoon while the colander stays supported; do not push so hard that it rocks.
- Serve promptly. A large raw handful becomes a small cooked portion because leaves collapse and release water. That shrinkage is normal. For a later freshly cooked omelette filling, use the small preparation route below rather than keeping a bowl of hot wet leaves beside the hob for an indefinite second task.
Prepare Savoy cabbage or curly kale leaves
- Washing vegetables and keeping prep cleanWash fresh produce and keep it away from raw-meat equipment.
- Knife confidence: the safe claw gripSlow down and reset between cuts on a stable board.
- For cabbage, pull off individual sound Savoy leaves with the knife parked, then wash both sides and the creases. For kale, separate individual leaves and wash the folds. Remove spoiled leaves rather than trimming mould and relying on boiling. Drain and dry enough that they are not slippery on the board. This route uses separate leaves, not cutting through a whole hard cabbage head.
- Lay one cabbage leaf at a time flat on the stable board, thick central rib visible. Hold the leaf beside, not behind, the blade path and make a slow cut along one side of the rib from its wider base towards the thin part. Park the knife, reposition, and make the cut on the other side. Remove the thick rib. If a leaf will not lie still, tear the soft blade away from the rib with the knife parked instead.
- For kale, with the knife parked, hold the stalk base in one hand and gently pull the leaf material away in short sections with the other, keeping hands away from any cutting tool. Discard the woody stalk. If tearing is awkward, lay a leaf flat and use the same controlled two-sided rib-removal cuts as for cabbage. Do not hold a stem in the air while drawing a knife towards your hand.
- Place a few rib-free cabbage pieces flat together, not a thick slippery bundle. Use tucked guide fingertips to cut across into strips about 1 cm wide. For rib-free kale, cut flat small groups into pieces about 2 cm across or tear by hand with the knife parked. Stop and reset if a pile moves. Weigh 100 g of your chosen prepared leaves; cook cabbage and kale separately.
Boil cabbage or kale and check a leaf
- Drain food and save cooking water safelyKeep food and receiving tools supported while draining.
- Bring the rehearsed 1 litre water in the 3 litre pan to a boil. Lower the prepared 100 g cabbage OR kale in small amounts with the spoon. Gently turn through the water without packing the pan. Once bubbling returns, lower to a controlled boil and start timing, leaving the lid off.
- For 1 cm rib-free Savoy strips, begin checking around 3 minutes; many small batches take about 3 to 5 minutes. For 2 cm rib-free curly kale, begin checking around 3 minutes too, expecting around 5 minutes or longer for a tougher leaf. These are early reminders, not a rule that all greens cook equally.
- Lift a leaf strip or piece onto the testing plate with tongs or the fine scoop. Let it cool before tasting with the clean spoon or fork. Check both leaf and any remaining small vein: you want a chewable tender piece, not a tough string hidden in a collapsed leaf. Continue a minute and retest if needed. If a woody rib was missed, set that piece aside; do not try to boil a thick stalk until the rest disintegrates.
- Once tender, switch off, drain by the prepared standing method or support the pan on its trivet and scoop small portions out. Let water drip back. With a supported colander, wait for fierce steam to clear and use gentle spoon pressure to release excess water. Never squeeze hot greens bare-handed. Serve now and let the water cool before emptying.
Serve store or use a small filling
- Butter, oil and finishing fatPractise one measured finish at a time.
- Seasoning food without guessingTaste a cooled small sample before changing the bowl.
- Garlic colour: fragrant, golden or burntPrepare and gently cook garlic as a separate learned task.
- Omelettes: set, fill and fold without panicComplete the plain two-egg method before a small cooked filling.
- Storage and reheating basicsCool a small portion promptly, label its original cooking time and reheat only once.
- Storage and reheating basicsFollow the whole reheating method for a chilled portion.
- How to rescue overcooked vegetablesUse a known-history soft vegetable and supported mash, not a promise to restore firmness.
Plain tender vegetables are a complete first result. For a later finish, follow the fat or seasoning lesson with a measured small trial instead of guessing salt and butter together. For garlic, prepare and cook it by its full method; do not scatter raw garlic or unprepared spices on the first bowl just because they appear in other recipes.
For a later filling during one continuous preparation, drain freshly cooked spinach, cabbage or kale well. Set out the whole omelette lesson's tools and ingredients, plus a marked 15 ml tablespoon, before starting the greens. Let a small drained portion cool just enough to handle comfortably on a clean stable board. With tucked fingertips, make short controlled crosswise cuts into pieces about 1 cm long, stopping and resetting if the loose pile moves; park the knife before scooping. Use no more than 2 measured tablespoons of these cooked chopped leaves in place of the cheese in that lesson's later filling, after learning its plain set-egg practice. Follow its full cooking and folded-centre check, not a quick cold-leaf garnish.
If not eating now, divide into a clean shallow container and use the full cooling routine so it reaches the fridge within one to two hours. Cover, label and use within 48 hours or a shorter label instruction, or freeze promptly if suitable. Keep the original cooking history. A chilled later hot use needs the storage lesson's thorough single reheating, not the fresh filling's short timing. Frozen blocks follow their own label; defrosting alone does not make raw frozen vegetables ready to eat.
If over-soft, cauliflower can be pressed into a coarse mash using the supported bowl route in the recovery lesson; greens cannot become crisp again. Do not deliberately overcook to practise rescue. An unpleasant spoiled smell or mould before cooking is a discard decision, not a reason to hide the flavour in sauce.
Sources and further reading
- Good Food: cauliflower preparation and boiling
- Good Food: baby spinach preparation and brief boiling
- Good Food: cabbage ribs, strips and boiling
- Good Food: kale preparation and short cooking
- Food Standards Agency: washing produce and rejecting mouldy food
- Food Standards Agency: frozen vegetables and once-only thorough reheating
- Food Standards Agency: chilling, freezing and defrosting