
Heat And Method
Slow cooker basics: browning, liquid and timing
Understand how a slow cooker behaves, adapt cautiously and use the correct setting for cooking rather than reheating.
Before you begin
- How to use hob heat without guessingUse the actual hob controls for the hot start and complete fallback.
- Washing vegetables and keeping prep cleanWash and trim the first soup vegetables.
- How to dice an onion without stressFinish the cold onion preparation, not its separate softening exercise.
- Stock cubes, stock pots and strengthIdentify ready-strength stock, or finish the actual concentrate dilution first.
What the appliance does
A slow cooker heats a covered pot over several hours. Its lid traps steam, so a moist dish loses much less water than an open saucepan would. It is useful for soup and suitable stews, not making a crisp roast surface.
Read the exact model manual before first use. Capacity, working fill, liquid, pot material, preheat and controls differ. LOW and HIGH are cooking settings; WARM is not for starting raw ingredients or slowly reheating cold leftovers. Some models have MEDIUM and others do not. The named example below is not a universal cooker conversion.
Before switching on
- With the appliance cold and unplugged, check the pot, lid, plug and cable are undamaged. Do not use chipped or cracked ceramic. Wash, rinse and dry removable parts as the manual directs; keep the electrical base out of water. Place it on a stable heat-resistant surface with maker-required clearance, away from water, a hob, curtains and passing traffic.
- Find the actual cooking setting, Off, indicator and start control if fitted. Check whether a timer only reminds you or changes the programme. Stay at home and available for this first attempt. Do not use delayed starts or an external timer to leave perishable food waiting before heating.
- Identify the permitted working fill before shopping/preparing. Nominal 3.5-litre capacity is not permission to fill a pot to its rim. For the named Morphy 3.5-litre ceramic model, its manual asks for at least half full for best results and a 5 cm empty gap below the rim for soup. Keep BOTH requirements. If you cannot identify or judge those limits confidently, choose the full hob method instead and obtain maker guidance before an appliance trial.
- Keep perishables refrigerated until preparation and wash hands/tools. Use sound fresh vegetables and fresh stock for this practice, not an unknown stored batch. Later frozen ingredients need the actual recipe/maker's permitted thawing procedure. Never put raw dried kidney beans straight into a slow cooker; choose correctly labelled canned already-cooked beans for a suitable later recipe.
- Have serving bowls, ladle, spoon, dry gloves, heatproof landing places and shallow leftover vessels ready before heating. A ceramic slow-cooker pot does not go on a hob, into an oven or into cold water while hot unless its exact maker explicitly permits the use. This named pot is not a searing pan.
A first vegetable soup with a defined model setup
- Knife confidence: the safe claw gripMake a controlled flat face before slicing harder vegetables.
- How to dice an onion without stressFollow the entire cold halving/peeling/dicing method.
- Measuring accurately without stressTare each prepared ingredient, weigh butter and read standing liquid marks.
- Stock cubes, stock pots and strengthFor concentrate only, finish its actual labelled dilution and portioning first.
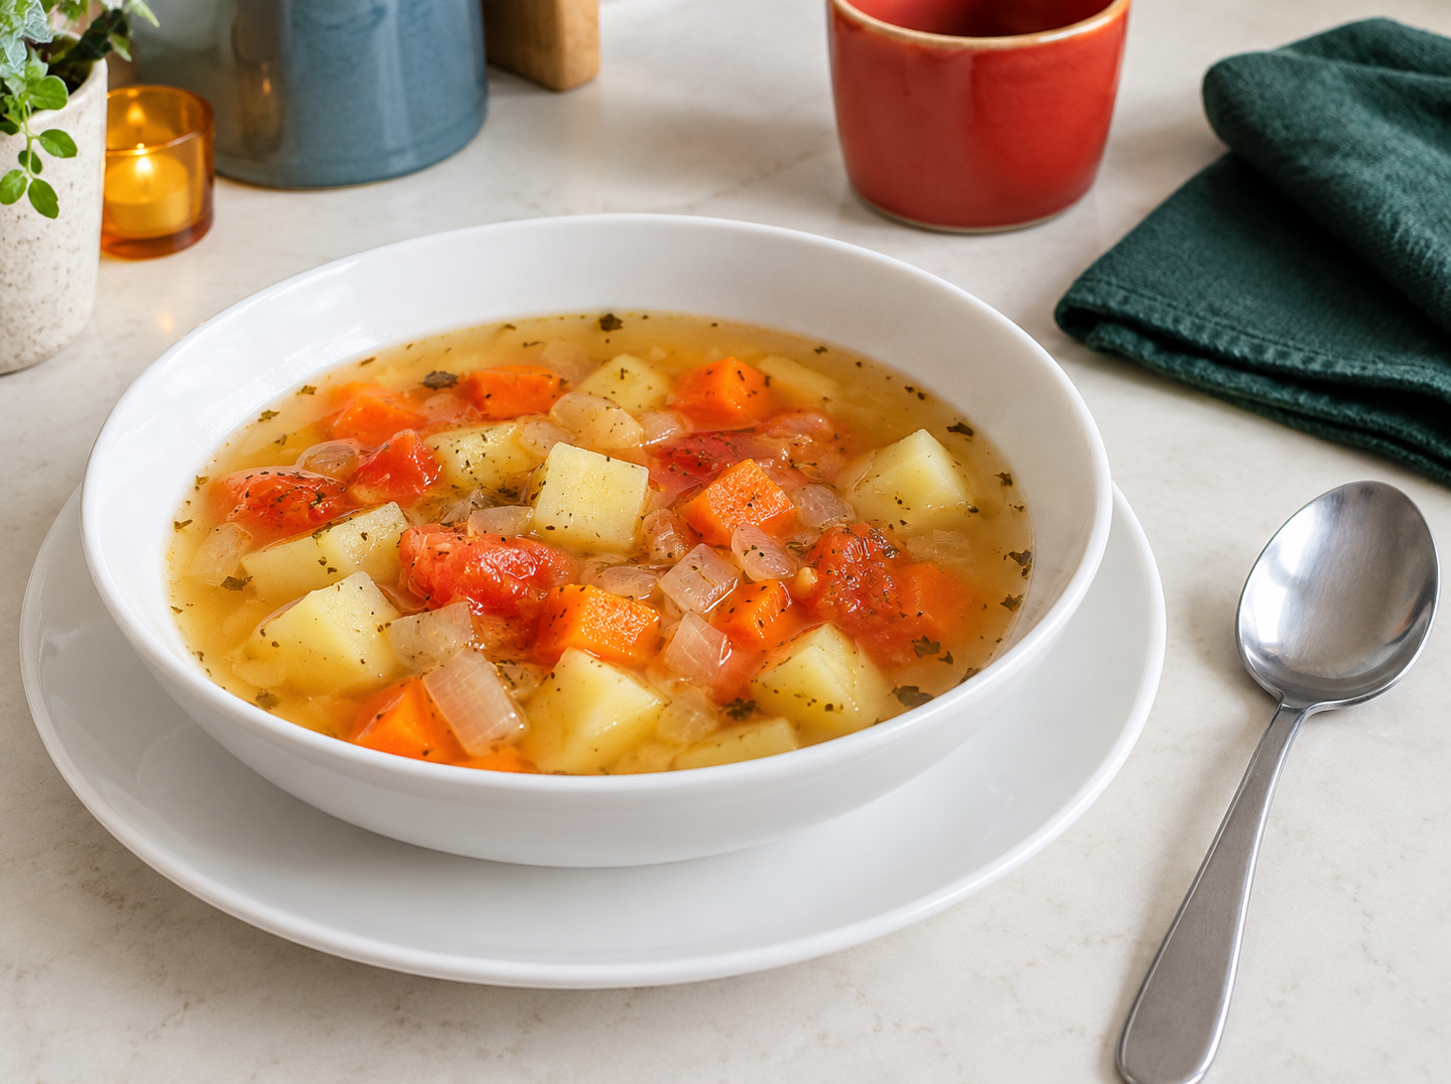
- This practice adapts the vegetable soup in the Morphy Richards SC48720 MUK Rev14 manual for its 3.5-litre ceramic model. It keeps the original 1.25 kg vegetable/1.1 litre stock quantities and hot hob start, but specifies the vegetable mix and serves it chunky, omitting the original flour and blending. It is a KINALO teaching variation, not a physically kitchen-tested reproduction.
- Use 1.25 kg PREPARED vegetables: 400 g potato, 350 g trimmed carrot, 250 g peeled onion and 250 g tomato. Weigh after washing and trimming, not the packet including skins/waste. Choose firm sound potatoes without visible green, sprouts, rot or mould. For the simplest version scrub/rinse potatoes and leave sound skins on; wash/dry the other whole vegetables before cutting. Carrot peeling is optional, following the full washing lesson.
- Cut potato and carrot about 1 cm across, onion about 1 cm dice and tomato about 2 cm. For a potato's first division use the knife lesson's bridge hold on its broad stable side to halve lengthways, not balance it tall. Put a half flat-face down; claw-cut into 1 cm thick slices. Park the knife before laying ONE slice broad-side down, then claw-cut 1 cm strips, park/reset and cut across those into pieces. Work with one stable piece, not a slipping stack. Stop if force is needed; get help or use appropriately labelled prepared pieces.
- For carrots, bridge-halve the stable trimmed carrot lengthways, lay each half flat-side down and claw-cut across at about 1 cm. Divide a very thick supported long half again before cross-cutting. Follow the full onion lesson for halving, peeling and 1 cm strip/cross cuts; do not perform its separate onion-softening exercise or add its oil here. For tomato, bridge-halve on a stable side, park the knife, then lay each half cut-side down. Claw-cut broad strips about 2 cm, park/reset and cross-cut about 2 cm. Discard a hard stalk-containing end rather than pointing a knife towards your hand to core it.
- Have 30 g butter, 1.1 litres fresh READY-STRENGTH liquid vegetable stock and 1 level marked 5 ml teaspoon dried mixed herbs. Check labels and allergens, including milk in butter and possible celery/wheat in stock, and follow actual product cooking directions. No meat, dried beans, cream, flour or extra salt goes into this first batch. A carton can be concentrate: ready-strength means the label permits using the liquid as it is.
- For the simplest first attempt, measure fresh ready-strength stock while cool: use a standing marked jug to measure 1 litre and a further 100 ml, transferring into a clean bowl/jug holding at least 1.5 litres. Keep chilled stock refrigerated until needed. For concentrate instead, complete its own labelled dilution separately first, making enough at the directed strength, then measure ONLY 1.1 litres made-up stock with suitable heatproof jugs and supported ladling. Start spare made-up stock's cooling clock immediately, not after this six-hour cook. Do not crumble a whole cube into an arbitrary volume.
- Set out scales, stable non-slip board, sharp suitable knife, bowls for prepared food, 5 ml measure, ordinary table knife for portioning butter/levelling herbs, compatible spoon, ladle, marked jugs, timer, checking fork/plate, clean tasting spoon, serving bowls and shallow storage vessels with lids/labels. Use a separate hob saucepan of about 4 litres or larger with a compatible lid and several centimetres of free headroom above this batch. Have separate heatproof landings for saucepan and slow-cooker lid, two dry gloves and a clean room-temperature compatible ceramic pot fitted in its dry base.
- The named manual's soup recipe guide gives MEDIUM approximately 6 to 8 hours or HIGH approximately 5 to 6 hours. Choose one cooking setting and its matching first check: 6 hours on MEDIUM or 5 hours on HIGH. WARM is not a substitute. For a different model without a clearly suitable hot-start soup method, capacity and fill, use the full hob fallback below instead, not a borrowed dial setting.
Build the first dish
- Read the whole method, including the hob fallback and storage, before heating. Finish all washing and cutting. Tare a clean bowl on gram scales for each ingredient and weigh the prepared quantities separately. Tare a small dish to weigh 30 g butter; use the table knife while cold to portion it. Fill the dry 5 ml herb measure loosely and level with the straight BACK of the table knife over a waste-catching bowl. Do not call a heaped eating spoon a teaspoon.
- Park the knife visibly and wash/dry hands. Set the clean room-temperature ceramic pot securely in its dry base, ready with the lid beside it on its landing. Do NOT preheat the empty pot for this model. Make sure you can check both the minimum working fill and 5 cm soup headroom when loaded; use the hob route if uncertain.
- Put butter in the separate saucepan on the correct stable hob ring, with handles away from edges/other heat. Use medium-low heat to melt gently, then add the prepared vegetables with the spoon and stir gently to coat them for about 3 minutes. Do not lift and toss a heavy pan or try to brown every piece. If the butter smokes or food catches, turn the heat down/off promptly before it burns.
- With the saucepan supported, add the measured stock slowly from low beside the rim, using dry gloves for a hot jug if the concentrate route produced hot stock. Add the level herbs and stir. Raise the heat to bring the combined soup to a controlled boil, then switch the hob off. The whole liquid must have reached bubbling, not just one hot patch; this hot hob start applies even when the ready-strength stock started cool. Keep face/hands clear of steam.
- Leave the switched-off pan supported on its safe heat-resistant hob position, or move it to its close trivet ONLY if you can carry the weight steadily with two dry gloves; do not improvise a heavy hot pour. Position the cooker safely nearby before heating so the ladle route is clear. Ladle vegetables AND liquid in small amounts low into the fitted room-temperature pot. Watch the actual fill as you go: at least half full for this named model, 5 cm empty below the rim, and vegetables surrounded by liquid. Never force in excess. If either condition cannot be met, switch/keep the cooker off, ladle the fresh mixture back into the roomy saucepan and immediately use the hob fallback.
- With dry hands, connect the cooker's plug to a suitable socket as its manual directs, keeping the cable clear of hot parts and the worktop edge. Fit the lid, select the actual MEDIUM setting and confirm its indicator is on. Set a reminder for 6 hours. For the named HIGH alternative, choose HIGH and set 5 hours instead. Do not combine a different metal searing-pot start with this no-empty-preheat ceramic method. Leave the lid closed while cooking and remain available to notice power loss, faults or boil-over, without touching the body as a heat test.
- At the first check, wear dry gloves and lift the lid so steam escapes away from your face. Land it on the prepared dry heatproof surface, not a cold wet worktop. Stir the soup gently from the base with the compatible spoon. Ladle a thick carrot and potato piece onto the checking plate and press into their centres with the fork: both should be soft through the middle, not hard/chalky. The stirred soup should be steaming throughout. A clean cooled teaspoon sample can assess flavour; never taste from the hot pot or return mouth-used tools.
- If the vegetables remain firm after known continuous normal cooking, replace the lid and cook for another 30 minutes on the same permitted cooking setting, then repeat those checks. Continue short checks until tender, keeping the permitted liquid/fill. Repeated lid opening slows cooking, so the estimate is not a guaranteed finish. Do not use extra heating to rescue an unknown power history or persist with a malfunctioning appliance.
- When tender and steaming throughout, turn the cooker off. Leave the fitted hot pot supported in its base and ladle low into standing serving bowls without holding a bowl under a falling stream. Let a spoonful cool before eating. Optional salt follows a clean cooled taste; stock may already be salty. This chunky soup is the finished task. Optional bread should be ready-to-eat labelled bread, not an unplanned concurrent bake.
If the prepared batch does not fit
- How to use hob heat without guessingIdentify controls and adjust heat without moving a hot pan.
- Simmer versus boilRecognise a controlled simmer and respond to vigorous bubbles.
- This is also a complete alternative when the named appliance setup is unavailable. Use the SAME prepared 1.25 kg vegetable mix, 30 g butter, 1.1 litre correctly made-up fresh stock and level 5 ml herbs. Follow the washing/cutting/weighing and separate-pan butter coating/stock-boiling steps above, then keep the freshly boiled mixture in the roomy hob saucepan instead of transferring. Its compatible lid, spoon, ladle, fork, checking plate, serving bowls, gloves, trivet and timer must already be ready.
- On the correct ring bring the mixture back to gentle bubbling if the immediate transfer-return cooled it, then lower to a steady gentle simmer: small continuing bubbles, not a violent splash. Fit the lid slightly ajar if its design permits; otherwise simmer uncovered and watch the liquid more closely. Set a first check for 20 minutes. Stay at the hob, stir gently from the base every few minutes and do not leave the pan unattended.
- If the surface liquid falls until vegetables are no longer surrounded, add 50 ml drinking water measured in the standing jug, slowly from low beside the rim with the pan supported, then stir and return to the gentle simmer. This may temporarily cool the soup. Repeat small additions only if needed, maintaining several centimetres of headroom, not flooding a full pan. Extra water is conditional, not an automatic ingredient.
- At 20 minutes, ladle a thick potato and carrot to the checking plate and fork-test their centres. If firm, continue simmering and set another 5 minutes; repeat until both are soft through the middle and the stirred soup is steaming throughout. Then switch the ring off. Leave the pan supported or move it to its trivet only with a rehearsed steady two-glove lift. Ladle low into standing bowls, cool a bite before eating and use the same full cooling/storage routine below.
- This fallback is for freshly prepared known-history vegetable soup, not a rescue for food with an unknown power-failure or storage history. It changes the cooking method; do not keep the six-hour appliance timer on a hob saucepan.
Adapting a hob recipe
- Meat temperatures: a practical UK cooking referenceUse appropriate centre temperature WITH holding time for later meat.
- Thicken a sauce with a cornflour slurryUse a separate complete measured-slurry method for a later sauce.
- Blend food without splashes or unsafe shortcutsFollow its full cold-first method instead of improvising hot blending.
Less evaporation does not produce one universal liquid percentage or timing formula. Changing batch, cut, starting temperature or pot changes the method. Begin with a suitable maker recipe and its actual fill rules, not simply transfer a saucepan method to WARM. The named soup example above omits flour and blending deliberately; it is not the entire original blended recipe.
For later meat cooking, choose a complete suitable recipe specifying thawing, cut, size, any separate-pan browning, immediate transfer and a verified cooking endpoint. Browning develops flavour; it does not seal in juices or prove a safe centre. Extra lid-on time is not a predictable way to reduce watery sauce.
Serve the first soup chunky. Do not add uncooked flour at the table or improvise hot blending. For a later smoother variation, chill a portion by the full storage method, follow the cold-first blending lesson, then reheat that portion only once. No optional variation is needed to finish the first bowl.
When cooking is finished
- Storage and reheating basicsUse full shallow cooling, original-date storage and one reheat.
- Storage and reheating basicsFollow the whole later reheating method.
- Decide whether food is still safe to useKnown handling history cannot be replaced by a smell or taste.
Serve promptly, and ladle untouched spare soup into shallow heat-compatible portions now. Follow the full cooling method and refrigerate within 1 to 2 hours of cooking ending. Label the original date/time, use within 48 hours or an earlier ingredient limit, or freeze promptly if suitable. Do not leave a full heavy ceramic pot cooling on the counter or plunge it into cold water.
Reheat a chilled portion only once using the full saucepan or suitable microwave method, stirring and checking that it is steaming throughout. A slow cooker is not the reheating method for cold leftovers. A later flavour or blending change does not reset the original storage deadline or reheat count.
If a power failure happened while you were away, or its duration/food history is unknown, discard the food even if it looks cooked. A warm pot or lit display is not a history check. If you personally witness an interruption during this fresh vegetable cook and can finish IMMEDIATELY on a working hob, switch the cooker off and use dry gloves to remove/land the lid. Leave the ceramic pot supported in its base, ladle low into the roomy clean saucepan and follow the full simmer/fork/steaming-centre fallback above without delay. Never put this ceramic pot on a hob. If immediate safe transfer and cooking are not possible, discard rather than wait lukewarm or rely on later reheating.
Switch off and unplug with dry hands. Let the appliance and removable parts cool safely before cleaning. Wash, rinse and dry pot/lid as their actual care instructions direct; no abrasive metal scourers or assumed dishwasher permission. Wipe the unplugged cool base as directed, never immerse it. Wash the visible knife separately and clean tools, bowls, board and worktop. Store dry intact parts and confirm all heat controls are off.
Sources and further reading
- Morphy Richards: SC48720 MUK Rev14, original 3.5/6.5 litre manual; use the 3.5-litre soup quantities
- USDA FSIS: slow-cooker food-safety leaflet (2012), including immediate cooking after witnessed power failure
- Food Standards Agency: cooking and reheating
- Food Standards Agency: chilling, freezing and defrosting