
Pantry And Ingredients
Mashed potatoes: even cooking without a gluey texture
Choose a suitable potato, check the centre and understand why whole potatoes and vigorous blending are not universal shortcuts.
Before you begin
- Washing vegetables and keeping prep cleanWash and peel potatoes safely before cutting.
- How to use hob heat without guessingBring water to a boil, then maintain a controlled simmer.
- Drain food and save cooking water safelyLadle water into a stable jug and drain with a supported colander.
Start with the potato and the result you want
Floury potatoes such as Maris Piper or King Edward tend to break down into a fluffy mash. Waxy varieties hold their shape more strongly and may make a denser result. Both can be edible; choosing a suitable variety makes the desired texture easier to reach.
Whole potatoes can limit water entering cut surfaces, but they take longer and mixed sizes can cook unevenly. Even-sized peeled chunks are a straightforward first method. There is no rule that whole potatoes always make better mash.
For two generous side portions
- Drain food and save cooking water safelyRehearse the filled pan while cold, then use the supported-colander or no-lift method.
- 500 g potatoes suitable for mash, 20 g butter cut into small pieces, and up to 60 ml milk. Optional salt and pepper. Check milk suitability; for a dairy-free first version use a labelled suitable plant spread and unsweetened plant drink, checking their allergens.
- A saucepan around 2 to 3 litres with enough headroom for the potatoes and covering water, supported colander, potato masher, heat-safe spoon, fork, slotted spoon, board, knife, peeler, timer, scales and measuring jug. Also have a clean testing/serving plate, two clean teaspoons for tasting and a second trivet for the warm milk pan.
- A small second saucepan for the milk, tablespoon measure, dry handle protection and trivet. A hand masher is the tool for this method; a blender is not an equivalent shortcut.
- For this first attempt choose firm potatoes without visible green, sprouts, rot or mould. Wash and dry before the preparation below. Select a manageable potato and a knife suited to it; if a cut needs force or the potato cannot be held steadily, stop and get help or choose ready-prepared raw chunks with suitable packet instructions. Do not chop towards your hand or hide questionable pieces in mash.
Prepare stable potato chunks
- Knife confidence: the safe claw gripMake the first flat face with a bridge grip before claw slicing.
- Washing vegetables and keeping prep cleanLearn washing and peeler handling before preparing the potato.
- Scrub the chosen potatoes under running drinking water, rinse and dry them using the washing lesson. Work on a non-slip board, not a potato held in the air. Keep the pan and hob cold during all peeling and cutting.
- Use the knife lesson's bridge grip to keep the holding fingers on opposite sides of a steady potato, with a clear blade path, and cut lengthwise into halves. If it rocks or needs force, stop rather than pressing with a second hand on the blade. Put each half cut-face down before any further cuts.
- For peeled mash, keep a half flat-side down and steady it behind the peeler's direction of travel. Draw the peeler across the curved skin in short strokes away from the holding hand. Put the peeler down before turning the half to expose another area. Remove thin skin, not large slices of flesh. If safe peeling is difficult, get help or use suitable prepared potatoes rather than improvising with a knife in the air.
- With each half supported flat, cut into similar chunks about 3 to 4 cm across using the controlled claw movement. Turn pieces only after putting the knife down, and stop before an awkward small end. The pieces do not need to be perfect cubes; similar thickness matters more. Rinse away clinging peel fragments and put prepared chunks in the cold pan.
Cook until the centre is tender
- Stir, whisk, fold and turn: four different movementsCombine with a spoon without beating repeatedly.
- Drain food and save cooking water safelyRehearse the filled pan while cold, then use the supported-colander or no-lift method.
- With the prepared chunks in the pan, add cold drinking water to cover by about 2 cm, leaving several centimetres of headroom. Rehearse handling this actual cold weight as the draining lesson explains. If too heavy, plan its no-lift spoon-out option before heating. Optional salt can be left out for this practice.
- Bring to a boil, then lower to a steady gentle simmer. Start a 15-minute reminder once simmering. Keep the potatoes covered by water, but do not let a violent boil break up the outsides. Similar chunks commonly need around 15 to 25 minutes, sometimes longer.
- At the reminder, lift a thick piece onto a plate with a slotted spoon. Press a fork into its centre: it should enter easily and the piece should break when pressed. Test another thick piece. If the middle resists, continue gently for 3 to 5 minutes and test again before draining. Keep hands off the hot piece and pan rim. If water is no longer covering the food, reduce heat and add a little drinking water carefully from the jug down the inside pan wall, avoiding steam; do not let it boil dry.
- Switch off and use the planned supported-colander or no-lift draining method. Leave the drained pieces in the colander briefly while visible steam escapes. Put the emptied saucepan on its trivet, then return potatoes to it with the spoon. Let surface moisture escape for about 2 minutes off heat; do not heat an unattended dry pan to force drying.
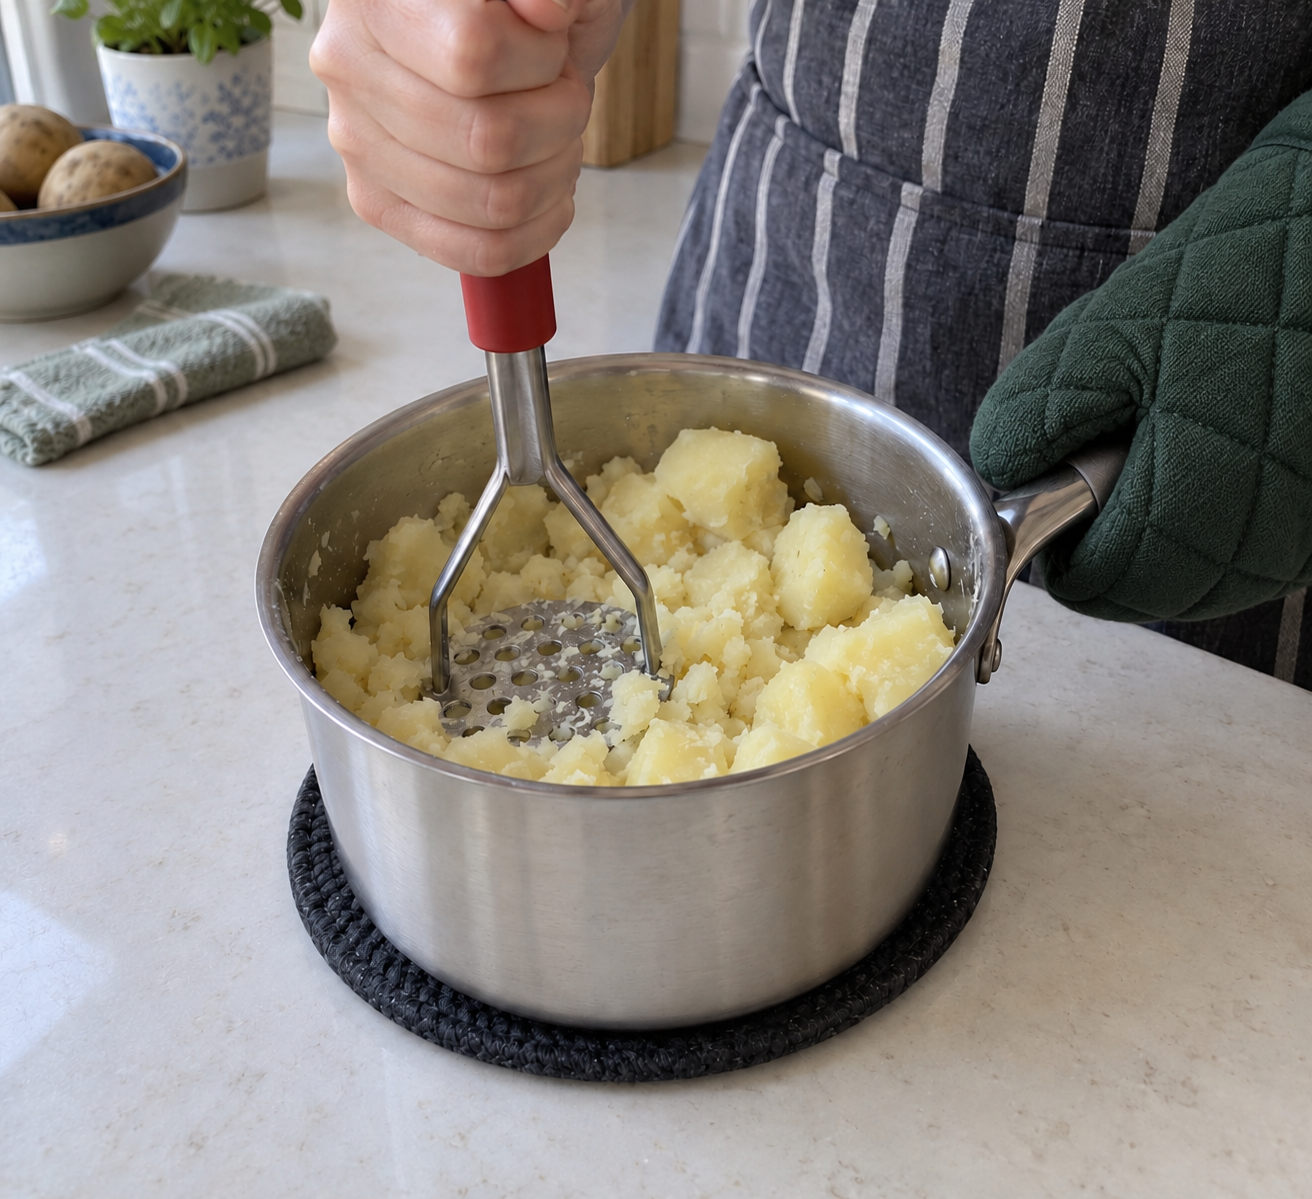
- Hold the pan handle, protecting it if hot. Press the masher straight down through the potatoes, lift and move to the next area. Work around the base until large pieces are broken. Scrape the edges in with the spoon and stop when evenly mashed; a few soft lumps are acceptable.
- While the mash stays supported off heat, put the measured milk in the second saucepan. Warm on low, stirring, until warm with faint steam but not boiling; then switch that ring off and put the milk pan on its own trivet. Stir the small measured butter pieces into the hot potatoes until melted. Do not juggle both pans or assume a second timer turns a ring off.
- Add the warm milk to the mash 1 tablespoon at a time, folding gently with the spoon after each addition. You may not need all 60 ml. Stop when the texture suits you rather than pouring it all in automatically. Cool a spoonful to taste, season modestly if wanted and serve promptly. Put a sample onto a clean teaspoon rather than tasting from the stirring spoon; do not return a tasted spoon to the pan. Serve onto supported plates with the spoon, keep both rings off and leave pans to cool safely before cleaning.
Why a blender can make it gluey
Potatoes contain starch. Very aggressive processing breaks down the structure and releases enough starch to create a sticky, elastic texture. A hand masher or potato ricer gives more control than a food processor or blender. Adding more liquid does not reliably reverse a gluey mash once it has formed.
Correct the common problems
Hard centres found before mashing need more cooking: return the pieces to the pan with enough water to cover, bring back to a gentle simmer and repeat the fork check. Adding butter or milk does not instantly cook a hard centre. This is why the check comes before draining and mashing.
If dairy has already been added and you find a few firm lumps, keep the mash in its saucepan on a trivet first. Add 1 measured tablespoon (15 ml) milk and return to low heat. Stir across the base continuously while it gently warms; do not use a blender or fierce heat. Check a cooled lump after 3 to 5 minutes. Add another spoonful only if it is catching, and continue brief checks until the lump is soft. Switch off before serving. This can give a coarse result; it is not a guarantee that a large hard potato core will become smooth. Stop and choose another side if it scorches, stays unpleasant or cannot be managed without sticking.
Dry but tender mash can take another tablespoon warm milk. For slightly wet mash, stir gently over low heat briefly to let some moisture escape, watching the base; do not chase a perfect texture with vigorous beating. Gluey, elastic mash cannot reliably be restored with more milk. Accept a small edible portion or start again and process less next time. Stop at the texture you can serve, switch off and set the pan safely on its trivet; do not keep cooking an already gluey batch.
Try one comparison next time
- Storage and reheating basicsFollow the cooling, storage and single-reheat routine.
- Use a microwave and check for even heatingUse a suitable covered container, stir and check the middle.
Keep the same potato variety and change the piece size or amount of milk, not both. Note how easily the centre pierced and how much liquid the mash accepted. Those observations are more useful than a fixed promise that every potato needs exactly twenty minutes or the same amount of milk.
For spare portions use the linked storage routine, including the earliest ingredient limit and the food's existing cooling/reheating history. A one-portion hob reheat can use 200 to 250 g properly refrigerated mash, a small saucepan, 1 tablespoon milk, spoon, clean plate, dry handle protection and trivet: warm gently while stirring through the base and centre until steaming hot throughout, adding a further small measured milk addition only if needed to prevent catching. Switch off and serve promptly. Use the microwave lesson for its different cover, stirring and standing sequence; do not keep reheating a tasted portion.