
Guided Practice
Learn browning and assembly with chicken thigh tacos
Choose the products and batch plan
Use fresh or fully fridge-thawed boneless, skinless thighs within use-by/opening limits. No bones, skin or still-frozen centres. Fully defrosted chicken has a 24-hour use limit or stricter label guidance; use the full storage lesson if thawing a future pack. Do not rinse chicken or remove every small bit of fat. Unfold soft flaps cold with raw tongs so they lie open, not rolled together; no raw knife work or pounding is required.
Use small fully baked soft tortillas explicitly suitable for warming in a dry frying pan and follow their whole label directions. Raw dough, hard shells and oven-only products need a different complete method. Check wheat/gluten, yoghurt milk and actual spice warnings with the people eating. Read the probe manual: its full sensing area must reach a thigh's thick centre from the side.
At the raw stage, after the clean toppings have been prepared and chilled, check how unfolded thighs fit in the cold chicken pan before heating. Use raw tongs and keep that raw-contact pan away from clean tools. If gaps cannot fit, plan two batches. Allow a calm continuous session including the second batch, not an exact serving deadline. The first fully cooked batch can pause covered only while immediately completing the second, not for a long interruption. Its original cooling clock starts first and is not reset by the later batch.
Prepare the cold ingredients first, cook chicken safely and assemble a meal without letting every component finish at once.
Before you begin
- Clean and set up your kitchen before cookingPrepare clean components first, keep raw bowls/tools separate, and wash hands before handles.
- Knife confidence: the safe claw gripPractise a secure handle grip and tucked supporting fingers before cutting ingredients.
- Measuring accurately without stressUse grams on scales and marked metric measures for the smaller quantities.
- How to dice an onion without stressPrepare the onion before handling chicken; use this meal's onion quantity.
- How to use hob heat without guessingIdentify the controls, safe handles and heatproof pause places.
- Kitchen thermometer basicsFit the whole sensing area in the meat centre and complete continuous temperature holds.
- Thermometer cleaning and carePrepare the complete compatible washing and food-contact disinfection method before heat.
- Washing vegetables and keeping prep cleanWash the tomato and lime before raw work; no food disinfectant.
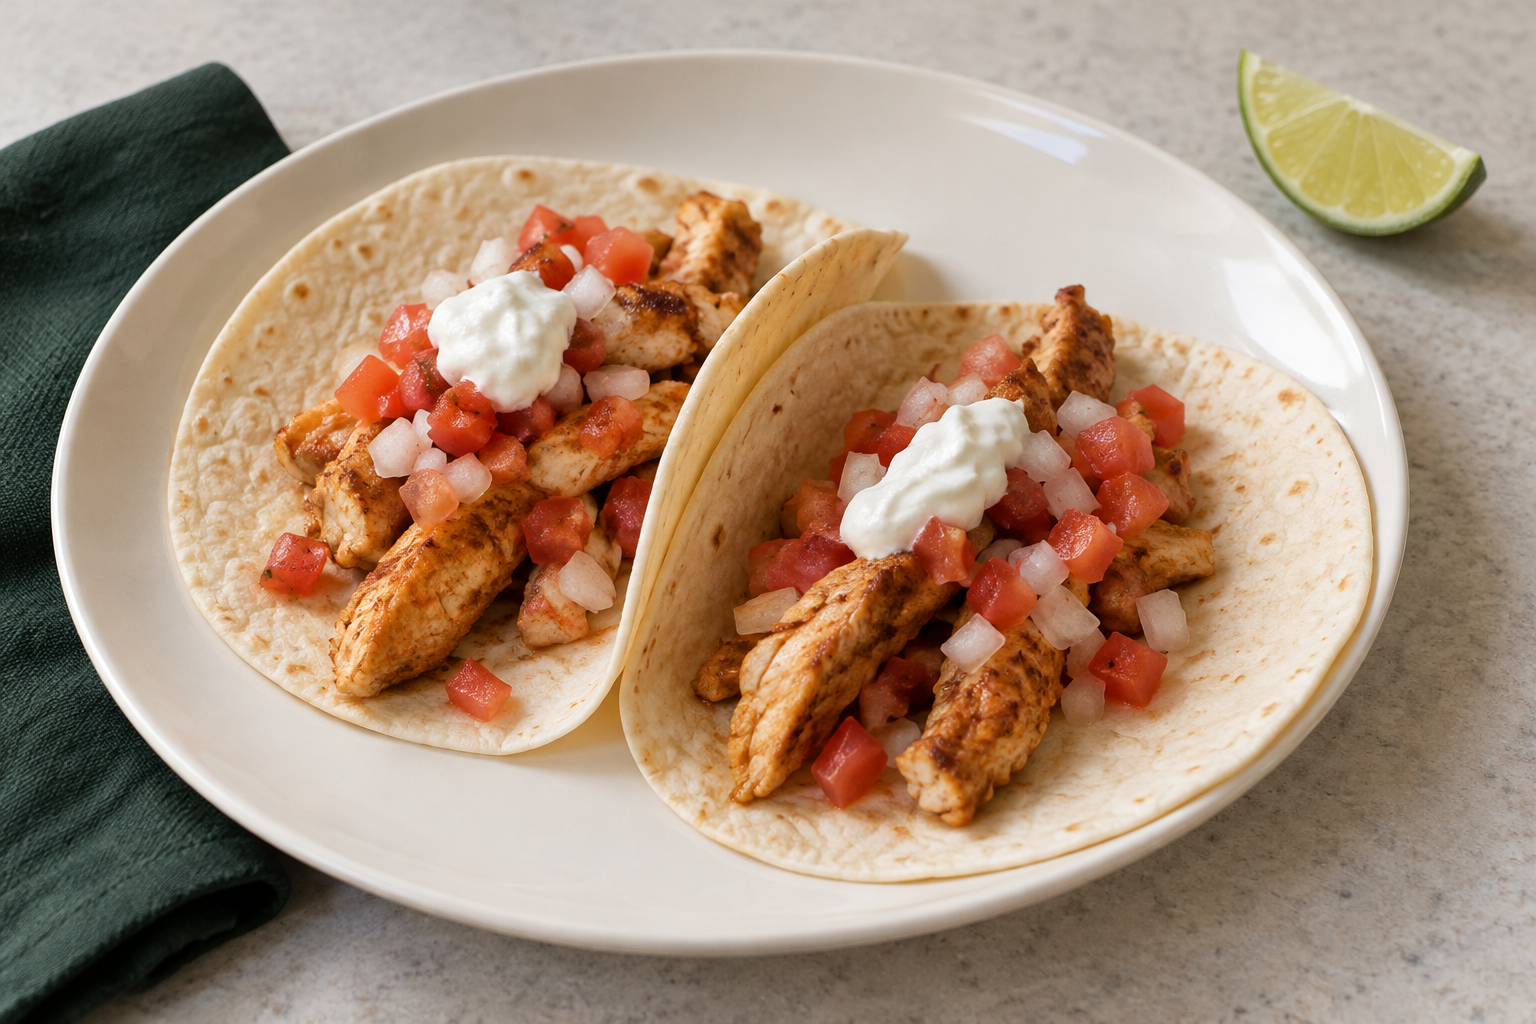
Assembly is a useful cooking skill
Prepare cold toppings first, focus on the chicken, then warm ready-baked tortillas. This teaches order, gentle control of a spice coating and a manageable filling, not a claim to one traditional taco style.
The linked Good Food recipe provides context for seasoned thigh fillets and dry-pan soft tacos, but uses different ingredients, quantities and covered cooking. This KINALO sequential teaching version and its time reminders have not been physically kitchen-tested here. Our centre checks, not its opaque-meat cue or the picture, decide safe chicken cooking.
For two portions
- Measuring accurately without stressUse actual marked fractions and separate oil measures.
- Storage and reheating basicsPrepare a future frozen pack safely; do not improvise a quick thaw.
- 300 g the suitable chicken; two separate level 5 ml teaspoons cooking oil, one for the coating and one for the pan; one level 2.5 ml half-teaspoon paprika and one level 1.25 ml quarter-teaspoon ground cumin. Optional small pinch salt; omit chilli for the first practice. Four to six suitable small soft tortillas.
- One medium tomato, 25 g peeled onion, one washed lime to cut a wedge from, and two level 15 ml tablespoons plain yoghurt. You will use one measured 5 ml teaspoon lime juice initially. Keep opened yoghurt and unused toppings chilled by their real dates. No coriander, lettuce or other extra garnish is required.
- Scales, marked 5 ml, 2.5 ml, 1.25 ml and 15 ml measures, table knife for levelling dry spices, small clean juice cup/spoon, clean topping bowl/spoon and yoghurt dish/spoon, covers. A stable produce board/non-slip mat and comfortable knife, plus a separate clean cooked-meat board and knife kept away from raw contact.
- Approximately 24 to 26 cm chicken frying pan and separate clean tortilla pan, both compatible/stable; two full-base trivets, dry heat-resistant gloves, seconds timer, suitable cleaned probe and compatible complete cleaning/disinfection kit with clean rest. Identify both ring controls before heating.
- Separate raw bowl/cover, raw tongs/rest and raw seasoning spoon; clean cooked-chicken supporting tongs/rest, clean fork for slicing and clean serving tongs; separate clean tortilla tongs. A clean plate and cover for the first cooked batch, clean plate for warm tortillas, clean dry tea towel kept away from heat and two serving plates. A saucer/eating fork for a cooled finished sample; shallow containers, labels and covers if saving eligible food.
- For the optional fresh-session scorch recovery only, a third clean compatible frying pan/lid with safe lid-rest, supported drinking-water jug and heat-safe marked 15 ml measure. Have these ready before heating if you want that route; otherwise stop and choose a new meal if badly scorched. Never fetch equipment while leaving an active pan unattended.
Prepare the cold parts
- Both rings remain off. Complete clean setup and arrange separate raw/clean tools, leaving chicken chilled for now. Wash tomato and lime under drinking water by the washing lesson, rubbing surfaces then drying with clean paper. Prepare produce before raw chicken and keep the two jobs separate.
- For tomato, stand the dried fruit on the stable board and bridge thumb/fingers either side of the intended centre cut, clear of the blade. Cut slowly through the middle to make halves; put knife down before turning a half flat-side down. With tucked supporting fingers beside the blade, cut 5 to 10 mm slices then, knife down to reposition, crosswise pieces. Leave a small hard stalk-end piece rather than trying a tiny tip cut. If it slips or needs force, stop and reset or ask for help. Put diced pieces into the clean topping bowl.
- Peel/dice onion by its full linked lesson, weigh 25 g in a tared clean bowl and add to tomato. Keep the unused onion covered/chilled as that lesson directs. The prepared tomato and onion pieces need not be identical.
- With the knife parked, put the dried lime lengthways on the stable board. Bridge either side of a lengthways centre cut, keeping palm/thumb/fingers outside the path, and cut down slowly without force. Put knife down, place a half flat-side down, then with the same clear bridge cut it lengthways into quarters. Stop if fruit rolls or the knife slides; do not stab at it or cut in your palm.
- Park the knife. Hold a wedge over the clean cup, cut face down, and squeeze gently by hand with fingers clear of the parked blade. Remove any seeds with the small spoon. Measure one level 5 ml spoonful juice into the topping, stir with its clean spoon, cover and chill. Chill unused cut lime; do not squeeze over raw meat or guess an entire lime's juice is one teaspoon.
- Measure two level 15 ml spoonfuls yoghurt into its clean dish, cover and chill. Prepare the tortilla plate/towel and dedicated clean tongs away from the hob. Measure paprika/cumin and the first 5 ml oil into the raw-designated bowl before meat handling; add optional salt if using.
- After covered toppings are chilled, weigh chicken in its raw bowl on the scales, keeping outside of bowl and controls clean. Put aside unused raw meat by its label. Use raw tongs to unfold pieces and briefly check the cold chicken-pan fit with gaps, then return them to the raw bowl. Plan two batches if needed. Turn chicken in the measured oil/spice coating; use the raw spoon only for that bowl. Cover and chill until cooking, with any waiting second batch kept chilled. Wash hands and clean/disinfect any raw-contact exterior handles or surfaces before clean controls. The raw-contact inside of the chicken pan belongs to the chicken cooking stage, not tortilla warming or clean topping work. Clean tools and plates stay out of the raw area.
Cook and assemble
- Measure the remaining 5 ml oil into the chicken pan. Warm over medium heat until it moves easily, not until it smokes. Lower thighs into the pan with raw tongs, away from you, open/flap-side spread and with gaps. Do not reach into a hot pan to flatten meat. Keep the waiting unstarted batch refrigerated.
- Let the first side gradually brown for approximately 4 to 5 minutes; use the raw tongs to gently lift an edge and check around 3 minutes if spices darken fast. Grip a piece securely, lift only enough to turn it away from you and lower the other face into the pan. Give that face approximately 4 to 5 minutes. Lower heat sooner if spice darkens faster than meat cooks; no maximum-heat shortcut.
- Continue on medium-low heat, turning every few minutes as needed and keeping the pieces open with the tongs rather than a knife. Start centre checks around 12 minutes total; roughly 12 to 18 minutes is a reminder range, not guaranteed safe timing. Different size/thickness may need longer. Do not taste partially cooked chicken.
- Pause the controlled pan off the ring on its trivet, protecting the handle as needed. With clean supporting tongs steady one thigh without fingers on hot food. Insert the cleaned probe from the side through the thickest part so the whole sensing area reaches its centre, not the pan or a fatty pocket. Wait for a settled display, then hold each thigh's potentially cold centre at or above 75 degrees C continuously for 30 seconds, or 70 degrees C for 2 minutes. Check other thick lobes if uneven.
- If any reading is low or falls before its hold ends, return to controlled medium-low cooking, allow another 2 to 3 minutes and recheck, restarting incomplete holds. Clean/disinfect the probe and any contaminated supporting utensil between undercooked and later checks. Do not average a failing centre with a hot one. After each piece fully passes, move it to the clean cooked plate with clean tongs, never raw tongs or a raw bowl.
- For two batches, cover the fully checked first cooked batch on its clean plate and immediately cook/check the second. Raw tongs can handle the second raw batch but stay separate from the first cooked plate; repeat cleaning requirements. The first batch's cooling reminder starts when it finishes cooking. Do not half-cook both batches, hold them for a long break or refrigerate half-cooked meat for later.
- Once every thigh passes, switch the chicken ring fully off and leave its pan safe. Retire raw tools/rests and wash hands. Let chicken rest on its covered clean plate for about 5 minutes while you remain in this short continuous session. On the separate clean cooked-food board, anchor a broad cooked piece with the clean fork, keeping fingers on its handle away from blade. Use short controlled downward-and-forward cuts across it about 1 cm apart. Put knife down to reposition, not fingers on hot chicken. Transfer strips with clean tongs back to the cooked plate and cover.
- Use the separate clean dry tortilla pan at the actual packet's heat and for its complete stated warming time. Lay one fully baked tortilla flat with its dedicated clean tongs, turn as directed and remove while warm/flexible, not hard or blackened. Do not invent 10 seconds as a substitute for the packet. Stack on the clean plate under the dry towel, entirely away from rings; lower heat if it scorches. Repeat, then switch the tortilla ring off.
- Check both controls off. Bring out chilled toppings with clean hands. Lay tortillas on the serving plates, use clean tongs for a modest line of chicken down each middle and the dedicated topping/yoghurt spoons for small amounts. Lift the two sides gently around the filling, leaving room rather than packing it full. Eat promptly; allow your own bite to cool. A short first-batch pause is not a method of long warm holding; if it fully cooled or you had to interrupt, use only the eligible thorough reheat route below or choose a new meal if history cannot be established.
What the pan should tell you
- How to use hob heat without guessingRead the entire smoke/fire stopping routine before frying.
Steady sizzling and gradual colour are useful. Liquid in a crowded pan may make chicken pale rather than browned; finish safe cooking instead of forcing colour with maximum heat. Next attempt, plan batches from the cold fit check. Browning is a flavour result, separate from the centre safety result.
Blackening without smoke: lower heat and safely pause the controlled pan on its trivet. Smoke: switch off only if safely reachable, leave the pan stable and allow cooling; do not carry it or add water to hot oil. Fire: do not tackle it or carry the pan; leave, close the door, warn others and call 999 from safety by the hob lesson. No meal recovery during smoke/fire.
For a small patch of scorched coating in an otherwise controlled, non-smoking fresh session, only use the prepared third clean pan recovery below. Burnt spice itself cannot be made sweet by lime. Badly blackened meat, ongoing smoke or an unsafe interruption is a stop, not permission to scrape every last piece into a new sauce. Never save partly cooked chicken to restart another day.
Controlled fresh-session scorch recovery
- Only proceed if the pan is stable, not smoking/spitting fiercely, and you already have the third clean pan/lid and safe setup. Switch the original ring off and leave that pan supported. The partly cooked meat and transfer tongs still have raw status; do not put them on the cooked serving plate.
- With raw-status tongs, move usable pieces one at a time directly into the cold clean recovery pan, leaving black deposits and burnt oil behind. Do not scrape/carry hot fat. Leave clearly badly blackened pieces; if there is no useful food, stop and choose a new meal. Put down the tongs, wash hands and use the prepared supported jug/heat-safe measure to add two 15 ml spoonfuls drinking water to the recovery pan, not to the burnt oil pan.
- Use medium-low heat, fit the lid safely and cook gently. Every couple of minutes uncover away from your face onto the lid-rest and turn pieces with raw-stage tongs; add one measured 15 ml water only if the pan dries. Continue until the full each-thigh centre check and failed-hold/cleaning routine in the main method passes. This is immediate continuous completion, not a way to store half-cooked meat.
- Switch off, retire raw-contact tools, transfer only fully checked pieces with clean tongs to the clean cooked plate and continue the resting/slicing/tortilla/assembly stage. Leave the original pan and fat secure until fully cool. The flavour may be less browned; correct cooking and safe handling are the useful recovery result.
Adjust the next attempt
- Storage and reheating basicsUse the original earlier batch clock, shallow portions and labels.
- Rice leftovers safelyA future rice meal has its own stricter limits, not chicken's 48 hours.
Use a small finished chicken strip on the clean saucer, cool it and taste with the eating fork before adding all toppings. A few drops of the prepared lime can brighten it; if seasoning is too strong, use a modest filling and mild yoghurt now and less spice next time. Eating cutlery never goes back into food being kept. Change one thing on the next fresh attempt rather than repeatedly heating this batch for practice.
Keep spare components separate. Use clean tools to divide eligible spare chicken into shallow portions; cool/refrigerate within one to two hours of each batch's original cooking finish, using the first batch's earlier clock if combined. Use within 48 hours of original cooking or an earlier applicable label limit; freeze promptly only by the full storage lesson. Fully fridge-thawed portions have a 24-hour use limit or stricter directions. Label original date/time and retain any reheating history.
Keep tomato/onion topping, yoghurt and cut lime refrigerated and use within their own earliest safe limits; assembly does not reset dates. Plan a later pasta/rice meal only by its complete linked method, with rice's shorter cooling/storage limits if included. Reheat chicken once by the full route below, adding cold toppings afterwards, not a quick warm in a taco. Unknown history or a missed cooling window means discard, not heat harder.
Reheat one eligible chicken portion
- Storage and reheating basicsDecide eligibility before heating.
- Kitchen thermometer basicsUse the complete sensing area in each potentially cold thick strip.
- Thermometer cleaning and carePrepare washing/disinfection, not a quick cloth wipe.
- This is for properly cooked/cooled/stored chicken that has never been reheated and whose actual labels permit it, not partly cooked recovery or poor-storage rescue. Read the storage eligibility lesson first. Take only the portion to eat, keeping other eligible food chilled. Have a suitable pan/lid/rest, clean tongs, trivet, gloves, supported drinking-water jug, heat-safe 15 ml measure, probe/cleaning kit and timer plus clean cooked plate/serving tools ready.
- Put chicken strips into the cold pan with two measured 15 ml spoonfuls water. Use medium-low heat and the lid to retain moisture, lifting it away from you to its rest to turn/separate strips with clean tongs every minute or two. Add one more measured 15 ml water if drying; do not let a burnt base form while the middle remains cold. There is no universal safe reheating time.
- Heat until steaming throughout. On the trivet make cleaned probe checks from the side in the thickest and potentially colder strips, with the whole sensing area in meat, not touching the pan. Require each checked cold centre to stay at or above 75 degrees C continuously for 30 seconds. If low or falling, cook further and clean/disinfect before the next check, restarting incomplete holds. If the sensing area cannot fit, use a suitable thin-tip device rather than accepting a shallow surface number.
- After all checks pass, remove probe and switch off. Use clean serving tools/plate and complete the separate packet tortilla warming and cold-topping assembly. Eat promptly, cooling your own bite. This portion has used its one reheating allowance; do not cool/freeze to reheat again, and retain that history if mixed into another dish.
Reset the taco station
Check both controls are off, including a recovery ring if used. Leave pans/fat stable and out of reach until fully cool; follow cookware care before washing. Scrape fully cold waste fat into appropriate local food/general waste, never the drain. Keep towels away from residual hot rings.
Complete the setup lesson's separate raw bowl/tongs/rest, seasoning tools and contaminated board/surface cleaning and appropriate disinfection. Wash the visible knives separately and store securely, clean/disinfect and dry the probe and sheath, and wash hands after contaminated cleanup. Finish chilling eligible food within its original clock while resetting; washing up does not grant more time.