
Heat And Method
Why food steams instead of browns
Learn why crowded pans make food wet and pale, how browning actually happens, and how to rescue a pan that has started steaming.
Before you begin
- How to use hob heat without guessingIdentify the ring, heat control and safe stopping position before cooking.
- Knife confidence: the safe claw gripPrepare stable slices with a flat face and tucked fingertips.
- Measuring accurately without stressUse scales, a jug and marked 5 ml and 15 ml measures, not eating spoons.
The beginner problem
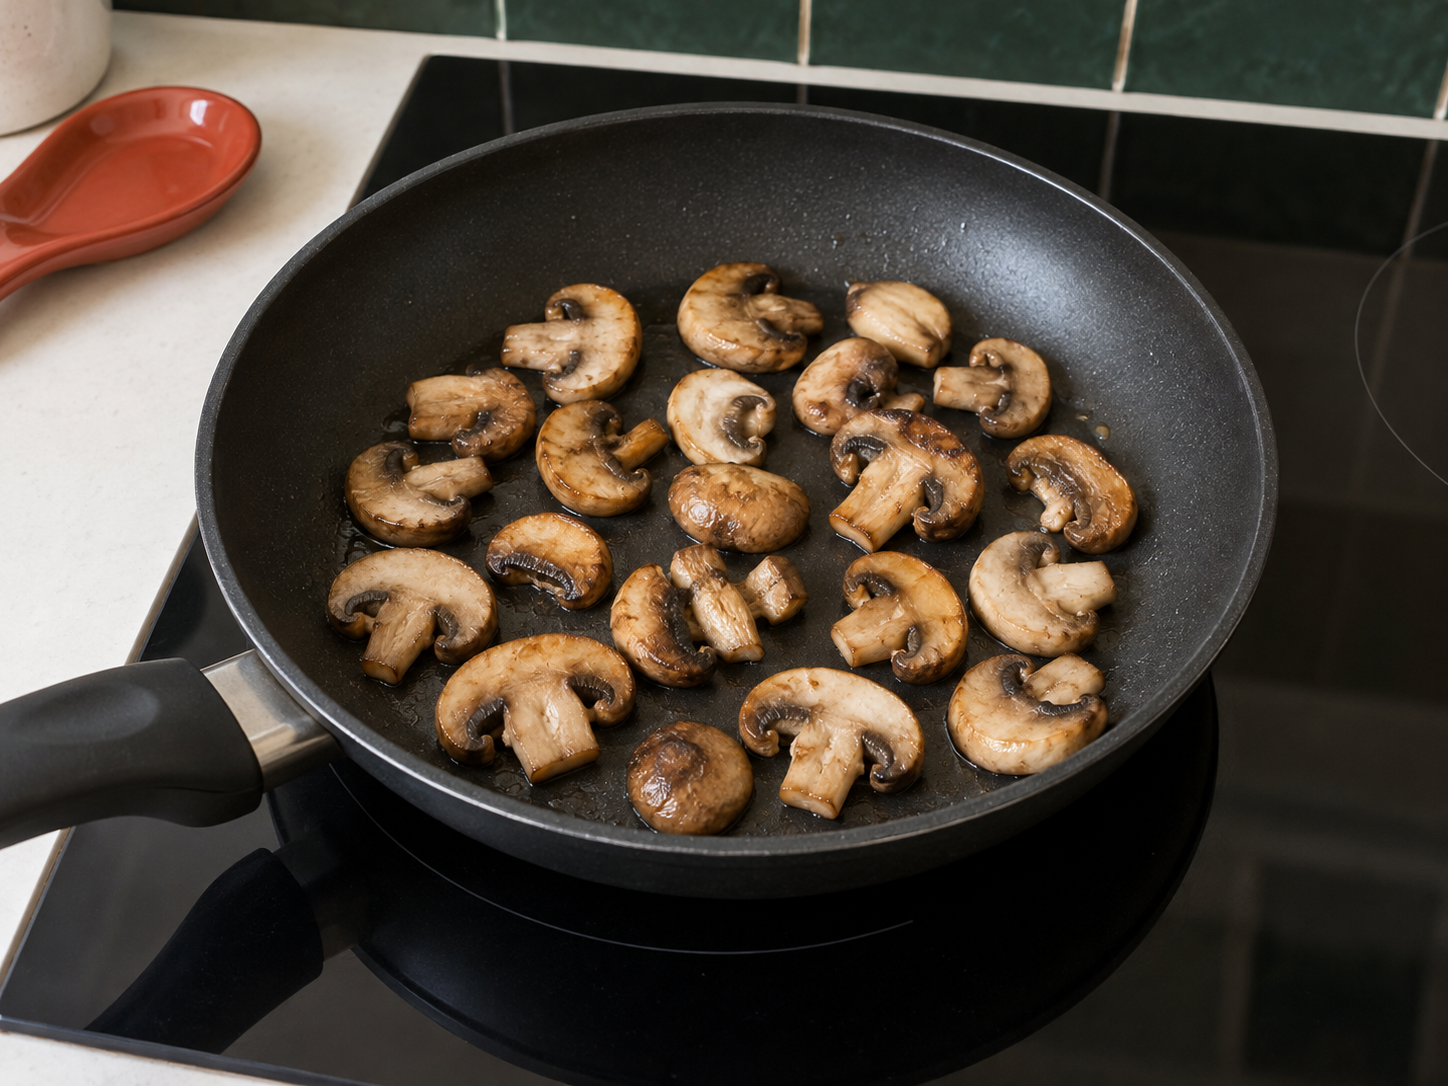
Food can be fully hot and still stay pale. If released water collects in the pan, the food is mainly cooking in that liquid rather than staying against a relatively dry surface. Extra heat alone does not fix overcrowding.
This first practice uses shop-bought button or chestnut mushrooms. It teaches spacing and moisture, not a meat-safety test. Eat the finished mushrooms plain; a separate meal is not needed to complete the lesson.
Moisture has to escape
Mushrooms release water as they cook. A wide pan and gaps between slices give that water room to evaporate. Closely packed slices can collect liquid; stirring constantly also interrupts contact with the base. A little steam is ordinary and does not mean the pan has failed.
Brown colour is a flavour and texture cue, not a universal proof that food is safely cooked. For meat use its complete method and required centre check, not these mushroom timings.
For a small comparison
- Washing vegetables and keeping prep cleanClean, dry and prepare the mushrooms before heat.
- Knife confidence: the safe claw gripMake the first flat face, then use slow supported slices.
- Measuring accurately without stressUse scales, a jug and marked 5 ml and 15 ml measures, not eating spoons.
- 200 g fresh shop-bought button or chestnut mushrooms, divided into two 100 g portions; 10 ml plain cooking oil, used as 5 ml for each portion. Do not use foraged mushrooms for this exercise. Check ingredient suitability and storage labels.
- A sound hob-compatible frying pan around 24 to 26 cm, its maker's heat limits, a coating-safe spoon or turner, stable board and sharp knife, scales, marked 5 ml measure, two preparation bowls, two clean serving plates and separate tasting fork. Have a timer, dry oven gloves, full stable trivet and utensil rest ready.
- With heat off, briefly rinse dirty mushrooms under drinking water or brush away dirt, then dry well. Trim tough stem ends on the stable board. For a mushroom that rolls, use the knife lesson's bridge grip to halve it; put a flat face down before slow claw-grip slices about 5 mm thick. Leave any unsafe small end. Prepare all 200 g before the hob goes on; park and clean the knife.
- Check that 100 g can lie in one loose layer in your cold pan. If not, use smaller batches instead of forcing this comparison. The first 100 g will be spread out. For the second 100 g, observe a loosely grouped centre for about two minutes, then spread it out to finish. Keep slice thickness and oil measure alike; this is an observation, not a controlled laboratory test.
Cook a batch with space
- How to use hob heat without guessingIdentify the ring, heat control and safe stopping position before cooking.
- Stir, whisk, fold and turn: four different movementsPractise the utensil movements before using a hot pan.
- Storage and reheating basicsFollow the original cooking clock, shallow cooling and earliest ingredient deadline.
- Put the dry pan level on the compatible ring with handle inward. Add 5 ml oil and use moderate heat within its maker's limits; warm briefly without waiting for smoke. Add the first 100 g carefully with the spoon and spread into a loose single layer. No hand needs to hover above the oil.
- Stay beside the pan. Let slices contact the base for about two minutes, checking a slice by lifting an edge with the turner. Reduce heat if a face darkens sharply. Turn the slices when they release and show some golden colour; do not force a stuck slice or toss the pan.
- Continue with occasional gentle turns until the slices soften through and any released water mostly evaporates, often about 5 to 8 minutes in total. Thickness and pan change the time. Switch off; with dry gloves for hot grips, land the pan on its full trivet. Transfer mushrooms with the spoon to the first clean plate. Cool a small sample before tasting with the separate fork; it should be tender, not a hard raw centre.
- Eat or start shallow cooling for that finished portion now. Its cooling clock is not postponed until the second batch finishes. Keep the second prepared portion covered in the fridge during the reset. Leave the pan fully cool, then wash and dry it; never pour cold water into a very hot pan.
- Repeat from a cool dry pan with the second 5 ml oil and remaining 100 g. This time loosely group slices in the centre, with some touching or slight overlap, not a deep mound. Observe the first two minutes: is there more liquid or less colour? Then spread them into one layer and finish by the same turning and tender-centre checks. Switch off and use the second clean plate.
- Compare what you observed in each pan and the tenderness you tasted after full cooking. A different result is information, not a failure: mushroom moisture, pan temperature and the reset can vary. Do not deliberately burn a batch to produce a dramatic difference.
When a wet pan is still useful
- Brown mince and make a simple meat sauceUse the complete meat handling and centre-check procedure for a later mince meal.
A small amount of mushroom liquid is not an emergency. Spread the slices, keep a controlled gentle-to-moderate heat and let the liquid evaporate while checking tenderness. Do not turn to maximum heat just to chase colour; soft, slightly pale mushrooms are a usable finished result.
If the cold fit showed the whole amount would not fit, divide it before cooking. If you nevertheless have a deep wet mound, finish it gently until tender as a moist mushroom portion, then use smaller batches next time. This first rescue does not ask you to move and hold partly cooked food while searching for another pan.
Raw meat liquid is a different situation. Do not taste it, drain it into a ready-to-eat sauce or use the mushroom endpoint. Move to a complete meat lesson before attempting that variation.
Prevent it next time
- Storage and reheating basicsFollow the original cooking clock, shallow cooling and earliest ingredient deadline.
Dry the prepared food, choose a comfortably manageable wide pan, and split the amount before heating. More food usually means more batches, not a higher ring setting. Leave contact time between turns while staying close enough to adjust heat.
Serve plain or use a fully explained later dish. Put saved cooked mushrooms in a shallow container, cool within 1 to 2 hours and refrigerate at 0 to 5 C; use within 48 hours or an earlier ingredient deadline. Follow the full storage lesson for a later reheat, steaming hot throughout and only once. Let pan and tools cool safely before washing.