
Pantry And Ingredients
Bread storage: cupboard, fridge or freezer?
Keep bread useful for the way you eat it, understand staling and freeze portions before they become waste.
Before you begin
- Read food labels before you cookIdentify the actual plain bread and its storage/freezing requirements.
- Clean and set up your kitchen before cookingPrepare clean ready-to-eat food space and reset it.
The fridge is usually unhelpful for plain bread texture
Plain bread can become firm faster in a fridge because of changes in its starch. That is staling, a texture issue, not the same as mould. For a plain loaf used soon, its own room-storage directions usually suit it; freezing small portions is often more useful for longer keeping.
A filled bread or sandwich with perishable ingredients is different. Follow its actual chilling/defrosting instructions. A tip about a plain loaf never overrides a filling's safety requirement.
First finish the no-heat sliced-bread portioning task below. Whole-loaf cutting, toaster use and plain croutons are separate later options, not three appliances you must use before storing bread.
Choose storage for the bread you have
- Read food labels before you cookKeep date type and actual bread allergens with the food.
- Decide whether food is still safe to useUnknown food history is not repaired by freezing.
- Read the actual bread label for allergens, date type, keeping and freezing directions. For the first task choose plain ready-to-eat pre-sliced bread with no mould and a known suitable history. A best-before date concerns quality; a use-by date is a different instruction.
- A soft sliced loaf commonly stays in its closed original bag in a cool dry place away from direct sun, steam and heat. Keep its original label with any separated portions so the ingredients are still identifiable.
- Enclosing warm homemade bread traps moisture. Let a newly baked plain loaf cool completely on a clean cooling rack as its recipe directs before packing. Do not judge cooling only from a briefly touched crust. A filled homemade bread needs its own recipe's storage method.
- A crusty loaf loses some crispness when wrapped to retain moisture. That trade-off is normal. Hot humid conditions shorten keeping; buy smaller amounts or freeze some suitable fresh bread rather than relying on a fixed number of counter days.
- Use a clean dry food-storage area, not the oven or microwave as a forgotten bread cupboard. Keep crumbs out, wash a suitable bread bin as its maker directs and dry it fully before food goes back.
Freeze in useful portions
- Storage containers: sizes, lids and useful portionsCheck the actual wrapping's freezer and food-contact suitability.
- Storage and reheating basicsFilled or perishable food retains its separate safe-history and thawing rules.
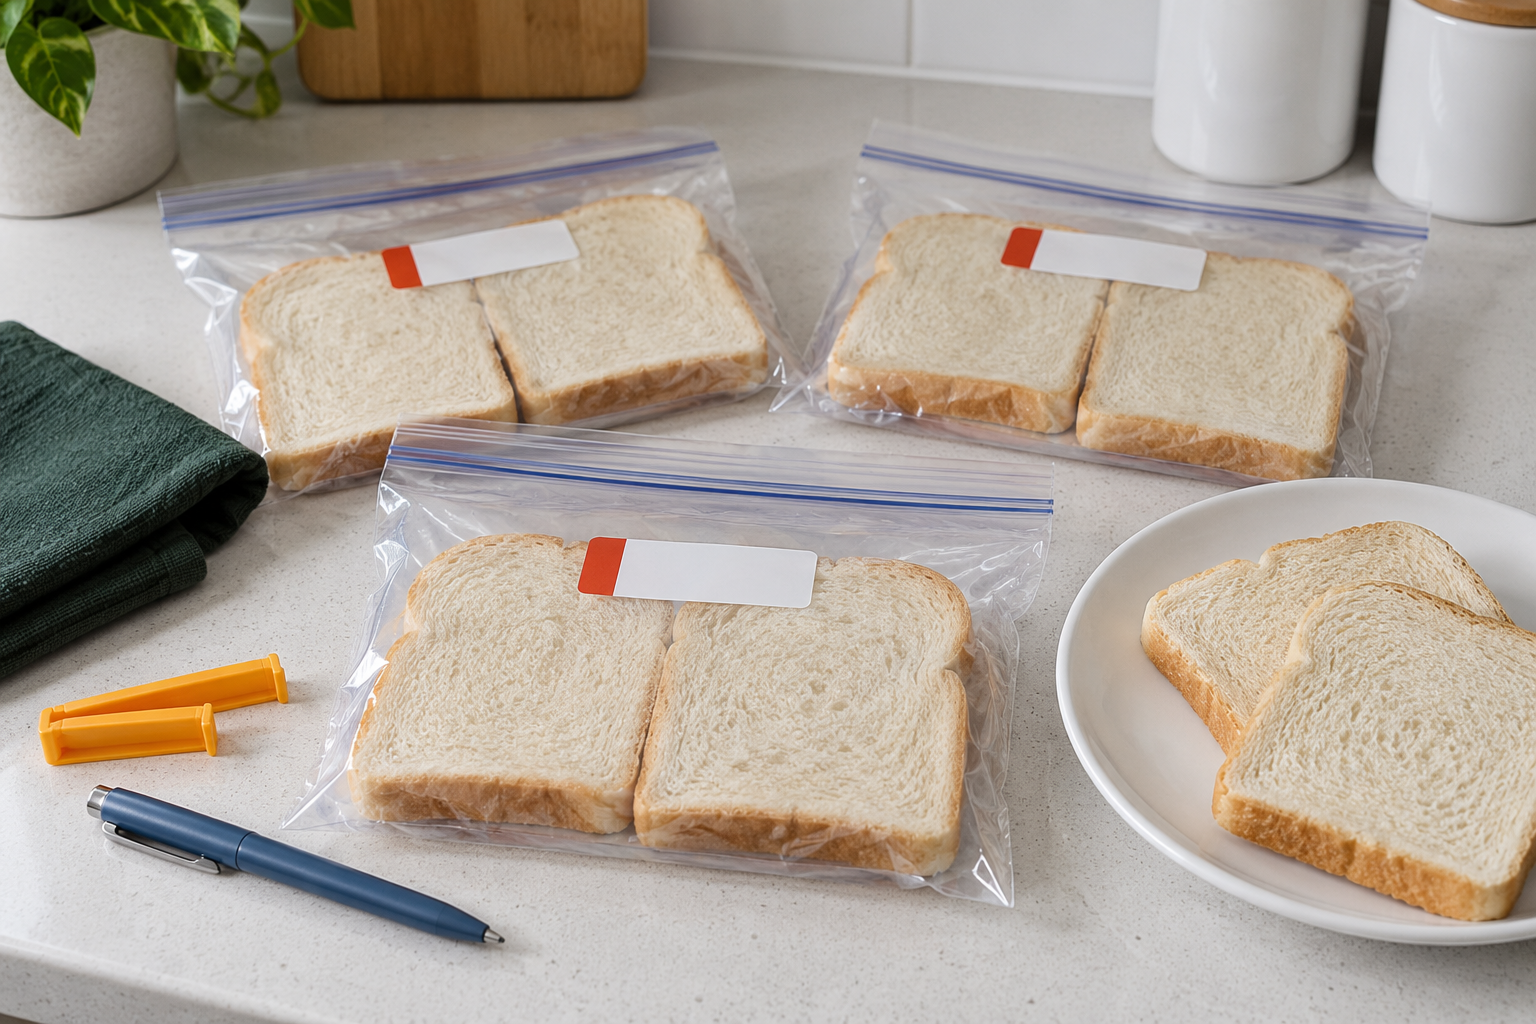
- Prepare a clean dry worktop and wash hands. Have four slices of the chosen plain pre-sliced bread, two intact food-safe bags explicitly suitable for freezing, a clean plate, label and pen. Keep the loaf packet/ingredient details. Check freezer space and its maker's correct food-storage setting, normally around minus 18 C; a dial number is not a measured temperature.
- Open the loaf bag over the clean area without tipping crumbs onto food. Put the four slices on the clean plate and close the original loaf bag again. If any mould is found in the loaf, stop and discard the affected loaf/bag contents; do not choose the apparently clean slices for this exercise.
- Put two slices in each freezer bag. Keep them flat enough to separate after thawing, with no toppings or fillings. If using food-safe baking paper to separate them, prepare a small clean piece now and remember to remove it before eating or any heating.
- Leave the seal partly open, gently press out surplus air around the bread without crushing it, then close the zip or seal completely as the bag directs. Check the whole closure. Do not use unknown non-food bags or put warm bread straight into an enclosed bag.
- Label each bag "plain bread, two slices", the freezing date and enough product detail to find the original ingredients. Keep the original date/opening history; this label does not invent or extend it. Put the bags promptly into the freezer without blocking vents, crushing food or leaving the door open while writing labels.
- Aim to use this plain bread within about three months for quality, unless the actual label gives a shorter period. This is a planning target, not a universal expiry or a way to repair mould. Put the remaining loaf away by its own directions, wipe crumbs/spills and wash the plate. The portioning task is finished.
- Later, remove only one bag for the no-appliance plain-bread thaw: place the closed bag on a clean plate at ordinary room temperature, away from heat and contamination. Check after about 15 minutes and allow longer if needed, until the slices are fully flexible with no hard icy centre. Separate gently only as they loosen; do not pry with a knife. Very cold rooms or thick pieces take longer, so the clock is not proof.
- Open the bag, remove any paper and eat the plain bread promptly when fully thawed. This is for plain bread whose label permits it, not a sandwich with chilled fillings. This first task freezes a portion once and uses it once; do not return its thawed leftovers to the freezer as an indefinite storage routine.
Slice a whole cooled loaf as a separate task
- Knife confidence: the safe claw gripPractise stable board, tucked fingers, blade parking and visible cleaning first.
- Clean and set up your kitchen before cookingPrepare and reset the board without hiding the knife in water.
- Use a fully cooled plain loaf, an intact serrated bread knife, stable clean board, non-slip support, clean plate and suitable bag. Serrations are the small teeth on the blade; do not test them with a finger. Read the linked grip/board lesson before picking up the knife.
- Set the loaf on its flat base on the stable board, well back from the edge. Choose an end to slice. If the loaf rocks or is so hard the knife will not start with gentle sawing, stop; do not force downward or cut it while partly frozen. Ready-sliced bread remains a practical alternative.
- Hold the knife by its handle. Keep the other hand on the larger uncut part, comfortably away from the chosen slice line and blade tip, fingertips curled inward. The blade travels beside that hand, never towards it or beneath its fingers. Leave generous distance; a thin last heel is not a cutting target.
- Rest the serrated edge at the chosen line, about 1 to 2 cm from the end. Start gently, then use smooth controlled back-and-forth strokes with light downward pressure, keeping the loaf steady and the moving blade clear of your supporting hand. Do not push hard through the crust or extend a stroke towards fingers. Keep sawing carefully until the slice separates against the board.
- Park the knife flat with its edge facing away before moving the slice onto the plate or repositioning the loaf. Repeat only while you can hold the remaining loaf safely; leave the final small heel whole. Do not pick up a fallen knife.
- Use the plain slice now or pack fully cooled slices by the portioning method. Bag the remaining loaf by its label. Keep the knife visible while washing it separately, edge away from you, then rinse/dry carefully and store securely. Clean the board/support and crumbs.
Toast a plain frozen slice only in a suitable toaster
- Kitchen cuts, burns and emergenciesUse the immediate stop/escape response for a fire, not a food rescue.
- This separate option needs an intact pop-up toaster whose own manual permits frozen plain sliced bread. Read first-use cleaning/conditioning, placement and any specific food restrictions before using it; complete that maker routine first, not an improvised empty cycle. Find Start, Cancel, browning and the frozen-bread control before food goes in.
- With it cool and unplugged, set it upright on a stable dry heat-resistant surface away from the sink, curtains and anything above the slots. Route the cable away from edges and heat; check the correct clean dry crumb tray is fully fitted. Have a clean plate and ordinary table knife for later eating. Do not use a damaged appliance.
- Remove one or two separate plain slices from their bags and any paper. If frozen slices are stuck together, use the covered thaw above until they separate gently, rather than forcing a knife between them. Each slice must fit and move freely according to the manual's size limit; torn, curled or jam-prone pieces use the no-toaster route. No butter, filling, toppings, bags or paper goes into the slots.
- With dry hands connect to the appropriate socket and use the actual manual's light-to-medium browning and frozen-bread sequence. Some require bread in slots, lever down, THEN the frozen button; do not assume choosing a snowflake beforehand activates it. An actual thawed slice uses the normal bread setting, not another frozen cycle. Stay present while it heats.
- Wait for the normal release without putting fingers near the hot slots. Use the maker's high-lift lever if provided. Let exposed bread edges cool sufficiently to handle, then lift by those edges only onto the standing plate, keeping clear of slot metal. If it remains too low or awkward, cancel, unplug and cool fully before the permitted removal method; do not fish for it in a powered toaster.
- For a jam, cancel, unplug and let the appliance cool fully, then follow its own clearing instructions. Never insert fingers, a knife or a metal utensil into a powered toaster. For unusual smoke, cancel and unplug only if safely accessible. For flames, leave, close doors if safe and call 999; do not tackle it or add water.
- Once the toast is comfortable to bite, eat it plain or add a separately checked topping only on the plate. Unplug after use and let the toaster cool completely. Remove and empty its crumb tray as directed, clean/dry/refit it before another use and wipe the body only as permitted. Never immerse the electrical body or try to repair its wiring.
Stale bread and mouldy bread are different
- Decide whether food is still safe to useDecide from the known food history, not a heating rescue.
A known suitably stored plain loaf can be firm or dry without being mouldy. That can be useful for plain toast or croutons. Mould is different: discard the affected bread loaf or bag contents rather than cutting off a visible spot and using the rest. Soft porous bread can be affected below the surface.
Do not sniff mouldy bread closely, taste it as a test or use toast/freezing to repair it. If a patch or the required storage history is uncertain, stop. Clean the emptied storage area as suitable, dry it fully and wash hands before handling another loaf.
A small use-up practice
- Use an oven: settings, preheating, shelves and the grillUse both dry gloves, trivet, full preheating and landed-tray checks.
- Measuring accurately without stressWeigh 80 g with tare and use the marked 5 ml measure.
- Cook red lentils and make a simple soupFor a later pairing, finish the whole soup before scattering croutons.
- Croutons are small crisp pieces of bread. For this separate first oven task use 80 g plain ready-to-eat bread that is suitable but slightly dry, plus 2 level teaspoons, 10 ml, suitable olive or rapeseed oil. Have scales, a clean dry bowl, marked 5 ml spoon, filling spoon for oil, mixing spoon, unlined suitable rimmed metal tray, heat-safe turner, timer, two dry heat-resistant gloves, trivet, clean plate, table knife and fork. No garlic, cheese, seeds or fillings are included.
- Before heat, prepare the clean area, weigh the bread with tare and tear it into similar pieces about 2 cm across. Tearing avoids forcing a knife through hard crust. Put them in the bowl, measure the two teaspoonfuls oil separately and use the mixing spoon to lift/turn the pieces repeatedly until lightly coated. Do not taste unknown or mouldy bread.
- Spread the pieces apart in one layer on the cold tray. Rehearse carrying this loaded tray level to the cold oven shelf and the trivet with both gloves. If its weight or route is awkward, resolve that while cold. Check the tray is permitted at 200 C conventional or 180 C fan and set the ordinary cooking function, not grill.
- Follow the oven lesson's full shelf/preheat/loading method at the chosen setting. Start an 8-minute reminder from loading and remain nearby. At that check, use both dry gloves to land the tray on the trivet and close the oven door before inspecting; use the turner to move pieces gently, not bare fingers on the tray.
- If still pale/soft, return the supported tray for short two-minute checks; around 10 to 15 minutes is an estimate, not a guarantee. Remove pieces that are already golden to the clean plate with the turner while the tray is landed. Stop before blackness. Dense bread may need longer at a gentler setting rather than a fierce blast.
- For a centre check, transfer one piece to the plate with the turner and let it cool comfortably. Use the table knife/fork on the plate to break it: its centre should be dry and crisp as well as the outside. Do not touch a hot piece on the tray or mistake a brown edge for a dry centre. If needed, continue short controlled checks; do not prolong badly burning food to chase a centre test.
- When useful, switch the heating function off, land the tray on the trivet and transfer the pieces with the turner. Cool before eating a plain crisp piece; that completes this task without another meal. Later, make the complete linked soup separately and scatter croutons on it at serving, not during the soup's simmering.
- For spare PLAIN croutons, cool completely in a clean protected place before closing in a clean dry airtight food container. Use promptly, preferably within two days for this small practice, or an earlier bread/product limit. This is a conservative plan for fully dried plain croutons, not perishable toppings. If damp or mouldy, discard. Let tray/oven cool, then clean tools and crumbs and confirm the controls are off.
Plan around how much you eat
Keep a note of whether two slices make a useful portion and how many you actually use. Freeze suitable surplus early, not after discovering mould. A small portion that you will eat is more useful than the largest possible freezer bag.
Plain bread thawing, filled-sandwich storage, toaster operation and crouton baking are different tasks. Keep their actual product and appliance instructions with the food, and retain the original earliest limits when adding another ingredient.
Sources and further reading
- King Arthur Baking: yeast-bread texture and storage
- NSW Government Love Food Hate Waste: plain-bread thawing and frozen toast
- Healthdirect Australia: discard mouldy soft foods such as bread
- Good Food: crouton size, spacing and crispness; this is a smaller plain variation
- Russell Hobbs 14364-57 manual: example toaster restrictions, sequence and cleaning; use your own model
- Food Standards Agency: chilling/freezing quality and wrapping
- London Fire Brigade: kitchen fire response
- Victorinox: bread-knife serrations, light pressure and controlled strokes