
Vegetables And Pulses
Roast peppers courgettes and tomatoes
Prepare one soft vegetable, choose its own roasting temperature and stop at a tender centre rather than waiting for everything to look alike.
Before you begin
- Knife confidence: the safe claw gripPractise the bridge, flat face and slow claw slicing before cutting vegetables.
- Washing vegetables and keeping prep cleanWash fresh produce and keep it away from raw-meat equipment.
- Measuring accurately without stressWeigh prepared food and use marked 5 ml and 15 ml spoons.
- Use an oven: settings, preheating, shelves and the grillIdentify normal fan or conventional baking, preheat, and practise a cold tray lift.
Choose one vegetable first
- Read food labels before you cookCheck storage instructions and any ready-to-eat or cooking requirements.
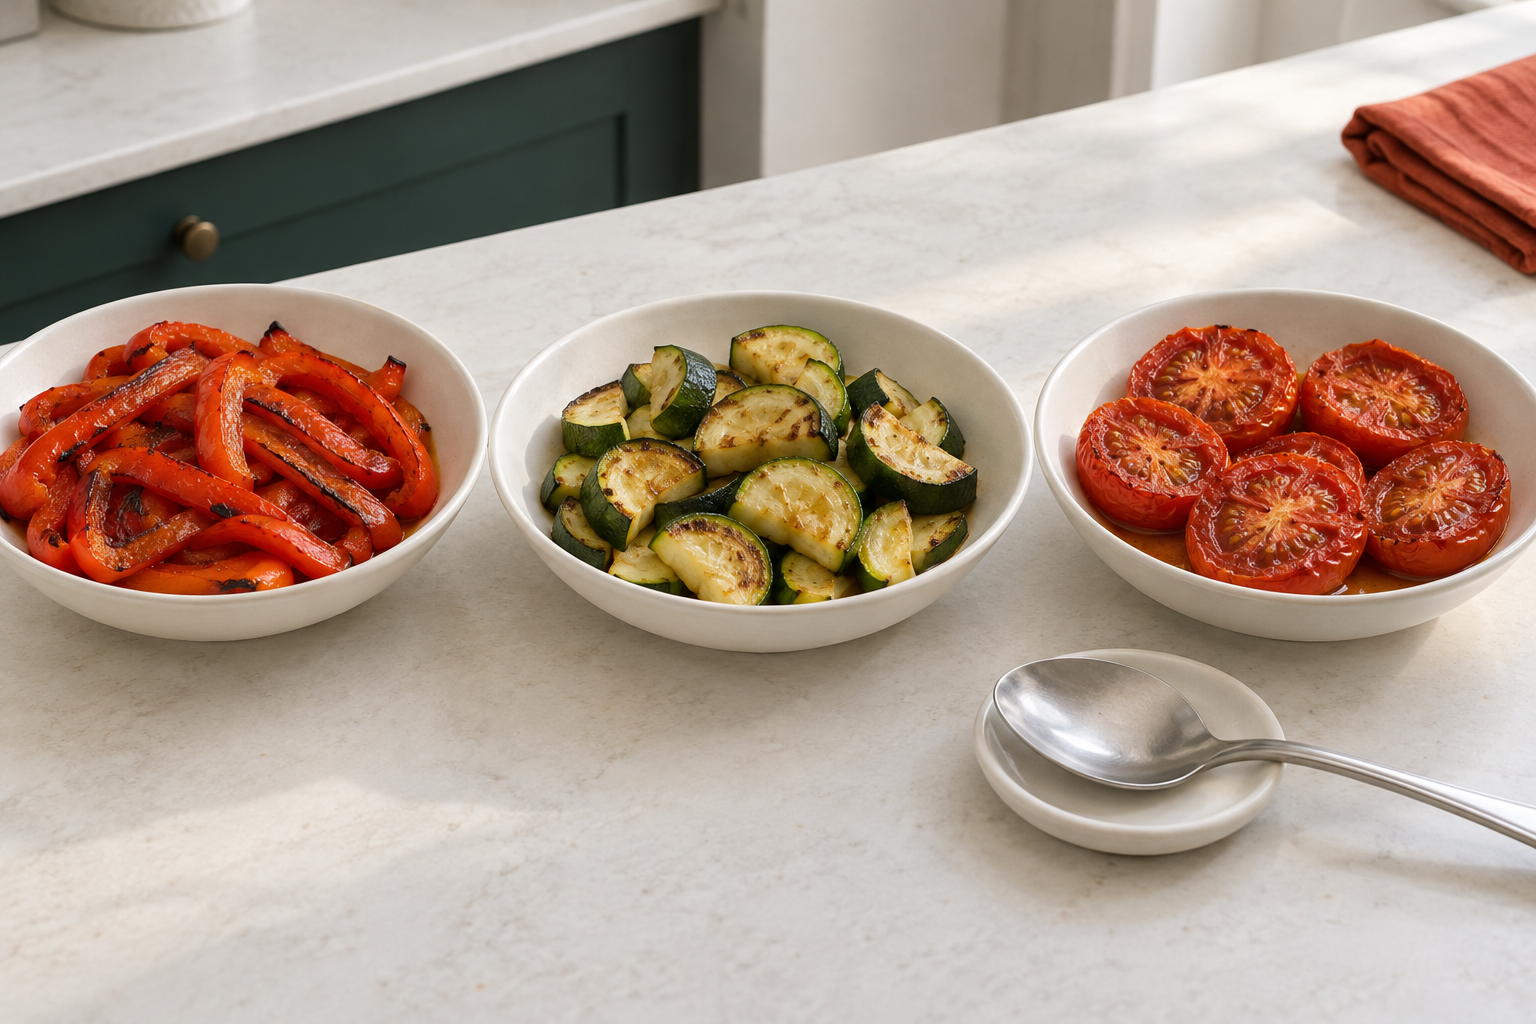
Peppers, courgettes and tomatoes contain more water and soften differently from carrots. Roasting means cooking with the oven's surrounding heat, not its grill. The practices below are separate choices: pick just one for the first attempt. A pepper panel can stay firm after a tomato has collapsed, so one time does not suit a mixed tray.
Use sound fresh vegetables, not mouldy produce, frozen packs or leftovers for these first tasks. Keep chilled food cold until preparation and follow its label. These methods do not teach a gas-flame char, grill blackening or removing hot pepper skin. Leave skin on for this simple version.
Set up a single tray
- Measuring accurately without stressWeigh prepared food and use marked 5 ml and 15 ml spoons.
- Use an oven: settings, preheating, shelves and the grillLearn shelf placement, the preheat signal and a two-glove level lift.
- Choose one: about 200 g prepared red bell pepper, about 250 g prepared ordinary courgette, or about 300 g ripe medium salad tomatoes. Prepared weight means the food after discarded stalks and cores, not the original packet including waste. Have 10 ml olive or vegetable oil for peppers or courgette, or 5 ml for tomatoes, measured with a marked 5 ml teaspoon. Check labels for suitability; leave seasonings out of the first comparison.
- Set out scales, a stable clean board with non-slip support, a sharp knife you control, a clean bowl holding at least 1 litre, measuring spoon, ordinary mixing spoon, sturdy rimmed oven-safe metal tray, heat-safe turner, checking fork, testing plate, separate clean tasting fork or spoon, small sample bowl, serving plate, timer, two dry oven gloves and a trivet supporting the whole tray. Keep mouth-used tasting tools out of shared food; replace with a clean one for the next sample. A rim keeps tomato juice on the tray. Use the tray unlined so there is no extra paper-handling task.
- With the oven cold and off, set a level middle shelf as its manual directs. Clear the route to the trivet and practise carrying the empty tray, then the prepared cold tray, level with both gloved hands. Reduce the portion or get assistance before heating if you cannot hold it steadily. Leave space around the tray inside the oven and clean gripping edges.
- Use your normal baking mode, not a grill, defrost or rapid-heat-only setting. The fan and conventional numbers below are alternatives: choose the one for your actual cooking mode. Wait for that oven's preheat signal before loading. Keep face and bare forearms back from escaping heat; set the tray fully on the shelf before releasing it.
Prepare a red bell pepper
- Washing vegetables and keeping prep cleanWash fresh produce and keep it away from raw-meat equipment.
- Knife confidence: the safe claw gripPractise the bridge, flat face and slow claw slicing before cutting vegetables.
- Wash the whole pepper under drinking-quality water and dry it. Place it on its side on the stable board. Use the knife lesson's bridge hold, keeping fingers and thumb on opposite sides outside the blade path, to halve it lengthways. Do not cut while holding the pepper in the air. Stop if it rocks or the blade needs force; ready-prepared pepper panels are another starting point.
- Park the knife flat and fully supported at the rear of the board. Separate the halves, then use your fingers or the spoon to remove the seed cluster, loose seeds and white inner ribs. If the hard stalk does not pull free easily, lay that half securely cut-side up and make short controlled cuts around the stalk with the knife, holding the food clear of the blade; discard that hard top. Do not push a point towards a hand behind the pepper.
- Lay each hollow half securely on the board, broad skin surface supported. With tucked guide fingertips and thumb behind them, cut it lengthways into two or three broad panels about 3 to 4 cm wide. Make one cut, stop and reset. Flatten a curved panel gently with the knife parked if needed; do not chase a slippery last end. Weigh about 200 g edible panels.
- Park the knife. Put the panels in the bowl, spoon over the measured 10 ml oil and stir gently with the ordinary spoon until both sides have a thin coating. Spread on the cold tray skin-side up in one layer, with little gaps, not piled in the centre. Leave raw pepper scraps separate from your cooked serving tools.
Roast the pepper panels
- Use an oven: settings, preheating, shelves and the grillLand the hot tray before turning or checking food.
- Preheat to 200 degrees C fan or 220 degrees C conventional using the normal baking function. Load the prepared tray by the rehearsed two-glove method, close the door and set a 20-minute checking reminder. Stay within hearing; a timer may not turn the oven off.
- At 20 minutes, take the tray level to its trivet with dry gloves and close the door. Use the turner to lift a thick panel onto the testing plate. Push a fork through the fleshy part and cool a small sample before tasting. You want a softened centre with skin you are happy to chew; light browning and some wrinkling are normal, but blackness is not the target.
- If still firmer than wanted, use the turner to turn the remaining panels while the tray is supported, return it to the oven and set another 5-minute reminder. Many panels need around 25 to 35 minutes in total, but size and oven behaviour vary. If edges are getting very dark while the flesh remains firm, lower the temperature by about 20 degrees C and check again after 5 minutes; do not keep a high heat just to meet a timer.
- Once tender, switch the oven off and leave the tray supported on its trivet. Lift panels with the turner onto the standing serving plate. Do not peel them hot with your fingers or attempt to make them black for a charred-pepper recipe. Let your own first mouthful cool before eating. Use the finishing and storage section below.
Prepare an ordinary courgette
- Washing vegetables and keeping prep cleanWash fresh produce and keep it away from raw-meat equipment.
- Knife confidence: the safe claw gripUse a bridge for the lengthways cut, then slice from the flat face.
- Choose an ordinary small or medium courgette rather than a huge marrow. Wash and dry it; its thin green skin can stay. Lay it across the stable board and use a bridge hold to trim a thin slice from the stalk end and dry tip. If a short end cannot be held safely, leave it aside instead of forcing a final cut.
- Divide a long courgette crosswise into manageable lengths about 10 cm long. Lay a length along the board and use the bridge hold to halve it lengthways, as in the cucumber knife practice. Put the knife down before separating the halves and turning one flat-face down.
- With the half supported on its flat face and guide fingertips tucked back, cut across into chunky half-rounds about 2 cm thick. Reset the holding hand between cuts and leave any unstable end. Weigh about 250 g. Skin remains on the curved edge; these pieces are much thicker than thin salad slices.
- Park the knife, transfer with the spoon to the bowl, add the measured 10 ml oil and stir gently. Spread in one layer with gaps on the cold rimmed tray. Wet or crowded pieces can stay pale and soft rather than develop golden faces.
Roast the courgette half rounds
- Use an oven: settings, preheating, shelves and the grillUse the same supported checking and removal route.
- Tray spacing and oven airflowLeave a single layer and room for hot air rather than packing the tray.
- Preheat to 180 degrees C fan or 200 degrees C conventional. Load the tray level with both dry gloves, close the door and set a 15-minute reminder.
- At 15 minutes land the tray on its trivet and close the door. Use the turner to turn pieces gently; keep the tray supported. Return to the oven and set another 10-minute reminder. Do not scrape forcefully at a piece that is stuck or put bare fingers on the hot rim.
- At about 25 minutes lift one thick piece onto the testing plate. A fork should enter its middle easily with the resistance you prefer; cool a sample before tasting. Many batches finish around 25 to 35 minutes. If too firm, cook another 5 minutes and retest. They do not need crisp edges or the same colour as peppers.
- A pool of liquid can mean a crowded tray, wet surfaces or a watery vegetable. Do not pour juice from a hot tray or keep baking until every drop disappears: you may turn tender pieces to mush. Stop at your chosen tenderness, switch off, land on the trivet and lift with the turner onto the standing plate. Make the next batch smaller or better dried.
Prepare medium tomato halves
- Washing vegetables and keeping prep cleanWash fresh produce and keep it away from raw-meat equipment.
- Knife confidence: the safe claw gripPractise the bridge, flat face and slow claw slicing before cutting vegetables.
- Remove the vine or stalk by hand, wash about 300 g ripe medium salad tomatoes and dry them. A small cherry tomato and a large beef tomato need different checks; do not silently substitute either for this first practice.
- Use a suitable sharp knife that cuts the skin without skidding. Set a tomato on its side on the stable board, use the bridge hold with fingers outside the path, and cut across into two halves. Do not press harder on a slipping skin; stop and use a suitable sharp or serrated tomato knife you can control, or ask for a demonstration.
- With the knife parked, separate the halves. If there is a hard stalk scar, leave that half securely supported on the board and make short controlled cuts around the small firm area, holding the food to the side clear of the blade path. Do not cut on the metal tray or hold a half in your hand behind the point. Seeds and juice can stay. Park the knife, then move halves cut-face up to the cold tray with the spoon or your clean hands.
- Measure 5 ml oil and spoon it over the cut faces, dividing it between the halves. Keep the halves in one layer with a little space and no extras for the first attempt. Their juices will collect in the rimmed tray; this is not a dry crisp-roasting task.
Slow roast the tomato halves
- Use an oven: settings, preheating, shelves and the grillRemove and support the tray before checking or serving.
- Preheat to 140 degrees C fan or 160 degrees C conventional. Load the tray by the rehearsed two-glove method and close the door. Set a 45-minute first checking reminder; this gentler tomato method is not the pepper temperature.
- At 45 minutes land the tray level on its trivet and close the door. Lift a half low with the turner onto the testing plate without tipping the tray's hot juice. Check with a fork through the thick outer flesh, then cool a small sample before tasting. The half should be soft, with a slightly wrinkled edge, not a firm raw centre.
- If too firm or you want a little more concentration, return the tray and check at 10-minute intervals. Around one hour is a useful guide for medium halves, not a promise. Stop when the flesh is tender and tastes as concentrated as you like; it need not become dry or brown. Very small or already soft tomatoes may be ready earlier.
- Switch off. With the tray supported on its trivet, lift the tomatoes low onto the standing plate. Keep hands away from their very hot inside juice. Leave tray juice to cool safely rather than pouring it one-handed. Serve with ready-to-eat bread. For a soft sauce, use the supported fork method below, not an unplanned hot-blender task.
Finish or store the cooked vegetables
- Seasoning food without guessingCompare a small finished sample before changing the whole portion.
- Fresh herbs: storing them and using them upWash, dry and prepare herbs before a later topping.
- Make an oil and vinegar dressingMeasure and mix a separate dressing rather than guessing additions.
- Omelettes: set, fill and fold without panicComplete the plain egg task first, then use its small cooked filling and full centre check.
- How to rescue overcooked vegetablesChoose a known-history soft-vegetable use and the small omelette-filling route.
- Storage and reheating basicsCool a small portion promptly, label its original cooking time and reheat only once.
- Burnt flavour rescue: when to save it and when to stopSeparate scorched residue and know when not to save a portion.
For a simple warm tomato topping, use a heatproof bowl holding at least 500 ml on a non-slip support, a fork, separate clean tasting spoon and sample bowl. Set these out before heating. Lift the cooked tomatoes low into the supported bowl with the turner; let fierce steam settle, hold the bowl only by a safe cool outside area or with a dry glove, and press gently with the fork. Small soft pieces and skins are fine. Transfer a little to the sample bowl and cool it before tasting, then spoon onto ready-to-eat bread. Do not return a tasted sample to the shared bowl. This is a coarse topping, not strained passata.
For pepper or courgette, plain pieces with bread are a complete first serving. Seasoning, herbs or a dressing are separate later choices: use their linked full preparation before adding them. For a later omelette during one continuous preparation, set out that whole egg lesson's tools, ingredients and a marked 15 ml tablespoon before roasting. Lift a small freshly cooked portion onto a clean plate, leave tray juice behind and let it cool just enough to handle comfortably. On the stable board lay a courgette piece on its flat face, or a pepper panel on a broad stable face, and use tucked fingertips to make slow crosswise cuts into pieces about 1 cm across. Stop and reset if the food slips; leave an awkward end. Park the knife before gathering with the spoon. Use no more than 2 measured tablespoons in place of cheese in the full omelette's later filling after learning its plain set-egg practice. Follow the folded-centre check, not a short cold-leftover warming shortcut. Do not leave the whole tray waiting while learning the egg method.
Cool an untouched portion promptly in a clean shallow container and refrigerate within one to two hours. Cover, label the original cooking time and use within 48 hours or a shorter product instruction; freeze promptly if suitable and not using in time. Follow the full cooling lesson rather than waiting for a deep bowl to cool slowly. A later hot use needs one thorough reheating to steaming hot throughout, not a brief warm coating. Reject unknown storage history.
If texture is too soft, a new use can help, but firmness cannot be restored. For bitter scorched edges, leave those pieces and any burnt tray residue separate and use the burnt-flavour guide's discard decision. A little browning is not an instruction to keep cooking to blackness.
Sources and further reading
- Good Food: soft vegetables and tray roasting
- Good Food: pepper preparation and oven roasting
- Good Food: slow-roasted medium tomato halves
- Food Standards Agency: washing produce and rejecting mouldy food
- Food Standards Agency: chilling, freezing and defrosting
- Food Standards Agency: frozen vegetables and once-only thorough reheating