
Vegetables And Pulses
Boil roast and mash prepared butternut squash
Start with peeled fresh cubes to learn tenderness, draining, roasting and a supported fork mash without first tackling a hard whole squash.
Before you begin
- Measuring accurately without stressWeigh prepared food and use marked 5 ml and 15 ml spoons.
- Read food labels before you cookChoose fresh peeled cubes and read their cooking, use-by and storage instructions.
- How to use hob heat without guessingControl the matching ring and find its off position.
- Drain food and save cooking water safelyRehearse the full cold weight or choose a no-lift draining tool.
- Use an oven: settings, preheating, shelves and the grillIdentify normal fan or conventional baking, preheat, and practise a cold tray lift.
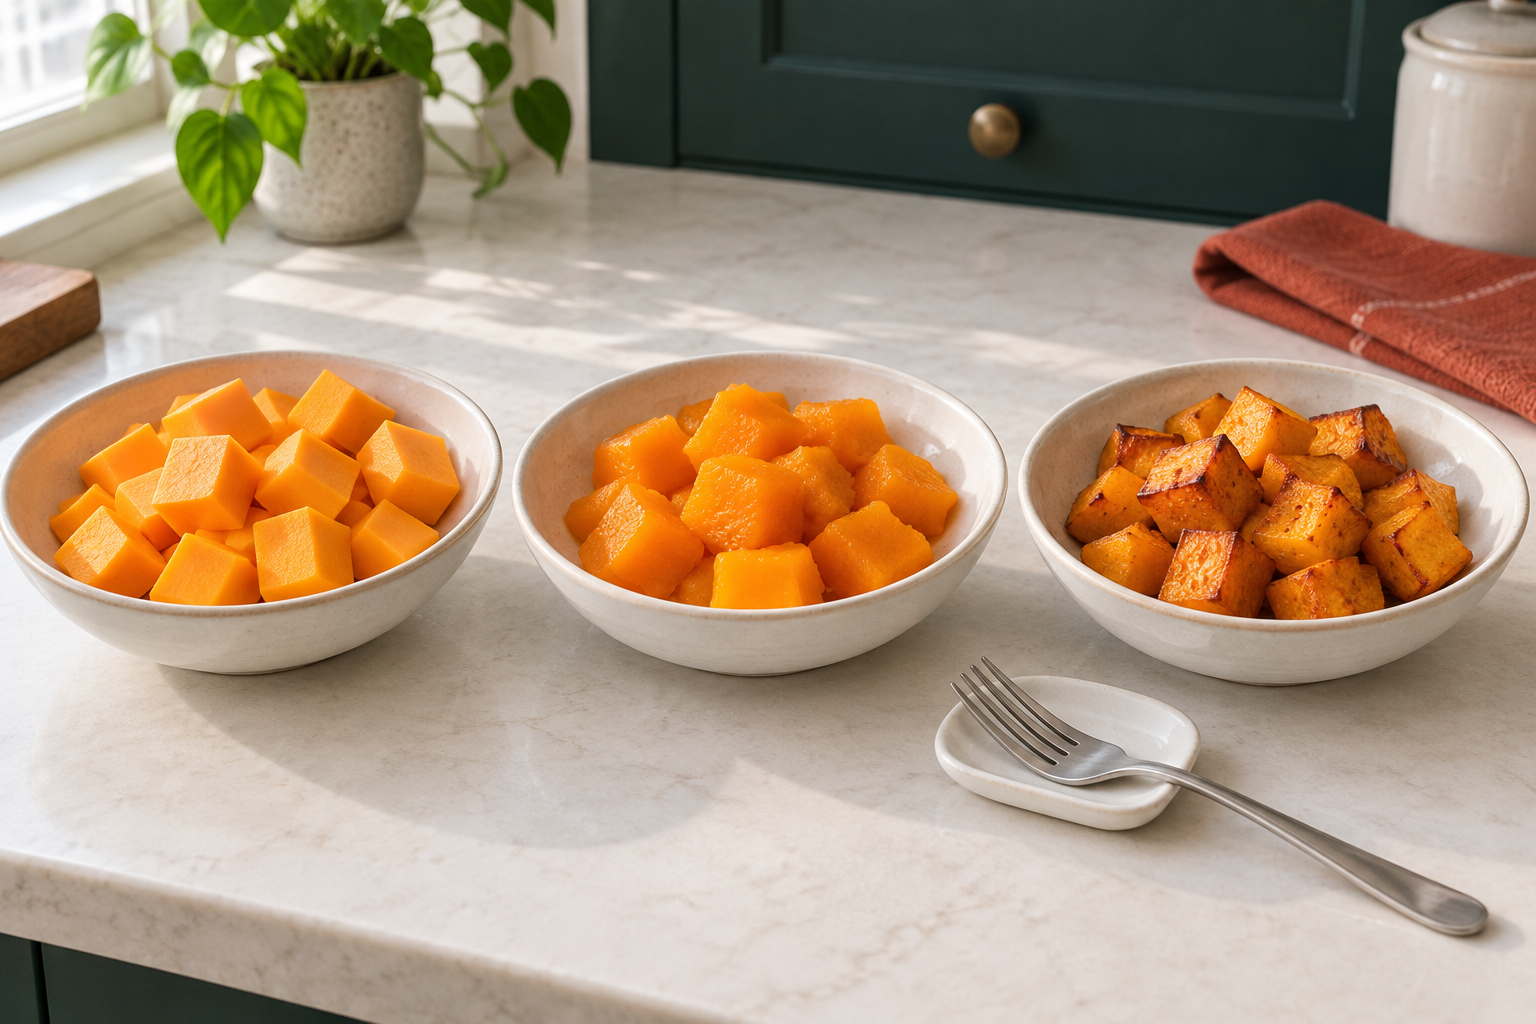
Start with prepared fresh cubes
- Read food labels before you cookRead the method rather than guessing that cubes are ready to eat.
- Washing vegetables and keeping prep cleanWash fresh produce and keep it away from raw-meat equipment.
Butternut squash has firm orange flesh inside a hard skin. For the first cooking task choose fresh chilled peeled, deseeded cubes, not a whole squash, frozen blocks, a ready-cooked pouch or a mixed vegetable pack. This teaches cooking without requiring a difficult hard-vegetable cut. Preparing a whole squash is a separate knife task; do not try to make it safe by pushing harder with a blunt knife or using an improvised softening trick.
Use about 300 g cubes roughly 2 cm across. Follow any cooking directions on the actual fresh pack, especially if it requires a particular full method or has much larger pieces. For this practice choose a pack with similar small cubes suitable for boiling or roasting. Keep it within its use-by and storage limits, and follow any washing instruction; do not assume prepared means ready to eat. Reject mould or decay.
Choose boiling OR roasting for the first attempt. Boiled pieces are moist and useful for a mash; roasted pieces can have golden faces. You are not boiling this batch and then roasting it as a two-stage potato recipe.
Set out the cooking tools
- Measuring accurately without stressWeigh prepared food and use marked 5 ml and 15 ml spoons.
- Drain food and save cooking water safelyRehearse the full cold weight or choose a no-lift draining tool.
- Use an oven: settings, preheating, shelves and the grillRehearse the actual prepared tray weight while the oven is cold.
- For boiling: scales, a clean cold preparation bowl, measuring jug, 1.5 to 2 litre saucepan, about 750 ml drinking water to cover the cubes with safe headroom, heat-safe spoon, slotted spoon retaining the cubes, checking fork, testing plate, small sample bowl, separate clean tasting spoon, serving bowl and plate, timer, dry oven gloves and trivet. If pan shape needs more water, check the full cold weight and headroom again before heating. Keep mouth-used tasting tools out of shared food and replace with a clean one for a new sample.
- If pouring instead of lifting food out, have a heat-safe standing colander retaining 2 cm cubes in the empty freely draining sink and rehearse the real cold pan weight with the draining lesson. If the pour is uncertain, use the no-lift slotted spoon from the start; do not try it hot to find out.
- For roasting instead: the same scales, checking fork, testing plate, sample bowl, tasting spoon, serving plate and timer, plus a 1 litre mixing bowl, marked 5 ml teaspoon, ordinary mixing spoon, 10 ml olive or vegetable oil, sturdy unlined rimmed oven-safe metal tray, heat-safe turner, two dry oven gloves and a trivet supporting the whole tray. Check oil suitability and leave seasonings out of the first attempt.
- For an optional mash after boiling: set out a wide heatproof bowl holding at least 750 ml on non-slip support, fork or hand masher, serving spoon and dry glove for the outside of a hot bowl. This needs no blender or extra liquid for the first coarse texture. Keep utensils away from raw-meat equipment.
Boil the prepared cubes
- How to use hob heat without guessingControl the matching ring and find its off position.
- Drain food and save cooking water safelyDrain with a supported colander or lift the cubes without carrying the full pan.
- Weigh 300 g fresh prepared cubes while cold and return any unused pack to the fridge promptly. Put the measured water in the saucepan, with several centimetres of headroom above the eventual food and water. Set the pan on a matching ring with its handle safely turned in and bring the water to a boil.
- Lower the cubes in small spoonfuls, keeping fingers above and away from the water, rather than dropping the whole bowl. Once bubbling returns, lower to a controlled steady boil, leave the lid off and start the timer. Stay beside it; violent bubbling can break softening cubes.
- Begin checking around 8 minutes for roughly 2 cm fresh cubes. Lift a thick piece onto the testing plate with the slotted spoon and push a fork into its centre. Cool a little sample before tasting with a separate clean spoon. Many cubed batches take around 10 to 15 minutes, but the actual pack, piece size and centre resistance decide. Continue a minute or two and retest if the middle is hard.
- When the fork enters the centre easily, switch off. Follow the rehearsed standing-colander route, or leave the pan securely on its trivet and lift small spoonfuls into the supported bowl, letting water drip back. Leave the hot water to cool before emptying. Do not hold a bowl in one hand while tipping the full hot pan with the other.
- Serve plain promptly, letting your first mouthful cool, or complete the immediate supported mash below. Drain once tender rather than leaving cubes in hot water while finding other tools; retained heat keeps softening them.
Mash the drained squash
- Butter, oil and finishing fatLearn a measured finish before adapting butter or oil to the mash.
- How to rescue overcooked vegetablesUse the supported mash and known-history soup routine, without a hot-blender shortcut.
- Put the whole drained boiled batch low into the standing heatproof bowl with the slotted spoon, keeping the bowl on its non-slip support. Let fierce steam settle and keep hands away from it. Hold the outside only by a safe cool area or through a dry glove if hot; do not grip the hot rim bare-handed.
- With no heat under the bowl, press gently down with the fork or hand masher in small areas. Keep the tool low and stop if the bowl slides or rocks. The tender cubes should break into a coarse mash. Small soft particles are fine; do not pound or use an appliance just to imitate a smooth photograph.
- Do not add water to make the first mash easier: excess draining water already makes it looser. Put a small sample in the separate bowl, let it cool to comfortable eating warmth and taste with the clean tasting spoon. Serve plain with the serving spoon onto a standing plate, or follow the measured fat-finishing lesson for a separate later butter or oil trial.
- If a few untouched centres resist the fork, do not solve it with extra force. Set those firm pieces aside with the clean spoon before serving. If the original hot cooking water is still available, keep the pan supported, lower those pieces back in small spoonfuls, then return it to controlled bubbling and cook another minute or two before repeating the centre check and draining. If the water was poured away, let the empty pan cool enough for safe handling, put in fresh drinking water sufficient to cover those pieces with headroom, bring to a boil and lower the pieces in with the spoon; use the same check and prepared draining route. Leave any tasted sample out of this shared food. The first mash needs properly tender pieces, not a harder tool.
Roast a separate fresh batch
- Use an oven: settings, preheating, shelves and the grillIdentify the function and safely load a preheated oven.
- Use an oven: settings, preheating, shelves and the grillSupport the hot tray before turning and checking.
- For this route start again with 300 g raw fresh peeled cubes, not the already boiled batch. With the oven cold, set a level middle shelf and clear the route to the tray trivet. Measure 10 ml oil with two level 5 ml spoonfuls, add to the cubes in the mixing bowl and stir gently with the ordinary spoon. Spread on the cold tray in one layer with small gaps and clear gripping edges. Rehearse the loaded tray weight with both dry gloves.
- Preheat to 180 degrees C fan or 200 degrees C conventional using the normal baking mode. Wait for the oven's preheat signal. Load the tray level with both gloves, set it fully on the shelf, close the door and set a 15-minute reminder. This is not a grill or air-fryer conversion.
- At 15 minutes, remove the tray level to its trivet with dry gloves and close the door. Turn pieces with the heat-safe turner while the tray is supported, then return to the oven and set another 10-minute reminder. Keep fingers off the hot tray and never turn food while holding it in the air.
- At about 25 minutes lift a thick cube onto the testing plate and push the fork into its centre. Cool a sample before tasting. A tender centre and a few golden faces are the target. Many small cubes take about 25 to 30 minutes, sometimes longer; if too firm, return and check after another 5 minutes. If darkening before tender, lower by about 20 degrees C and continue checking, not to blackness.
- Switch off once ready and land the tray on its trivet. Lift pieces low onto the standing plate with the turner and serve promptly. You do not need every cube equally brown. Leave tray and oil residue to cool before cleaning.
Correct texture and store the untouched portion
- Tray spacing and oven airflowLearn why a small single layer browns differently from a packed tray.
- Fresh herbs: storing them and using them upPrepare a small clean herb topping as a separate later step.
- Garlic colour: fragrant, golden or burntLearn garlic preparation and gentle cooking before adding it.
- Dry frying, toasting and blooming spicesUse the complete spice practice rather than raw spice as a texture cure.
- How to rescue overcooked vegetablesPractise its measured first soup before changing the vegetable.
- Storage and reheating basicsCool a small portion promptly, label its original cooking time and reheat only once.
- Storage and reheating basicsFully thaw a frozen cooked portion in the fridge.
If boiled cubes fall apart, stop and drain promptly; a coarse mash can still be useful. If a roast is pale but tender, that can be a usable result, not a reason to keep baking until dry. For more colour next time dry surfaces if washed, use a single layer and avoid crowding. A hard centre needs further cooking; a burnt bitter face cannot be turned golden again.
The first small serving can stay plain. A later parsley, garlic or spice version needs the full linked ingredient preparation and cooking, not a raw arbitrary garnish. For a soup next, the recovery guide starts with a complete carrot practice. Learn that supported bowl, liquid adjustment and serving method before adapting it to known-history squash; its 200 g carrot batch does not define the weight or thickness of every vegetable soup.
Cool an untouched portion promptly in a clean shallow container and refrigerate within one to two hours, following the complete cooling method. Cover and label its original finish time; use within 48 hours or a shorter instruction, or freeze promptly if suitable. Reheat a later hot portion only once, to steaming hot throughout. Fully fridge-defrost a frozen cooked portion first and use within 24 hours of fully thawing; fresh frozen uncooked cubes instead need their own full packet cooking.
Note the cube size, method and point you preferred. The useful skill is checking the middle before serving, not memorising a time for every kind of pumpkin or squash. Unknown storage history, mould or decay is a discard decision, not another boiling attempt.
Sources and further reading
- Montana State University Extension: boiling cubed winter squash to tenderness
- Good Food: roasting small butternut squash cubes
- Food Standards Agency: washing produce and rejecting mouldy food
- Food Standards Agency: frozen vegetables and once-only thorough reheating
- Food Standards Agency: chilling, freezing and defrosting