
Essentials
Air fryer first use: baskets, space and cooking checks
Set up an air fryer, cook a small first batch and learn why airflow and food checks matter more than a universal conversion.
Before you begin
- Washing vegetables and keeping prep cleanComplete washing, trimming and optional peeling before cutting.
- Knife confidence: the safe claw gripRehearse stable food and the bridge/claw grips before halving a carrot.
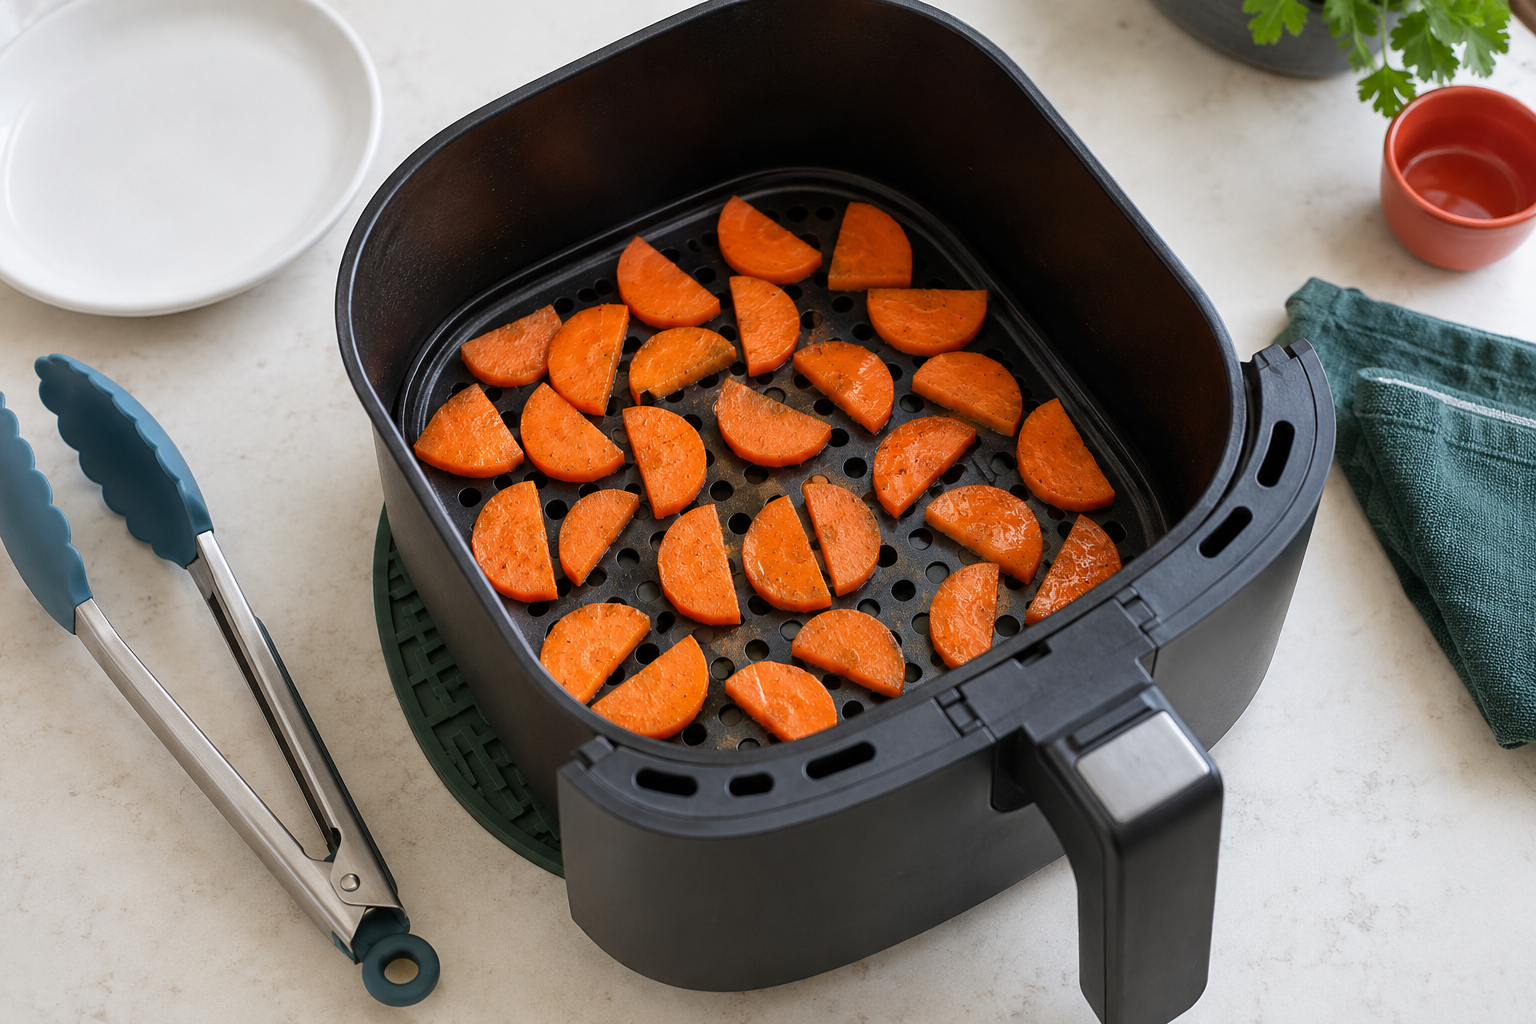
An air fryer is a small fan oven
- Clean and set up your kitchen before cookingPrepare a dry electrical area and heatproof landing place.
- Kitchen cuts, burns and emergenciesKnow how to respond to a burn, fault or fire before heating.
An air fryer moves hot air around food in a small cooking space. Its drawer holds a basket or a perforated crisper plate, meaning a plate with holes for air. It is not a deep-fat fryer. Brown edges and a timer beep do not prove that the centre of raw meat is safe.
Find your exact model number and its manual before connecting power. Check its permitted location, vent clearance, first-use cleaning, accessory position, cooking mode, temperature control, start, stop and drawer-opening procedure. Resolve missing instructions before heating. Use an undamaged appliance and its own approved parts on a stable heat-resistant worktop, away from its edge, water and an active or accidentally switchable hob. Do not cover vents or put the hot-air outlet towards a socket, cable or stored items.
With the unit cold and unplugged, remove transport packaging and wash, rinse and dry removable food-contact parts as the maker directs. Keep the electrical body, plug and cable out of water. Complete any maker-required first-use cycle, then cool before the food practice. Do not invent a burn-in cycle or add loose paper.
For example, the AF180UK manual requires 15 cm clearance above and on all sides, and its AIR FRY function uses the crisper plate in the LOWER position. These are that model's instructions, not universal dimensions. MAX CRISP is a different fixed high-temperature programme, not another name for adjustable air frying.
A first vegetable batch
- Knife confidence: the safe claw gripRehearse a bridge division and stable flat-face slicing.
- Measuring accurately without stressTare the prepared-carrot bowl and use a marked 5 ml measure.
- Use 250 g fresh prepared carrots: their weight AFTER washing, trimming and any peeling. Choose manageable carrots about 2 to 3 cm thick; follow the full washing lesson first. Set out scales, a clean bowl holding at least 1 litre, stable non-slip board, suitable sharp kitchen knife and optional peeler. Put the empty bowl on scales set to grams and press tare/zero, then weigh the prepared food.
- For the first cut, put a washed, dried, trimmed carrot lengthways on the board. Use the knife lesson's bridge hold with thumb and fingers on opposite sides outside the cut to halve it lengthways. Park the knife before separating halves. Lay each half flat-face down, reset a claw grip with fingertips and thumb tucked back, and cut across in slow downward-and-forward slices about 5 mm thick. These are half-moons. Stop if a carrot rolls or needs force; use labelled ready-sliced fresh carrot or get a demonstration, not harder pressure.
- Have 1 level marked 5 ml teaspoon cooking oil, an ordinary mixing spoon and optional small pinch of salt. Use the supplied fitted basket/plate with no extra dish, liner or foil. This is a KINALO small-batch teaching variation, not an exact manufacturer recipe or a physically kitchen-tested cooking time.
- Set out heat-safe non-scratching tongs, a checking fork, clean checking plate, separate serving plate, clean tasting fork, timer, two dry oven gloves and a broad heatproof trivet supporting the whole drawer. Keep handles, cables and gloves clear of the outlet. Have shallow heat-compatible leftover containers, lids and labels ready if saving any food.
- Use the actual manual's permitted adjustable air-fry mode at 180 C for this small fresh-carrot practice. Check any specific fresh-vegetable directions before starting; choose its complete suitable method instead if they conflict. The first check is 8 minutes, then 3-minute cooking intervals as needed. Around 12 to 20 minutes is only an estimate; cut size, starting conditions and the appliance change the result.
Cook and inspect
- Finish all carrot preparation before heating. Dry the pieces, put them in the weighed bowl and stir and turn with the measured oil until thinly coated. Keep this preparation and the cooked-food tools away from raw meat. Park the knife visibly and wash and dry hands.
- With the machine still cold, fit the dry basket/plate in its permitted position. Load a loose shallow layer with gaps, not a heap. If 250 g cannot fit, use less prepared carrot and set the rest covered in the fridge for a separate later batch; record the actual amount used. Rehearse pulling the cold loaded drawer by its handle to the trivet and reinserting securely, using the gloves. Never press a basket-release control while carrying it. Get help or use a smaller batch before heating if you cannot handle it steadily.
- If your model requires a separate preheat, return the carrots to their clean bowl, follow that whole preheat procedure with the approved fitted empty parts and NO loose paper, then land the hot drawer on the trivet with dry gloves and load with the spoon/tongs. Otherwise keep the cold-loaded drawer in place. Keep face, hands and bare forearms away from escaping heat.
- Connect power with dry hands as the maker directs. Select AIR FRY or the permitted adjustable equivalent, set 180 C and 8 minutes, and press the actual start control. On the AF180UK this is Power, AIR FRY, TEMP arrows, TIME arrows, then START/STOP. Confirm the cooking indicator/countdown is running; selecting a mode alone may not start cooking. Stay nearby and set an independent 8-minute reminder too if useful.
- At 8 minutes, follow your model's opening/pause procedure. Wear dry gloves, pull by the handle and land the drawer level on its trivet, keeping fingers off the hot metal and basket-release control. The AF180UK pauses automatically when the drawer is pulled out during a running cycle and resumes when reinserted; its START/STOP button STOPS and resets the timer, so do not describe it as a pause button. After END, further cooking needs a new timed start.
- With the drawer supported, turn and spread the carrots using the tongs. Lift one of the thickest pieces to the checking plate. Press the checking fork into its centre: there should be no hard raw core. Let the sample cool, then try a small bite with the separate clean tasting fork if wanted. Never taste from the hot drawer or return a mouth-used fork or tasted sample to shared food. Use a clean fork for the next taste.
- If the thick centre still resists, reinsert the drawer, set another 3 minutes at the same permitted temperature and start/confirm cooking again. Check, turn and repeat in 3-minute intervals. If edges darken before the centre softens, use an allowed setting about 10 to 20 C lower and continue those checks. Do not keep cooking black bitter pieces to try to repair them; next time make thicker pieces smaller.
- When thick pieces are tender and the edges are browned to your preference, stop cooking and turn the unit off using its actual controls. Wear dry gloves to land the drawer on its trivet. Lift carrots with the tongs onto the separate standing serving plate. Do not tip loose hot fat or a detachable plate towards yourself. Cool a mouthful before eating; plain cooked carrots are a complete first result. Optional seasoning follows a clean cooled taste, not an automatic extra spoon of salt.
- Record model, mode, prepared weight, cut size, oil amount, checking points and total actual time. Start the leftover cooling routine now, then let the drawer and unit cool for cleaning. The next batch should keep these variables similar rather than assuming a full basket has the same timing.
Avoid blocking the air
- Kitchen cuts, burns and emergenciesUse the full emergency response, not an improvised fire experiment.
Loose baking paper can lift into a heating element. Use only maker-permitted liners positioned and held down as directed, never loose paper in preheating. Do not cover all the holes with foil, add a deep pool of oil or put food where it can touch the element. The first task uses the supplied plate/basket alone.
An oven-safe dish is not automatically air-fryer safe. Both appliance and accessory permissions, dimensions and clearance matter. Do not attempt a large liquid-filled pot or loose wet batter without a suitable complete method.
If the appliance malfunctions, follow its fault instructions and stop using it. For a fire or spreading smoke, keep clear, get everyone out and call 999; do not pull a smoking drawer open or throw water into it. Disconnect power only if safe, without approaching the hazard. A still photograph cannot certify a safe appliance.
When moving on to meat
- Kitchen thermometer basicsFollow the complete probe placement and holding-time procedure.
- Meat temperatures: a practical UK cooking referenceChoose the appropriate food category.
- Cook a plain chicken breast in the ovenUse its full oven method unchanged instead of inventing a chicken conversion.
Choose a full food/packet method suitable for your exact appliance, cut, amount and starting condition. The carrot timer is not a chicken timer. Raw poultry, pork, minced, rolled and stuffed meat need thorough cooking; use a clean food probe and the appropriate centre temperature WITH its holding time. For example, the FSA gives 75 C for 30 seconds or 70 C for 2 minutes, not a momentary target reading.
Keep raw utensils separate from serving tools and clean the probe between undercooked and later checks. Check more than one thick piece if they vary. Do not serve a browned but unverified centre or keep raw food waiting while experimenting with unsupported modes.
Cleaning keeps the next batch predictable
- Storage and reheating basicsFollow the full shallow cooling and original-date routine.
- Clean and set up your kitchen before cookingWash a visible knife separately and leave the worktop dry.
For untouched spare carrots, transfer with clean tools to the prepared shallow containers and follow the full cooling method. Refrigerate within 1 to 2 hours, label the original cooking time and use within 48 hours or an earlier ingredient limit; freeze promptly if appropriate. Reheat only once until steaming throughout. Saving leftovers does not reset their clock.
With dry hands, disconnect the switched-off appliance when the maker directs. Let all hot parts cool in a safe place before removing the plate and washing. Wash, rinse and dry approved removable parts as directed; do not assume dishwasher suitability. Use non-scratching tools, not metal scourers. Built-up oil can smoke at the next cook.
Wipe the cool unplugged electrical body as its manual allows, never immerse it or run water through it. Wash the board, visible knife and preparation/serving tools, wipe and dry the worktop, and store the clean dry unit safely with its parts intact. Confirm that the controls are off.
Sources and further reading
- Ninja AF180UK: original manual, first-use setup, AIR FRY controls and conventional-oven adjustment
- SharkNinja: carrot AIR FRY example at 180 C; not the exact small-batch lesson below
- Food Standards Agency: cooking and reheating
- Food Standards Agency: chilling, freezing and defrosting
- London Fire Brigade: do not tackle a cooking fire; leave and call 999