
Baking Basics
A first muffin bake: measure, mix and check the centre
Combine and fill
- Stir, whisk, fold and turn: four different movementsSee the difference between folding and vigorous beating.
- Make a hollow in the dry mixture with the spoon and pour the wet mixture into it. Hold the bowl steady with one hand. Draw the spoon down through the middle, scrape along the bottom and lift the mixture over itself. Turn the bowl a little and repeat.
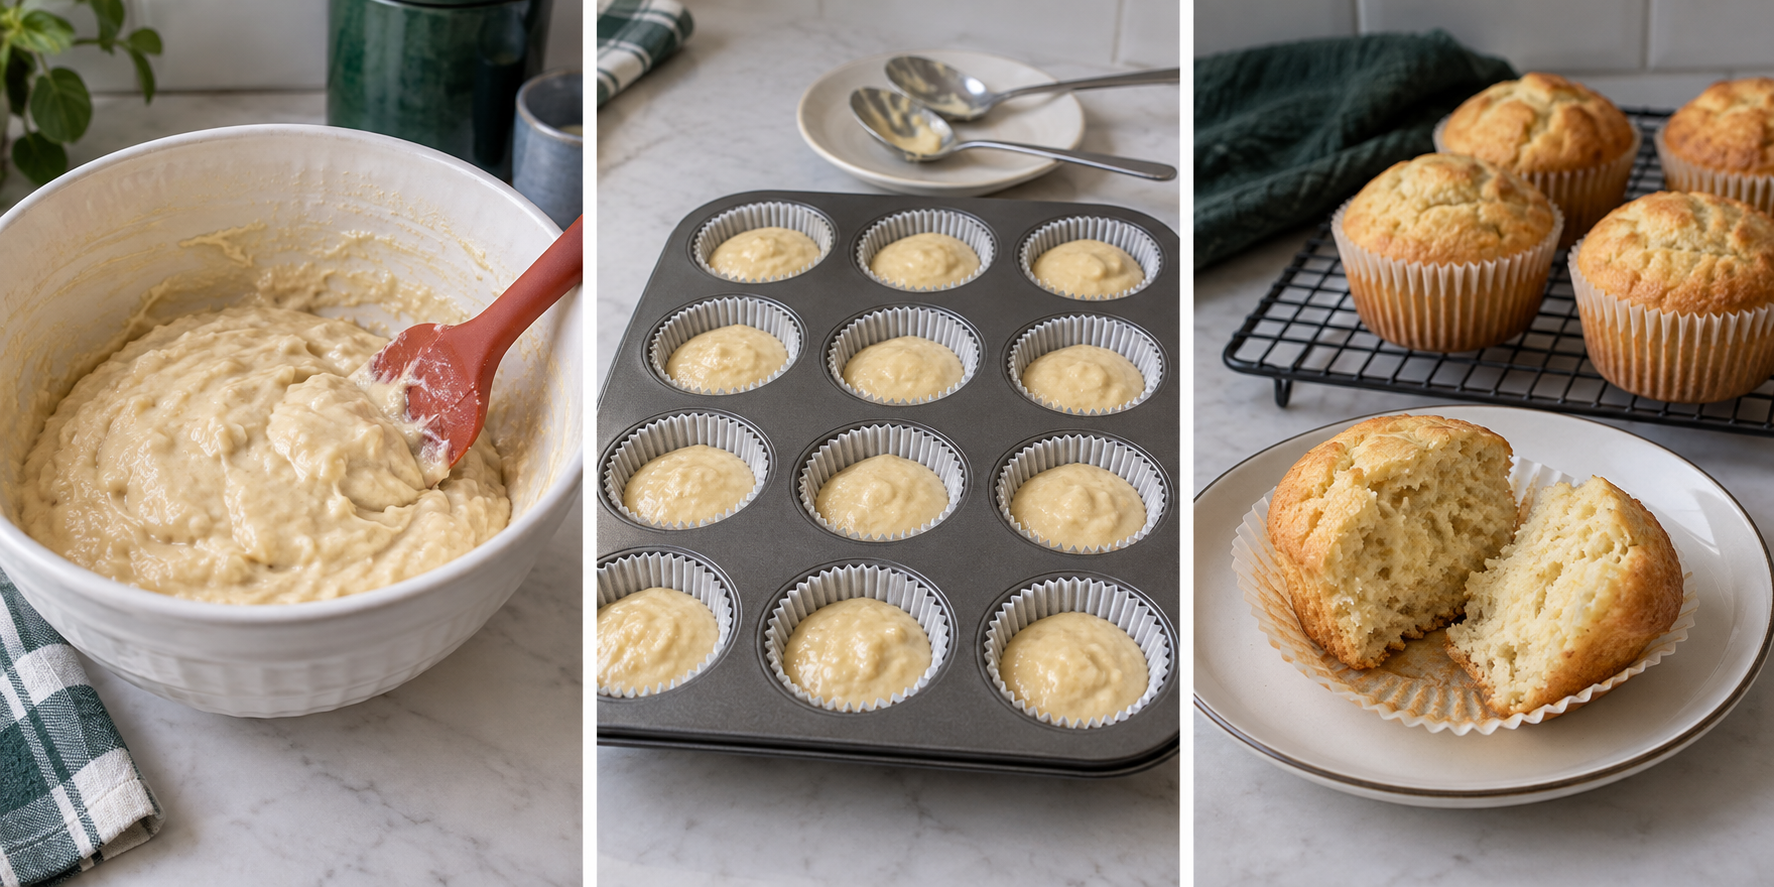
- Look at the bottom and edges for dry flour. Stop as soon as no dry pockets remain. Small soft lumps are normal; do not beat for several minutes to chase a glossy, perfectly smooth mixture. Overworking flour can make muffins tough.
- Support the tin on the worktop. Scoop batter with one ordinary spoon and scrape it into a case with the other. Start with a little in each, then share the rest in small additions. Stop around two-thirds of the case height: roughly one-third of its depth remains empty, not a heaped rim. Rebalance cold cases with clean spoons before heat. Use fitting cases in the spare supported wells if needed; do not overfill to force exactly ten muffins. If batter still remains, bake it in a separate suitable supported muffin tin, never in loose paper.
- Before opening the hot oven, test lifting and landing the actual filled cold tin on the trivet with both gloves; do not put it into the oven for this grip check. Get assistance or a smaller suitable load if unstable. Then open with face/forearms back, lift level, set fully on the middle shelf before releasing and close gently. Set a 20-minute first reminder. Leave the door closed during early rising; an oven light, if available, lets you watch without opening.
Use a small plain muffin batch to learn weighing, gentle mixing, filling cases and checking baked batter without relying only on colour.
Before you begin
- Measuring accurately without stressWeigh the dry ingredients and measure small liquid amounts.
- Use an oven: settings, preheating, shelves and the grillChoose the oven setting and handle the hot tin.
- Crack an egg and beat it with a forkCrack the egg into a separate cup and break up the yolk.
What this practice teaches
A muffin batter is a thick, spoonable mixture that sets in the oven. Unlike bread dough, it is not kneaded or left to prove. Here you will stop mixing when the flour disappears, divide the batter into supported cases and check the centre before serving. A slightly uneven top is not a failure.
Keep the first batch plain. Fruit, chocolate, alternative flours and sweeteners can change the moisture or structure, so learn the base process before combining changes. This is an oil-based method: there is no butter-softening or creaming stage.
This is a KINALO-authored smaller teaching variation informed by the published Good Food method, not an exact half-batch or a physically kitchen-tested recipe. We use 60 ml oil, optional smaller salt and a hand-mixed wet/dry sequence. Your actual oven, cases and centre checks decide the finishing time.
For about ten small muffins
- Baking basics: raising agents, sifting and oven doorsIdentify baking powder and measure it level.
- Read food labels before you cookCheck the actual ingredients and equipment for the people eating.
- 200 g plain flour, 1 1/2 LEVEL teaspoons baking powder, 125 g caster sugar and optional 1/4 teaspoon fine salt. Measure the powder as one 5 ml spoon plus one 2.5 ml spoon, both level. Salt needs a marked 1.25 ml quarter-teaspoon; omit the optional salt if you cannot measure it. Do not add this powder to self-raising flour as well.
- 1 medium egg, 125 ml milk and 60 ml neutral cooking oil, such as sunflower or rapeseed. Four level 15 ml tablespoons measure the oil. Keep milk and egg chilled until you are ready to mix.
- A standard 12-hole oven-safe metal muffin tin with a grippable rim, and twelve fitting paper cases ready: start with ten and use spare wells if needed. The yield depends on case size. Not mini or jumbo timing. Paper cases need support in the wells; never stand them loose on a flat tray. Check the tin and cases are permitted at the selected baking temperature.
- Scales, a jug with readable 125 ml markings, marked 5 ml/2.5 ml teaspoon and 15 ml tablespoon measures, optional 1.25 ml salt measure, straight-backed table knife for levelling, large bowl, smaller bowl or jug, egg cup, fork/whisk, spatula and two ordinary filling spoons. Choose a bowl within the scales' load limit and tare separately for each weighed ingredient.
- Two dry intact heat-resistant oven gloves, a large dry heatproof trivet, timer, clean wooden skewers, heat-safe broad turner and stable cooling rack on a clear heatproof worktop. Check actual labels: this version contains wheat, milk and egg. Never taste raw batter or lick its spoon, even if the egg alone is suitable lightly cooked.
Prepare the tin and the two mixtures
- With the oven cold and off, clear it and fit the middle shelf. Put ten cases into matching tin wells, pressing the bases gently flat without crushing the sides. Practise an empty-tin two-glove grip, loading and level landing on the trivet. Resolve poor grip or an awkward route before heating. Preheat in normal cooking mode to 200 degrees C conventional OR 180 degrees C fan, not grill. Empty spare wells need no water.
- Weigh the flour in the large bowl using tare, then tare again before weighing the sugar. Add separately level-measured baking powder and optional salt. Stir thoroughly across the bottom/sides to distribute them; press ordinary soft powder lumps with the spoon back. If flour needs sifting, sift weighed flour and powder first, transfer ALL of them, then add the weighed sugar.
- With the jug supported, read milk at eye level to 125 ml. Measure 60 ml oil as four level 15 ml tablespoons over a separate bowl, filling each with a clean spoon, then transfer it to the milk. Crack the medium egg separately into its cup; remove shell with a clean spoon and beat with the fork until white/yolk combine. Add to milk/oil and whisk briefly to disperse. Wash hands and egg-contact tools before touching ready-to-eat food.
- Check that the oven has reached its setting and that the cases, filling spoons and trivet are ready. The batter should go into the oven shortly after mixing, not wait while you look for the tin.
Check the centre and cool
- At 20 minutes, use dry gloves to move the tin to its trivet and close the oven door. The tops should look set and lightly coloured, not liquid or sunken. Most batches of this size take about 20 to 25 minutes, but the centre check decides.
- Leave the hot tin supported on its trivet. Holding the clean skewer by its unpointed end, push down through the top of a middle muffin into its deepest crumb, stopping above the paper/metal base, then withdraw. Do not touch or hold a hot muffin. Wet sticky BATTER on the skewer needs more baking; a few dry crumbs are fine. Check another large or less-coloured muffin too, since one small edge muffin does not represent the whole batch. Do not taste doubtful crumb.
- If batter remains, return the tin using the same dry-glove lift, close the door and set a NEW 2- to 3-minute reminder. Recheck with a clean dry skewer. If tops darken too much before crumb sets, lower the selected temperature by about 20 degrees C and continue short checks. Times vary; do not keep opening every few seconds or accept a brown top as proof.
- When the checked centres are set, switch the cooking function and temperature controls off as your manual directs. Land the tin on its trivet and leave about 5 minutes, longer if still too hot to handle. Once paper edges are comfortable to hold, lift gently onto the rack; if not, wait, or use the broad heat-safe turner under the paper base with the tin steady. Never poke bare fingers beside hot metal or hold a hot muffin by its crumb.
- Space muffins on the rack. Wait until a sample is comfortable to handle and eat, not merely until its paper feels cool. Peel the paper down and gently pull the muffin apart over a clean plate. Look for a set soft crumb with air holes, not shiny wet paste. The skewer and crumb checks work together. Let the rest cool completely before packing; do not serve a raw-centred batch.
What to change next time
Large tunnels and a chewy texture can follow too much mixing. Uneven sizes finish at different times, so divide the next batch more evenly. A dark outside with raw batter inside calls for checking the oven mode, case size and temperature rather than accepting the crust as proof.
If this just-baked, still-attended batch shows raw paste at the first crumb check, do not taste it. Reheat the oven to the chosen setting, lower by about 20 degrees if outsides are already very dark, and promptly return supported muffins in their tin for 2- to 3-minute checks using dry gloves. Recheck another whole muffin's centre before serving. This is same-session recovery, not permission to rebake old, stored or unknown-history raw batter. Discard an already burnt or otherwise doubtful batch. Note case size, mode and actual finish time.
Store a plain batch
- Storage and reheating basicsUse the chilling routine for perishable additions.
For this plain unfilled practice, eat the completely cooled batch on baking day or freeze spare portions promptly rather than relying on several cupboard days. Put cooled muffins in a clean food-safe freezer bag/container, close, label with the baking date and freeze at minus 18 degrees C; up to three months is a best-quality guide, not a safety extension for mishandled food. Keep a same-day portion covered in a cool dry place. Do not trap steam by packing warm muffins.
Thaw only the plain portions needed, covered on a clean plate at room temperature until there is no hard icy centre. No compulsory reheating is needed for a correctly fully baked plain muffin. Eat that day, do not repeatedly thaw/refreeze, and discard a mouldy batch rather than cutting away spots. This cupboard/thaw route does not apply after adding fruit, cream, custard or soft-cheese toppings.
This advice is for these fully baked plain muffins. Fresh cream, custard, soft-cheese toppings or moist fillings bring different chilling requirements. Do not add those and assume the same cupboard storage applies. Wash raw-batter bowls, utensils and the worktop before using them for ready-to-eat food.
Sources and further reading
- Good Food: separate published muffin formula; inspiration for this authored smaller plain lesson, not an exact tested reproduction
- Food Standards Agency: handling flour and flour products safely
- Food Standards Agency: cleaning hands, surfaces and equipment
- Food Standards Agency: safe cooling, freezing and storage history