
Fish And Plant Proteins
Cook a fish fillet in the oven
Start with a boneless white-fish fillet: check for bones, prepare a small tray and use the centre of the fish to decide when it is cooked.
Before you begin
- Use an oven: settings, preheating, shelves and the grillSet the oven and handle a hot tray before working with fish.
- Kitchen thermometer basicsLearn probe placement and a temperature-and-time check.
- Clean and set up your kitchen before cookingKeep raw fish separate from ready-to-eat food.
- Measuring accurately without stressUse the scales, jug or marked spoons before heating, rather than guessing the starting amount.
Choose a simple fillet
- Read food labels before you cookCheck dates, ingredients and the actual cooking directions.
- Storage and reheating basicsAllow the food to thaw fully in the fridge before this method.
A fillet is a length of flesh cut from the fish rather than a whole fish or a steak containing a central bone. For a first attempt, buy one chilled or fully fridge-defrosted boneless cod or haddock fillet, around 150 to 180 g and roughly 2 to 3 cm thick at its thickest point. A very thin tail cooks faster than a thick centre cut.
Follow the product's storage and use-by instructions. This method is not for a whole fish, breaded fish, shellfish or cooking directly from frozen. Use the specific packet directions for those products. Fish is an allergen; check suitability before choosing it. If starting frozen, use the linked fridge-defrosting routine and cook within 24 hours of full thawing, or a shorter packet limit. Keep fish chilled while setting up; do not thaw on the counter.
Set out the ingredients and equipment
- One prepared skinless cod or haddock fillet, 1 measured teaspoon (5 ml) suitable oil, and optional 1 teaspoon bottled lemon juice plus a small pinch of salt or pepper for serving. Put any optional seasoning in its own clean dish before raw-fish handling; no lemon-cutting task is needed.
- A small unlined rimmed metal oven tray rated for the setting, raw-preparation plate, disposable kitchen paper, marked teaspoon, spoon for spreading oil and raw-transfer tongs. Have a separate clean broad turner, serving plate, fork for parting the centre and clean food probe. Kitchen scissors are optional if the pack needs cutting rather than peeling.
- Two dry oven gloves, seconds timer, tray-sized trivet and clean rest for used tools. Food-use tweezers or fish-bone pliers are optional if removing a missed pin bone. Ask the fishmonger to check a skinless boneless centre piece if you are not ready to do that preparation yourself.
Prepare without washing the fish
- Clean and set up your kitchen before cookingPrepare separate raw-contact and serving areas.
- Set a shelf near the oven middle while cold. Preheat to 200 degrees C conventional or 180 degrees C fan, unless the product gives a different method that you are following.
- With clean hands, open the supported pack using its peel tab; if needed use clean scissors, cutting away from fingers. Keep juices in the raw preparation area. Do not rinse. Blot a very wet fillet gently with disposable paper and bin it immediately. Put the fish on the raw plate to check for bones, keeping clean serving tools elsewhere.
- Even a boneless fillet can contain a missed pin bone. With clean fingertips, feel gently along the centre line for a hard projecting point. On the supported raw plate, grasp an exposed bone near the flesh with food-use tweezers and draw it gently along the angle it already lies, rather than wrenching across the fillet. Keep fingers clear of the point. If you cannot grip or remove it without force, stop: cover and refrigerate the fish within its limit and ask the fishmonger to remove it. Do not blindly dig with a knife. Set raw-contact tweezers aside for cleaning.
- Use the spoon to spread about half the measured oil across the cold tray base. Move the fillet from its raw plate to the tray with the raw transfer tool, lying flat rather than folded. Drizzle the remaining oil onto it and spread gently with the spoon; that spoon is now raw-contact equipment too. This first attempt uses a skinless piece. Keep the tray supported and do not stack pieces.
- Dispose of packaging and wash hands and raw-contact tools before touching oven controls or serving equipment. Keep the raw plate separate from the clean serving plate.
Bake and check the thickest part
- Kitchen thermometer basicsPractise placing the sensing area and timing a continuous hold.
- Thermometer cleaning and careClean before checking and again after an undercooked reading.
- Put the tray on the middle shelf of the preheated oven and set a reminder for 10 minutes. A fillet of this size often takes roughly 12 to 18 minutes, but thickness and the actual oven matter more than a single time.
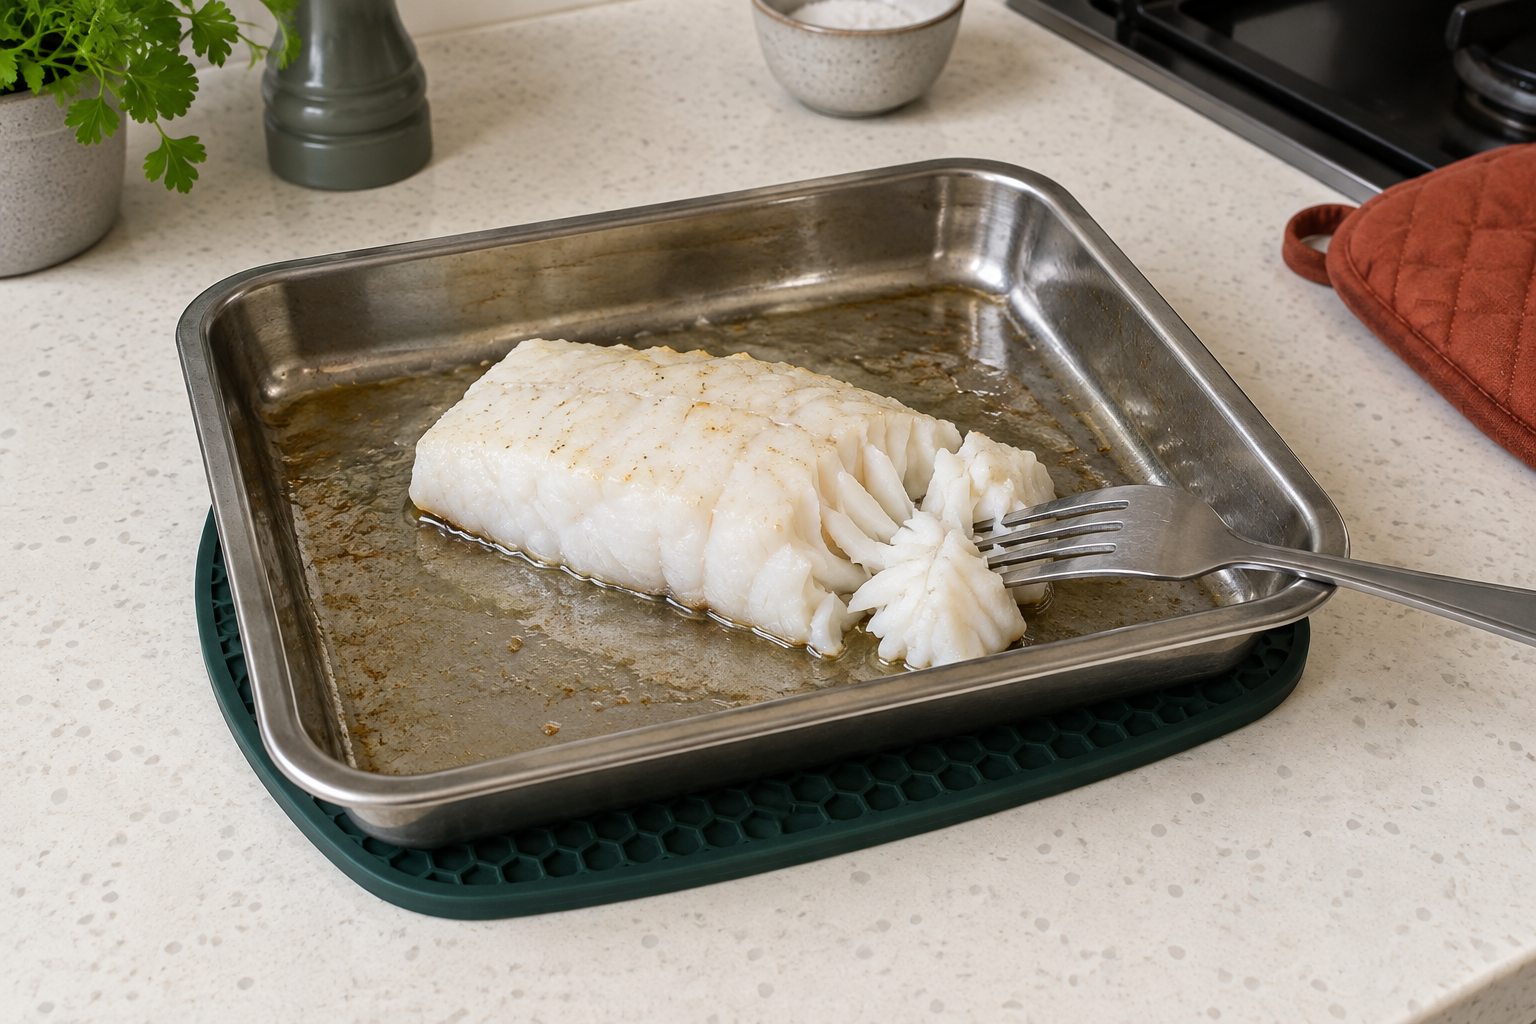
- At the reminder, stand back as you open the door, then use both dry gloves to land the tray level on its trivet. Close the door while checking. Gently part a thick section with the clean fork: opaque rather than glassy flesh and easy separation into flakes are useful texture cues. If still undercooked, set that fork aside for cleaning before it touches finished food.
- For a measurable thorough-cooking check, insert the cleaned probe from the side into the centre of the thickest section, avoiding the tray. Use the probe's response instructions and check more than one thick point.
- For this measurable first practice, use the FSA thorough-cooking target of at least 75 degrees C continuously for 30 seconds. Once the lowest checked thick centre reaches it, start the seconds timer and leave the sensing area in that point with the tray safely on the trivet. If the reading drops, continue cooking and repeat a complete hold. A brief number on the display or merely flaky flesh is not that check. The probe lesson explains other equivalent combinations.
- If not ready, remove the hand-held probe, return the tray with both dry gloves for a short interval, typically 2 minutes, and reset the reminder. Clean the probe and raw-contact fork before checking again. Do not leave an ordinary instant-read probe inside the oven. Stop further baking when the complete centre check is satisfied.
- Switch the oven off. With the tray supported on its trivet, slide the clean broad turner under the fillet and lift it low onto the counter-supported serving plate; serve pieces if it breaks. Add optional measured lemon juice or seasoning with clean utensils. Watch for missed bones as you portion and eat; let a first small bite cool. Leave the tray to cool safely before cleaning and confirm the oven is off.
What if it breaks or looks dry?
- Make a white sauce, then a cheese saucePrepare an optional plain sauce before starting the short fish cook.
Fish can flake apart as you lift it. That is a serving issue, not automatically a cooking failure: use a wider turner and serve the pieces. Dry, fibrous fish cannot become a moist intact fillet again. A little prepared sauce can improve the meal, but does not reverse overcooking. You can also serve it plain; making a sauce is not required. For a later meal, prepare the linked white sauce first and finish the fish last.
Next time, use a similar thickness and begin checking earlier. Do not attempt to fix dryness by leaving the centre undercooked. The point of the first attempt is learning where the thickest centre is and when to stop heating it.
Keep the rest of the meal simple
- Boil and steam vegetables without guessingA manageable vegetable side.
- Storage and reheating basicsPortion and store what you are not eating.
For the first exercise, serve with bread or ready-to-eat salad checked by its label. If washing produce, do it before opening raw fish and keep it in its clean serving area. For a later meal, read the complete vegetable method first and plan the timing before starting either hot job; do not leave cooked fish sitting out while beginning another unfamiliar recipe.
Cool any leftovers promptly, refrigerate within one to two hours and use within 48 hours or freeze. Reheat only once until steaming hot throughout. Do not keep food with an uncertain storage history just because it smells acceptable. Keep any shorter ingredient or pack restriction, and freeze only if the product allows it; reheating does not restart the storage clock.