
Essentials
Prep tools: bowls, graters and food processors
Use simple prep tools safely, choose a bowl that suits the task and understand when a food processor earns its space.
Before you begin
- Clean and set up your kitchen before cookingPrepare a clean workspace and clean the equipment afterwards.
- Knife confidence: the safe claw gripUse a stable cutting setup before preparing pieces for a machine.
Begin with the amount you prepare
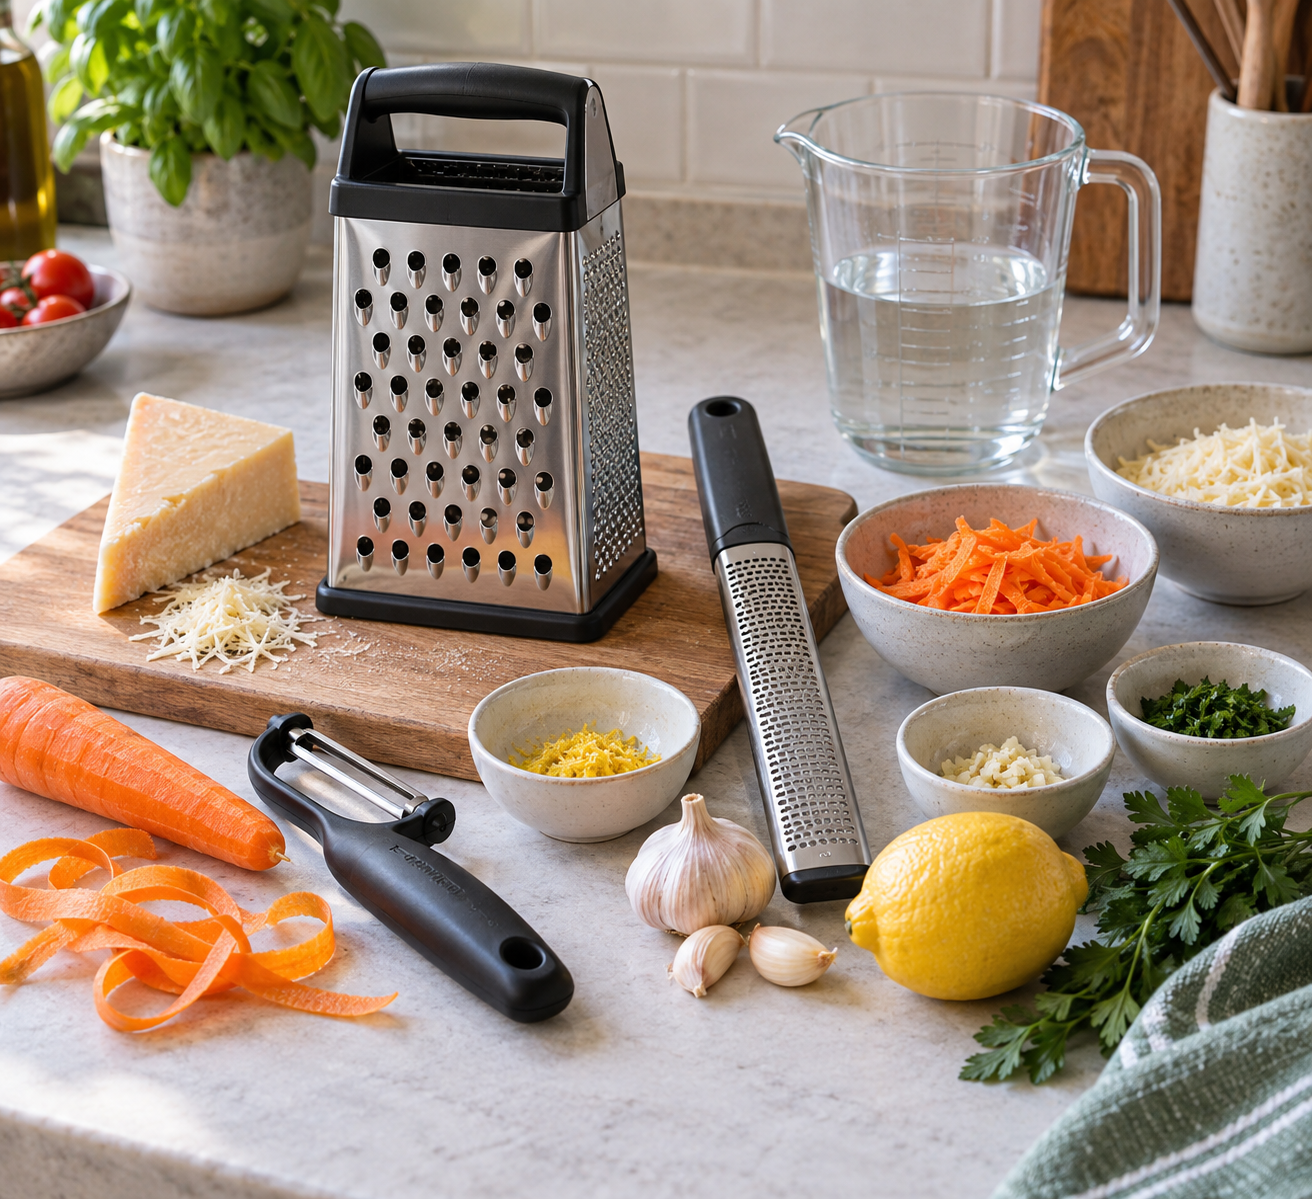
A bowl holds ingredients while you mix, season or organise them. A grater reduces food into shreds or fine particles. A food processor uses powered blades or discs for larger chopping, mixing and slicing jobs. These tools overlap with a knife, but they change the texture and the amount of washing-up.
One medium bowl and a small grater can cover many first meals. A food processor is useful if you repeatedly prepare enough food to justify assembling and cleaning it. It is optional when chopping one onion takes less time than setting up the machine.
Choose one small job at a time. Complete the manual cheese practice without assembling a processor; the onion processor option is a separate later session using a known model and its instructions. No machine is necessary to finish the beginner knife or onion lessons.
Choose the bowl for the task
- Measuring accurately without stressRead the actual 100 ml mark with the jug standing level.
- A food-preparation bowl holds ingredients while you mix or organise them. Leave headroom: for a first no-heat practice use 100 ml cold drinking water in a sound bowl holding at least 500 ml, a measuring jug and an ordinary spoon. A small ingredient dish is not necessarily a mixing bowl.
- Set the bowl flat on the counter, with a clean damp cloth or suitable non-slip support if it slides. Measure the water into it and stir slowly with the spoon, keeping the supporting hand on the outside rim. Stop if the bowl moves instead of stirring harder. Empty the water, wash, rinse and dry bowl, jug and spoon; this task needs neither a hot-water bath nor a microwave.
- Food-grade stainless steel can be useful for ordinary cold mixing. Heat resistance and microwave permission are separate: a metal bowl does not go in a microwave, and a bowl over simmering water needs explicit suitability and the complete later melting lesson. Do not test an unidentified bowl with heat.
- A clean grease-free bowl matters for later egg-white foam, but a cold water stir does not teach that different task. Choose a full baking method before separating or whisking eggs; do not treat this equipment overview as a raw-egg recipe.
Grate cheese or a carrot
- Washing vegetables and keeping prep cleanWash, board-trim and optionally peel produce before grating.
- Measuring accurately without stressZero the cheese bowl and read 40 g.
- Make a white sauce, then a cheese saucePrepare the complete sauce and add the 40 g cheese off heat.
- Knife confidence: the safe claw gripPrepare the small cold cucumber portion by the full supported cutting practice.
- For the first cheese task, have a comfortably large block of chilled Cheddar, about 200 g, but aim to collect only 40 g. Read the pack's storage and allergy information; ordinary Cheddar contains milk. Set out a sound box grater, stable board, clean bowl, spoon, scales, suitable washing brush and washing-up liquid. Keep the remaining block for its proper chilled storage, not on the worktop for another hour. If making sauce afterwards, read and prepare that whole sauce lesson before any heat.
- With no food against it, stand the box grater flat on the stable board and check it stays still. Hold only its safe handle, supporting fingers clear of all teeth. Choose the coarse hole face, not an exposed slicing slot. A flat fine grater has a different support: use its own instructions rather than holding it in the air as if it were this box.
- Hold the cheese with fingertips behind the end touching the holes. Make short controlled downward strokes against the coarse face, lifting the cheese slightly clear before the return stroke. Keep the grater still, do not push body weight onto it and stop before fingers could approach its cutting face. A holder is useful only when intended for that tool; do not invent a sliding shield or force the last nub through.
- Put the remaining block aside for chilling. Lift the grater by its handle, with fingers outside its sharp faces, and park it safely before gathering shreds with the spoon. Weigh the collected cheese in the zeroed bowl. If below 40 g and a safe large block remains, grate a little more; leave any small end ungrated. Put spare cheese away by the pack instructions, then eat the prepared shreds with a cold meal or use the complete cheese-sauce method. Do not start heating flour and milk from a one-line equipment tip.
- For a separate carrot practice, wash and dry one sound medium carrot, trim its hard top on the board and peel only if wanted using the linked vegetable lesson. With the grater supported as above, grasp the thicker end, keeping fingertips behind the section at the holes. Move the carrot's side down the coarse face in short strokes, stopping with a safely held end left. Park the grater before spooning out the shreds; washed fresh carrot can be eaten plain without a cooking task. Put spare prepared carrot away promptly by its storage instructions.
- For a separate zest practice, also have a marked 1/4 teaspoon measure, clean spoon and a portion of the washed cut cucumber from the linked knife lesson. Choose a washed dried lemon whose label permits using its peel, and a grater intended for zest. Set up that tool's permitted stable support and grip. Zest means only the yellow outer peel, not white pith or lemon juice. Make a light short stroke, move to another yellow patch and stop when white appears. Do not rub back and forth over exposed white peel. Keep the supporting hand on the safe handle, not the teeth. Park the tool before spooning out a little zest; a level 1/4 teaspoon added to prepared cucumber gives a complete cold use. Cover and chill the remaining fruit by its storage instructions, planning its next use rather than leaving it out.
- Wash the grater as its maker directs, using washing-up liquid and a suitable brush, then rinse thoroughly. Microplane advises brushing in the same direction as its teeth; check your actual tool rather than dragging a cloth against sharp openings. No fingertip rubbing on either side, and no hidden grater in a sink of dishes. Dry safely and use its own protective cover or secure separated storage. Wash and dry the bowl and board and wipe residue off the counter.
Use a food processor deliberately
- How to dice an onion without stressComplete the supported halving, peeling and safe cut preparation.
- How to soften onions without burning themCook this one onion with the complete measured setup and centre checks.
- When to replace kitchen equipmentStop at damaged parts, a faulty interlock or wet electrics.
- Blend food without splashes or unsafe shortcutsUse the separate permitted-temperature blending lesson for later liquid work.
- How to dice an onion without stressFollow the complete covered cut-onion storage and same-day plan if cooking is deferred.
- Read your exact model's assembly, permitted food, chopping-blade grip, minimum and maximum amounts, pulse control, run/cooling limits and cleaning instructions. This first task uses cold onion, not hot soup or a slicing disc. Use a knife instead if one onion is below its minimum, the controls or safe blade grip are unknown, or an interlock is faulty. A blade can cut even when unplugged.
- Set out one medium onion, stable board and suitable knife, a clean receiving bowl, spatula, a separate clean dry tray for parking the removable blade visibly away from the counter edge and routine hand movements, washing brush and supplies. For immediate cooking also prepare the complete softening lesson's compatible pan, 10 ml oil, 30 ml reserve water, measuring tools, spoon, tasting tools, timer, dry protection and trivet before assembly. Cooking is separate and starts only after the processor is off and the onion transferred.
- With the processor switched off and unplugged, check the base and cable are dry, sound and stable, and the parts are clean. Prepare the onion by the linked bridge-halving and peeling sequence. With each half flat-side down, cut chunks of the size your manual requires, keeping the support hand clear, and discard the hard root remnant. Kenwood's FP180 manual gives roughly 2.5 cm vegetable chunks as an example, not a size suitable for every machine. Park, wash and safely store the knife before powered preparation.
- Fit bowl and chopping blade in your model's order, holding the blade only by its designed safe hub or handle. Add the permitted quantity of cold chunks, secure the lid and fit the feed-tube cover or pusher as directed. Confirm the lid locks normally; never defeat an interlock. Keep hands and utensils out whenever the machine is connected, even if it appears stopped.
- Connect power and use brief pulses, around one second if the actual control and duty limit permit. Release between them and wait for movement to stop to inspect through the clear bowl. Aim for defined pieces about 5 mm for the linked onion base, not a watery puree. Stop after the first few pulses to check: there is no fixed number for every machine. If this model has no suitable pulse method, use its documented short chopping operation or the complete manual onion method, not a guessed button sequence.
- If inspection requires opening or food needs scraping down, switch off, wait for the blade to stop and unplug before removing the lid. Use a spatula on the bowl wall with its end and your hand clear of the blade edges; never reach in to free food with fingers. Replace and properly lock the lid before reconnecting for another permitted short pulse. Do not put hands or utensils through the feed tube; attachment feeding uses only its supplied pusher and its own instructions.
- When pieces are suitable, switch off, wait until all movement stops and unplug. Remove the lid and other parts in the manual's order; some models require unlocking the lid before the bowl can be removed. Before pouring or scraping onion out, lift the chopping blade by its safe hub as the manual directs. Put it in the clear secure blade place, edge visible and separated from hands, not under a cloth or washing-up water. Transfer onion only after the blade is out.
- For defined small pieces, follow the full softening lesson with this one onion and 10 ml oil, checking cooled centre tenderness rather than just a timer. Very fine pieces may cook faster or release more water: stir and check rather than assuming identical timing. If accidentally pureed, you cannot turn it back into dice; put it in a clean covered food container and refrigerate promptly by the onion lesson's cut-onion routine, planning a same-day cooked use with a full method suited to puree. This exercise does not teach that different sauce; use a fresh onion and the complete knife method for the defined-piece practice instead. Do not taste raw onion as a cooking-safety test.
- With the machine still off and unplugged, clean removable parts in the permitted way, using a brush on blades and avoiding edges with fingers. Rinse and dry fully. Wipe the motor base only as instructed; never immerse it, its cord or plug. Do not copy a blender's warm-water motor-cleaning trick into a food processor. Store the dry blade with its proper protection or the maker's safe assembled storage, then reset the worktop. Hot-liquid blending is a different appliance-specific lesson, not this procedure extended to steaming soup.
Judge the result by its use
Large grated cheese shreds melt differently from a compact pile of very fine cheese. Processor-chopped onion can release more water than neat knife-cut pieces. Use the result appropriately: very finely chopped vegetables may suit a sauce base, while a salad benefits from a more defined cut. Try the small manual tool first and upgrade when you can name the job it will save.
Choose the target before starting. A first onion base needs identifiable pieces; pulsing past that point is not improved chopping. A processor cannot replace the cooking, centre check or storage steps. For the cheese practice, useful safely collected shreds matter more than using the entire block. Leave a safe remainder rather than exchanging hand clearance for a few grams.
Sources and further reading
- Food Standards Agency: cleaning hands, surfaces and food-contact equipment
- Microplane: careful cleaning and brushing in the direction of the teeth
- Kenwood: attachments, pulse texture control and electrical cleaning precautions
- Kenwood FP180 manufacturer manual: assembly, vegetable chunks, interlocks, blade removal before pouring and cleaning