
Pantry And Ingredients
Roasted vegetables: spacing, oil and doneness
How to cut, space, oil and roast vegetables so they soften and brown instead of steaming into a wet tray.
Before you begin
- Use an oven: settings, preheating, shelves and the grillSet the oven and shelf, then handle the hot tray.
- Washing vegetables and keeping prep cleanWash and trim the carrots before cutting.
Match the cut to how quickly the vegetable cooks
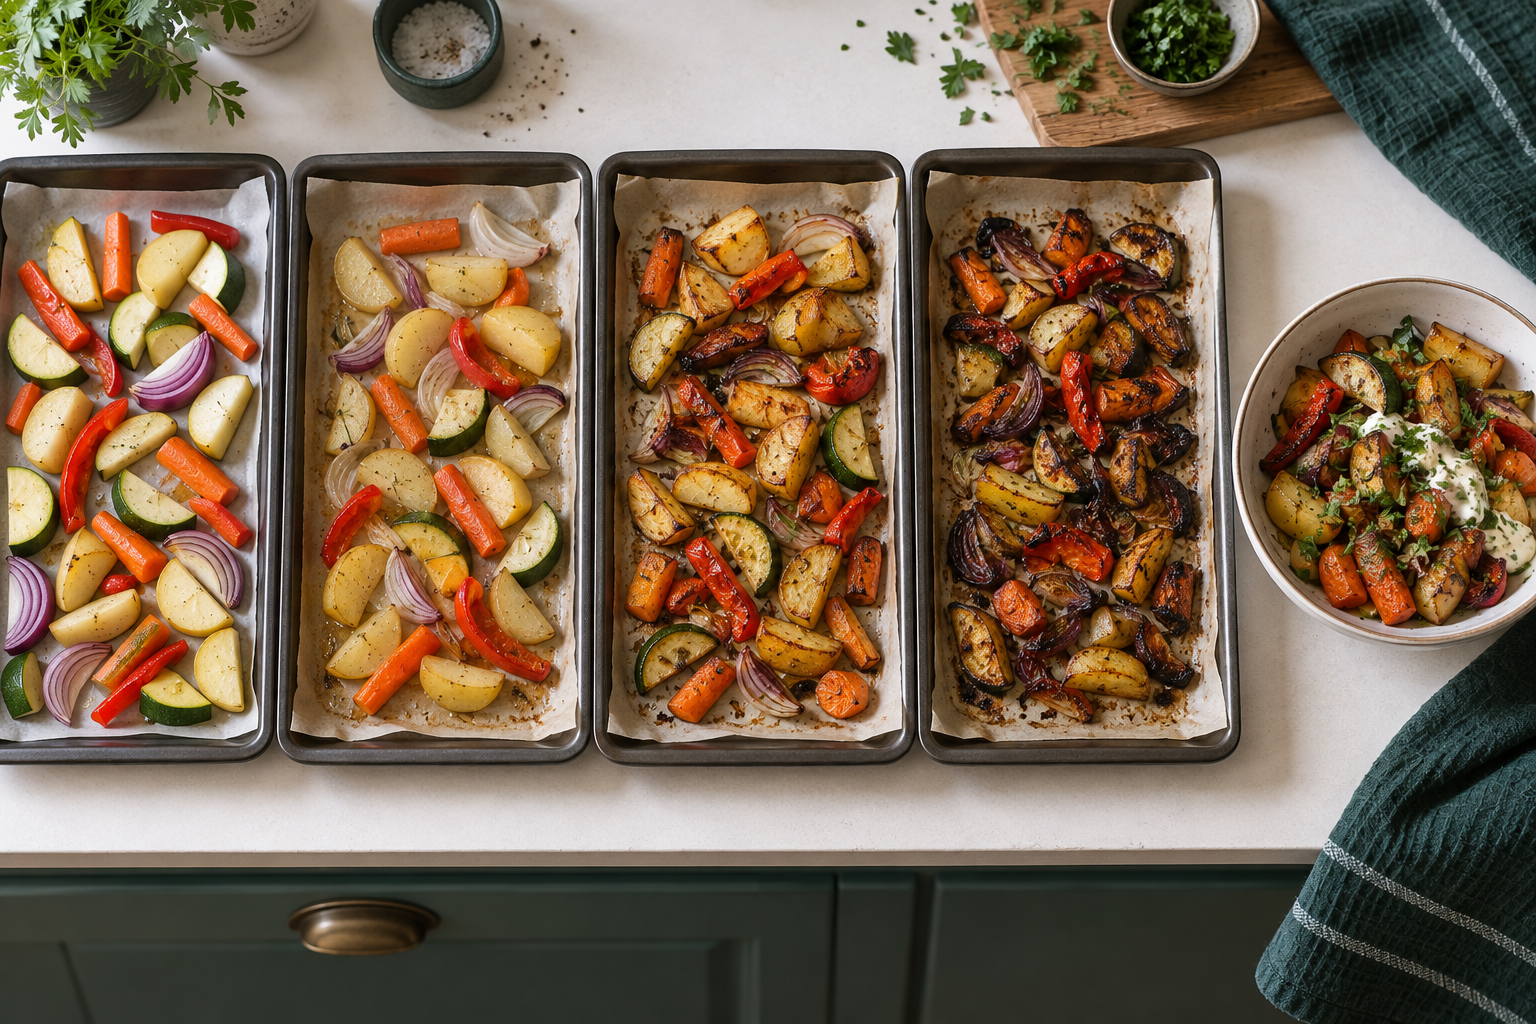
Roasting uses hot air and the tray surface to cook and brown food. Carrots and potatoes generally need longer than courgette or peppers. For the first attempt, use one vegetable or add the quicker ones later. A colourful mixed tray is harder to judge if every piece has a different cooking time.
Wash the vegetables and dry them where practical. Excess surface water and crowding create more steam, which can soften the food without giving the browned edges you wanted.
For a small practice tray
- Knife confidence: the safe claw gripMake the first flat face with a bridge grip before claw slicing.
- Use an oven: settings, preheating, shelves and the grillPractise the filled cold tray and identify the correct oven function.
- 400 g fresh carrots, washed and trimmed. Choose manageable carrots about 2 to 3 cm thick for this first practice. Peeling is optional as explained in the washing lesson. Put a stable carrot section on the board, use the knife lesson's bridge to halve it lengthwise, then lay each long half flat-face down and claw-cut crosswise into about 2 cm lengths. If a very thick piece would exceed about 2 cm thickness, divide it again while supported flat. Do not balance a short rounded chunk and force a lengthwise cut.
- 1 measured tablespoon (15 ml) cooking oil. Optional small pinch of salt and pepper; leave herbs and other additions out of the first batch. Check ingredient suitability for whoever will eat it.
- Stable board, suitable knife, mixing bowl, tablespoon measure, heat-safe spoon, sturdy rimmed oven-safe metal tray, turner, fork, clean checking/serving plate, timer, two dry oven gloves and a large heatproof trivet. Use the unlined tray for the first attempt; paper is an extra material with its own temperature limits. Have scales ready to weigh the prepared carrots; tare their bowl before filling as the measuring lesson shows.
- Prepare the shelf and landing place while cold. Check that the tray can carry the carrots in one layer with gaps and still be gripped securely. Use less carrot if needed and reduce oil proportionately; do not start an unfamiliar second tray while learning the first. Rehearse carrying the filled cold tray. Preheat to 200 degrees C fan or 220 degrees C conventional, selecting the corresponding normal cooking mode.
Coat, spread and check
- Put the cut carrots in the bowl, add the measured oil and stir and turn them with the spoon until thinly coated all around. No aerial tossing is needed. Transfer to the cold tray in one layer, leaving small gaps and a clear gripping edge. There should not be a deep oil pool.
- Check that no pieces overlap or hang over the rim. If the quantity cannot fit, set some prepared carrot aside covered in the fridge to cook separately later; do not pile it up. The stated time is for this small single layer, not any mixed vegetable or packet product.
- Place the tray on the middle shelf of the preheated oven and set a timer for fifteen minutes. At that point, use dry gloves to put the tray on the trivet. Turn pieces with the turner to expose another side, inspect the first browned surfaces, then return the tray to the oven.
- From about 25 minutes total, take the tray to its trivet with both gloves and close the door. Lift a thick carrot onto the clean plate with the turner. Steady it with the fork and press into its centre; it should enter without a hard core. Let a small piece cool before tasting. Around 25 to 35 minutes is a starting range, not a fixed finish. Return the tray and set another 5-minute reminder if the centre still resists.
- If edges darken while centres remain hard, lower the oven by about 20 degrees C and continue checking every five minutes. If only a few pieces are ready, lift those out onto a clean serving plate while the rest continue. Next time, cut the large pieces smaller.
- Once the thick pieces are tender with the chosen browned surface, switch the oven off. Carry the tray level to the trivet and use the turner to serve onto the supported plate. Let a mouthful cool; do not pick pieces directly off the hot metal. Leave the tray safely to cool before washing and confirm the controls are off. Adjust optional seasoning only after a cooled taste.
For courgettes, peppers and mixed trays
- Roast potato texture: from hard centres to crisp edgesUse the complete potato method rather than assuming the carrot timer transfers.
Softer vegetables can release more liquid and cook sooner. Cut them somewhat larger or add them after firmer vegetables have started. Do not assume a potato and a courgette need the same time because both pieces are 2 cm across. Record a successful combination once you know the individual behaviour.
Learn each ingredient in a separate complete method before coordinating a mixed tray. The carrot practice does not supply all cutting and cooking instructions for courgette, peppers or potatoes, and frozen or prepared packs need their own directions. The linked potato lesson provides a full parboiled-roast method.
Read the coating
Dry leathery patches may need a more even oil coating, while greasy pieces may have too much. Tossing in a bowl distributes a measured amount more evenly than pouring a large stream over one part of the tray. Oil supports browning, but more oil cannot create space in an overloaded dish.
If they are already too soft
- Storage and reheating basicsFollow the cooling, dated-storage and single-reheat routine.
Stop cooking and choose a different use, such as soup, mash or a pasta sauce, if the food is safely handled and tastes good. Very dark bitter pieces may need discarding. A crisp topping can add contrast but will not restore the original vegetable structure.
The task can simply finish here as soft cooked carrot served with the meal; a soup or sauce is a separate method, not something you must invent to rescue it. For spare cooked portions, follow the reviewed storage lesson rather than leaving a tray out until another meal.
Build a repeatable note
Write the vegetable, piece size, tray, temperature and actual time. The next batch should begin close to those conditions. This teaches you when to check rather than depending on one universal vegetable-roasting timer.