
Eggs
Poached eggs without fear
A beginner guide to gentle water, gathered whites, draining, and what to do when a poached egg looks messy.
Before you begin
- How to use hob heat without guessingFind the ring control and adjust the heat as the food changes.
- Crack an egg and beat it with a forkOpen the egg into a cup and remove shell fragments.
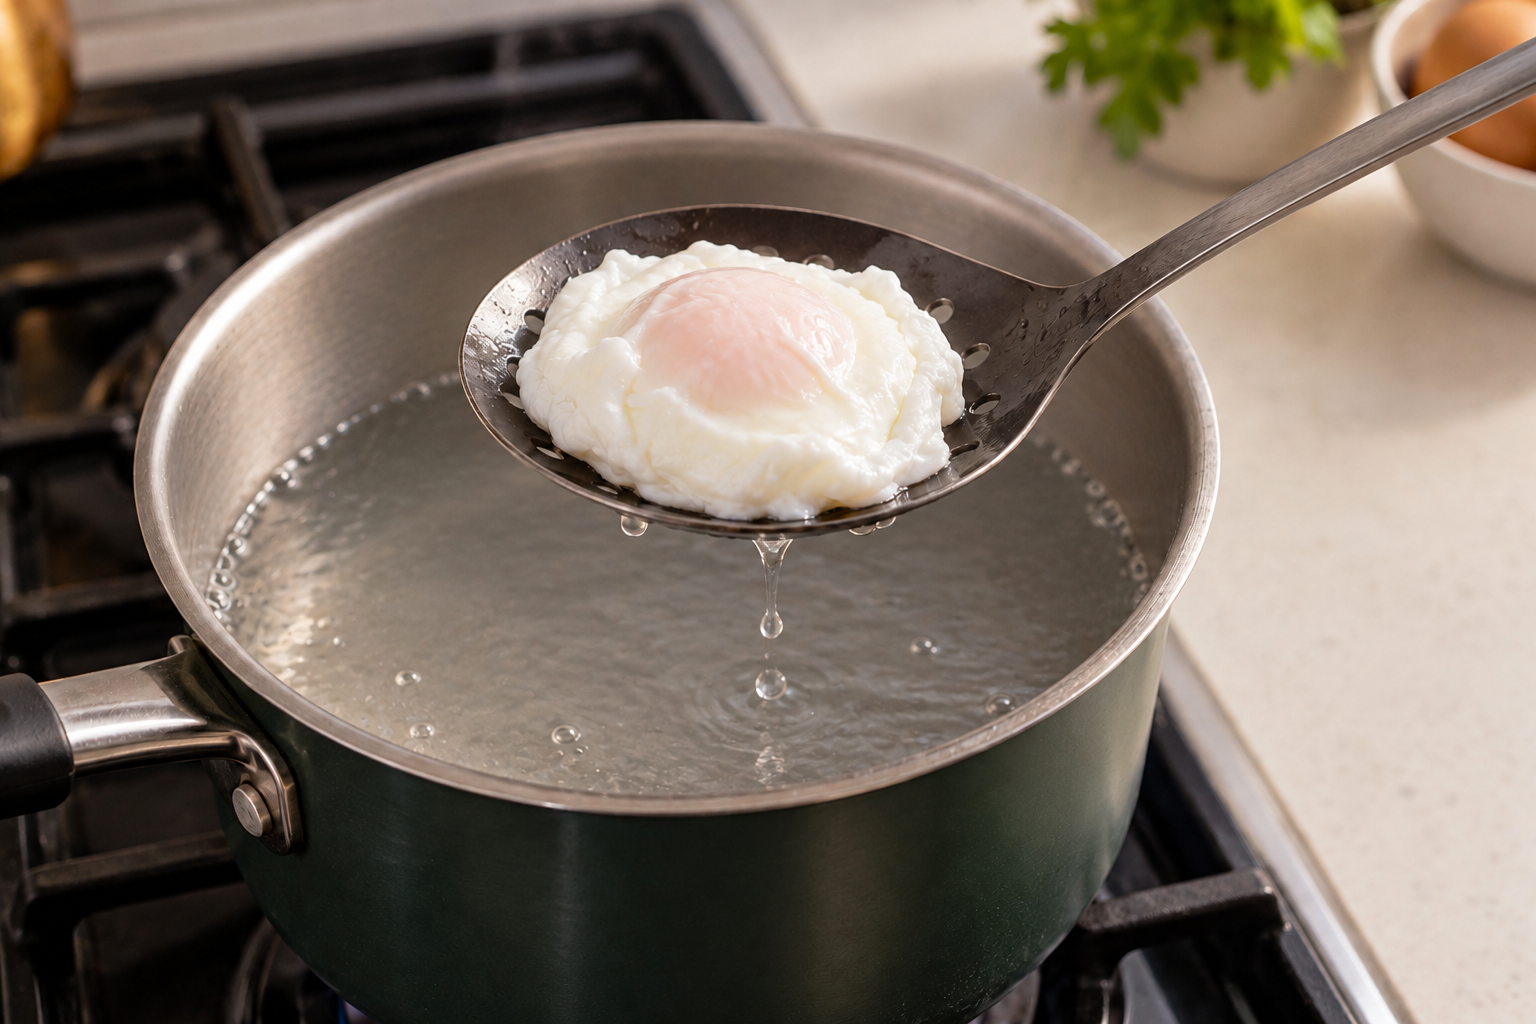
Poaching uses gentle water
A poached egg cooks out of its shell in hot water. Gentle movement lets the white gather around the yolk. A rolling boil throws it around and can tear the white into strands. Fresher eggs often hold a neater shape because their white is thicker, but a slightly ragged outline is normal.
Choose eggs for the result you want
- Egg freshness, storage and separating yolksRecognise the assurance before choosing a soft yolk.
Choose hen eggs within their best-before date for this first practice. A runny or lightly cooked result needs British Lion or Laid in Britain assurance; if unsure, fully cook both white and yolk. For severe immune suppression with a medically supervised diet, follow the clinical team's advice instead. Other egg species need thorough cooking.
Set up for one egg
- One suitable hen egg and a clean cup holding at least 150 ml. Use a compatible saucepan tall enough for 6 to 8 cm of drinking water with at least several centimetres of space below its rim. Check the depth and spoon reach while cold. Choose a manageable pan, not one filled nearly to the top.
- A broad long-handled slotted spoon large enough to support the whole egg, timer, clean serving plate, fork for opening the cooked centre, dry oven gloves and trivet. Set the plate on the counter beside the hob, outside the heat zone; optional clean kitchen paper can lie on a separate draining plate. You will lift the egg, not carry or drain the hot pan.
- Before switching on, follow the cracking lesson to put the checked egg into its cup, remove shell, dispose of shells, clean raw spills and wash and dry hands. Keep the cup steady on the counter while not in use. Skip the optional fine-sieve step for this first attempt: it is not needed to poach one egg.
- Have any accompaniment ready first; plain ready-sliced bread needs no second hot appliance. Egg is an allergen. Choose any accompaniment for the person eating it and check its label. For a first fully cooked result, plan to open the centre after lifting rather than assuming a neat shape proves cooking.
Lower the egg into calm water
- Simmer versus boilSee the gentle water movement before lowering the egg.
- Boiled eggs: soft, jammy and hardFinish a just-cooked egg whose opened centre needs further cooking.
- Put the water-filled pan on a matching ring with its handle turned safely in, away from other rings. Heat until small bubbles begin rising, then reduce to a bare simmer: a few small edge bubbles and gentle surface movement, not a rolling boil. Stay with the pan.
- Hold the cup by its outside. Bring its lip close to the water surface without dipping your fingers into water or steam, and tip the egg in slowly at one spot. Keep the pan stationary; no vigorous whirlpool is needed. Put the cup down in the raw-tool area and start the timer when the egg enters.
- Leave the egg undisturbed for the first minute so the outside can hold together. Keep the simmer gentle. If the water becomes vigorous, turn it down; do not stir the egg into a fast current or try to gather loose white with your fingers.
- Begin checking around 3 minutes. Slide the slotted spoon beneath the egg, support it and lift just above the water, allowing drips back into the pan. The white should be opaque throughout its visible folds and hold together, not have clear jelly-like patches. A suitable soft-yolk egg often needs about 3 to 4 minutes; this is a checking range, not a guarantee.
- If the white is loose, lower the supported egg gently back into the water for another 30 seconds and check again. For a firm yolk, expect longer, often around 5 to 7 minutes in total, with repeated checks rather than a fixed promise. A spoon press can suggest firmness, but cannot prove the hidden centre is fully cooked.
- Once the outside is set and the intended centre seems ready, switch off the ring. Lift on the spoon, let water drip back without holding your hand over steam, and transfer onto the supported plate. If using kitchen paper, rest the egg briefly on it, then lift gently to the serving plate; do not press the egg or leave paper attached underneath.
- Open through the plated centre gently with the clean fork. For a fully cooked result the white and yolk must be set through the centre, with no runny yolk or unset paste. If it is softer than required, do not put the split egg back into the water: use the linked immediate small-piece pan finish, or discard it and cook the next one longer. Suitable soft results can be served promptly. Let a mouthful cool before eating.
- Leave the switched-off water pan safely where it cannot be knocked until it cools; there is no need to carry boiling water to the sink. Confirm the controls are off. Clean the raw cup and contact areas and, once cool, the pan and spoon using the setup routine.
What went wrong?
A spreading white can mean an older egg, a high drop into the water or excessive movement. Use a fresher egg, lower the cup closer and reduce the heat on the next attempt. A very firm yolk means a longer cook; it can still be eaten in a different way if the egg is suitable and safely handled. A messy shape alone does not tell you it is unsafe or safe.
Vinegar is optional
- Measuring accurately without stressMeasure water and the small vinegar addition.
Learn the plain-water method first. For a later comparison, add 1 measured teaspoon (5 ml) mild clear vinegar per litre of cold poaching water before heating; it can help the white hold together but also changes flavour. Measure the water to keep the comparison consistent, and check the vinegar's label for suitability. It does not make an unsuitable soft egg safe. Do not add a vigorous swirl or several eggs at the same time as changing this one detail.
Practise the endpoint
Cook one egg and open it on the plate with the fork. Note its size, fridge starting temperature, water depth, gentle simmer, cooking time and centre. Next time keep those conditions similar and change the time in 30-second steps. For this exercise cook only what you will eat, rather than adding cooling and reheating tasks to the first poach. A messy outline alone is not a safety verdict.