
Knife And Prep
Chopping, slicing, scoring and using kitchen shears
Understand common cutting instructions and practise stable, even cuts before attempting smaller or more difficult work.
Before you begin
- Knife confidence: the safe claw gripPractise the grip and stable board before adding a new cut.
- Washing vegetables and keeping prep cleanWash, dry and trim the practice produce.
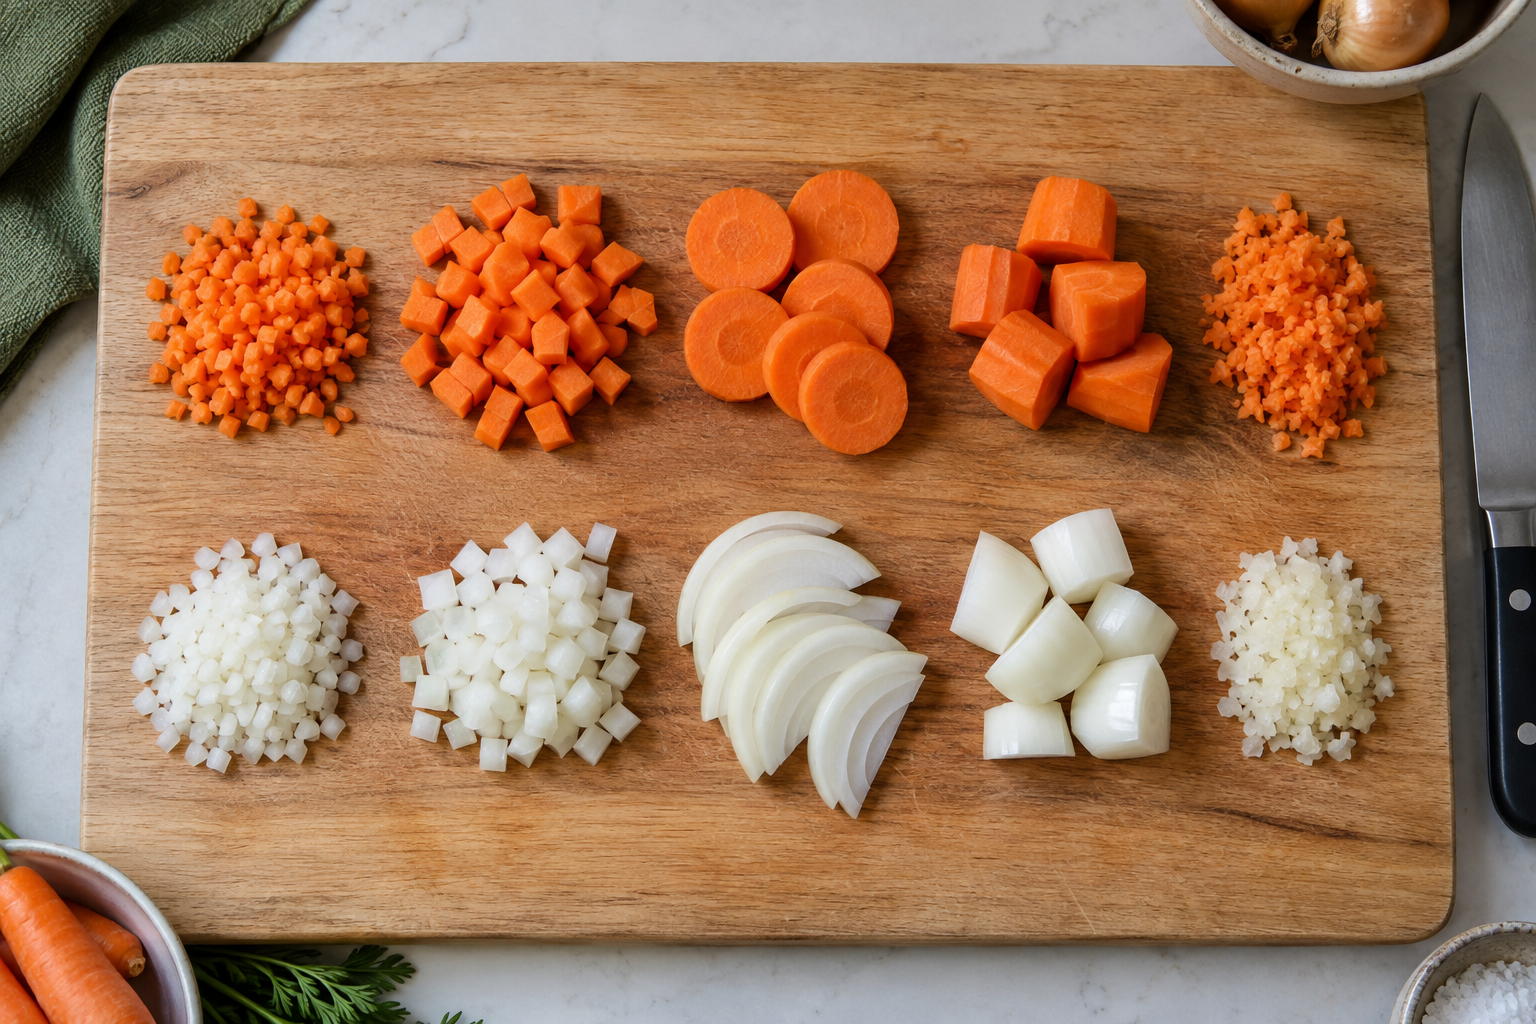
The cut changes the cooking
Chopping divides food into pieces without always requiring an exact shape. Dicing makes roughly cube-shaped pieces; slicing makes flatter pieces. Similar thickness helps pieces cook at a similar pace. First practise with cucumber, which can be eaten after washing and cutting without adding a cooking task. Smaller cuts are optional, not a test of speed.
Scoring means making shallow cuts in a surface without cutting all the way through. Recipes may ask for it to help a surface open, let seasoning reach grooves or control a skin's shape. It is not another word for chopping. Kitchen shears are strong food scissors, useful for herbs and some packaging or food preparation.
Set up the board
- Complete the linked clean setup, produce-washing and knife-grip lessons first. Use a whole cucumber long enough for two 10 cm sections, a sound suitable sharp kitchen knife, a roomy stable board with appropriate non-slip support, clean bowl, kitchen paper and washing-up tools. No hob needs to be on for slices or dice.
- Wash and dry the cucumber, your hands and knife handle. Keep ready-to-eat produce separate from raw meat or fish and their tools. Clear the whole blade path, and choose a visible knife-parking place away from the counter edge with its cutting edge directed away from the supporting hand.
- For the later scoring practice, separately set out one small slender aubergine around 200 to 300 g, 10 ml plain cooking oil, a marked 5 ml spoon, ordinary spoon or food brush, fork, clean tasting spoon and serving plate. Have a sound rimmed metal tray rated for the chosen oven setting, timer, two dry oven gloves and a trivet supporting the whole tray. Read and rehearse the full oven lesson before cutting.
- For shears, use two or three washed dried chives, a clean bowl and sound food shears whose pivot is secure and handles fit your hand. These are separate choices: you can finish the cucumber practice without doing either the oven or scissors task.
Practise slices, then dice
- Knife confidence: the safe claw gripUse the complete bridge-to-flat-face sequence.
- Knife confidence: the safe claw gripReset the curled hand between slow cuts.
- Washing vegetables and keeping prep cleanWash the practice produce and put cut food away by the full routine.
- Follow the knife lesson's bridge grip to cut a manageable section about 10 cm long, then divide it lengthways: the supporting thumb and fingers sit on opposite sides of the cutting line, with the knife passing through the clear gap. Do not try to balance a long round cucumber with a slicing claw for this first division. Park the knife before separating the halves. Put one flat cut face down.
- For crosswise slices, curl the guide-hand fingertips back, with thumb tucked safely away from the blade. Set up each cut while the knife is still. Make a slow slice about 5 mm thick, then reset the guide hand for the next. The actual claw movement is demonstrated in the linked lesson; do not chase rolling food or strike the board.
- Leave the final short end if fingers would approach the edge. Try a few 3 mm slices only when the thicker ones are controlled. Compare their thickness in the bowl with the knife parked. Even but slightly thicker slices are useful; recutting every small variation is unnecessary.
- For dice, prepare a fresh 10 cm section by the same bridge and flat-face steps. With a half flat-side down, cut lengthways into strips about 1 cm wide. Keep the supporting hand outside the full cutting line, using the bridge arrangement where needed rather than putting fingertips ahead of the blade. Leave any narrow strip you cannot safely support.
- Park the knife before gathering and turning strips across the board. Leave them flat, not in a tall stack. Work on one or two strips at a time with the curled guide hand, cutting crosswise at roughly 1 cm intervals and leaving unsafe small ends. Park the blade before comparing or transferring the pieces with a spoon.
- Eat a few washed cucumber pieces plain, or use a complete later salad lesson. Put the remaining cut cucumber and uncut portion away promptly by their storage instructions, planning to use the cut practice portion the same day. Wash the visible knife separately, rinse and dry carefully, store its edge protected, then wash and dry the bowl and board.
Scoring without cutting through
- Use an oven: settings, preheating, shelves and the grillComplete the cold rehearsal, correct function and supported tray handling.
- Use an oven: settings, preheating, shelves and the grillLand the full tray before checking its centre.
- Measuring accurately without stressMeasure two level 5 ml spoonfuls, not two eating spoons.
- Storage and reheating basicsCool and store a saved cooked half by the complete procedure.
- With heat off, check the tray and oven function, set the shelves as the oven lesson explains and rehearse lifting the cold loaded tray with both gloves to its full trivet. Wash and dry the small aubergine. On the stable board, use the bridge arrangement to remove the leafy cap with your hand outside the cut, then halve lengthways through the clear bridge gap. Do not hold it in the air or force a blade through an unusually hard specimen.
- Park the knife and put a half skin-side down, cut face upwards. It must stay still while scored. If it rocks, turn it cut-face down first, then with the supporting hand clear of the cutting line remove a very thin lengthways strip of the rounded outside skin on the board to make a base. Park the blade, turn it back onto that base and retest. Choose a better-shaped half or stop if a stable base cannot be made; do not score rocking food.
- Rest the supporting hand to the side of the half, outside the entire line the knife will follow. With a suitable sharp knife make one short shallow cut in the flesh, aiming for about 3 mm deep. Check the groove with the blade parked before continuing. The point must not pierce the skin underneath. Extend shallow lines roughly 1 cm apart across the broad face, keeping fingertips out of each path.
- Park the knife before turning the half on the board. Make a second set of shallow lines crossing the first to form a grid. Repeat the stable-base and shallow-cut steps on the other half. A deeper accidental cut is not a reason to push deeper everywhere; keep the remaining cuts shallow. Both halves stay together rather than becoming separate pieces.
- Park the knife, then spoon or brush one level marked 5 ml teaspoon of oil over each cut face, 10 ml in total. Place both halves cut-side up, spaced apart on the rimmed tray. This is a small plain teaching adaptation of a scored-half roasting method, not a tested cooking-time guarantee. Use 200 degrees C conventional or 180 degrees C fan, never the grill; follow the oven lesson's preheat signal and supported loading.
- Set a timer for 25 minutes. Land the hot tray on its full trivet with two dry gloves before checking. Push the fork into the thick centre, with the tray supported and hands clear: cooked flesh should yield easily and be soft, not springy and spongy. If firm, return the tray safely and check in another 5 minutes. Small halves often take about 30 to 40 minutes, but size and oven change this. If the top darkens before the centre softens, reduce the temperature slightly and continue checking rather than judging by surface brown alone.
- Switch the oven off when done and land the tray securely. Let a small spoonful of flesh cool on the plate before tasting with a clean spoon. You can scoop out the soft flesh and leave the skin if its texture is unappealing. Eat this plain practice while comfortably warm; put any saved cooked portion away using the full cooling lesson. Leave tray and tools to cool safely before washing, and store the clean dry knife protected.
- Bread dough, poultry and other meat have their own scoring depth, handling and cooking checks. This grid is a vegetable practice, not permission to slash any food by the same pattern.
Use shears for a suitable job
- Roast and spatchcock chicken: shape, heat and safe donenessFollow the poultry-specific positions and cleaning routine.
- Clean and set up your kitchen before cookingClean food-contact tools and separate raw-food work.
- Check the clean food shears with blades closed and no food present: a loose pivot, broken handle or uncertain grip needs assessment before snipping. Set the clean bowl on the worktop. Use only the two or three washed dried chives for this first practice, not packaging or raw poultry in the same session.
- Hold the chives by their upper part over the bowl. Keep fingertips at least a few centimetres above the cutting point, with shears below the holding hand. Open the blades, position the herb ends between them and close gently to snip short pieces into the bowl. Do not put supporting fingers between the blades.
- Advance the herbs only with the shears open and stationary. Stop with a safe long end still held; do not snip the last nub near your fingertips. Put the shears down closed and separate before gathering or transferring herbs. Add a small spoonful of snips to a portion of the prepared cucumber for a complete cold use.
- Put spare herbs away as their label requires. Wash, rinse and dry the shears following their maker, brushing sharp parts rather than rubbing them with fingers. Separate the two blades only on a model designed for that, then reassemble and check the pivot as instructed before protected storage. Household scissors are not a clean food tool by default.
- For a later poultry job, use proper poultry shears and the complete spatchcock lesson, including its hand positions, probe check and raw-food cleanup. Do not force ordinary scissors through bone. A butcher-prepared bird is an option; read that whole poultry lesson before starting.
Recognise when to stop
If the knife slips, the food rolls or your wrist needs increasing force, put the knife down and reset the setup. Fine slicing is optional; a slightly thicker, controlled cut is useful. Avoid a mandoline as a shortcut until you have its guard and understand its instructions, because the exposed blade can cut fingers very quickly.