Heat And Method
Hot oil: shimmer, smoke and when to stop
How to recognise oil that is warming, ready, too hot or smoking, and why beginners should treat smoke as a reset cue.
Before you begin
- How to use hob heat without guessingFind the controls and learn how the pan responds.
- How to soften onions without burning themPrepare the onion and read its full cooking method before heating the oil.
Shimmer and smoke are different cues
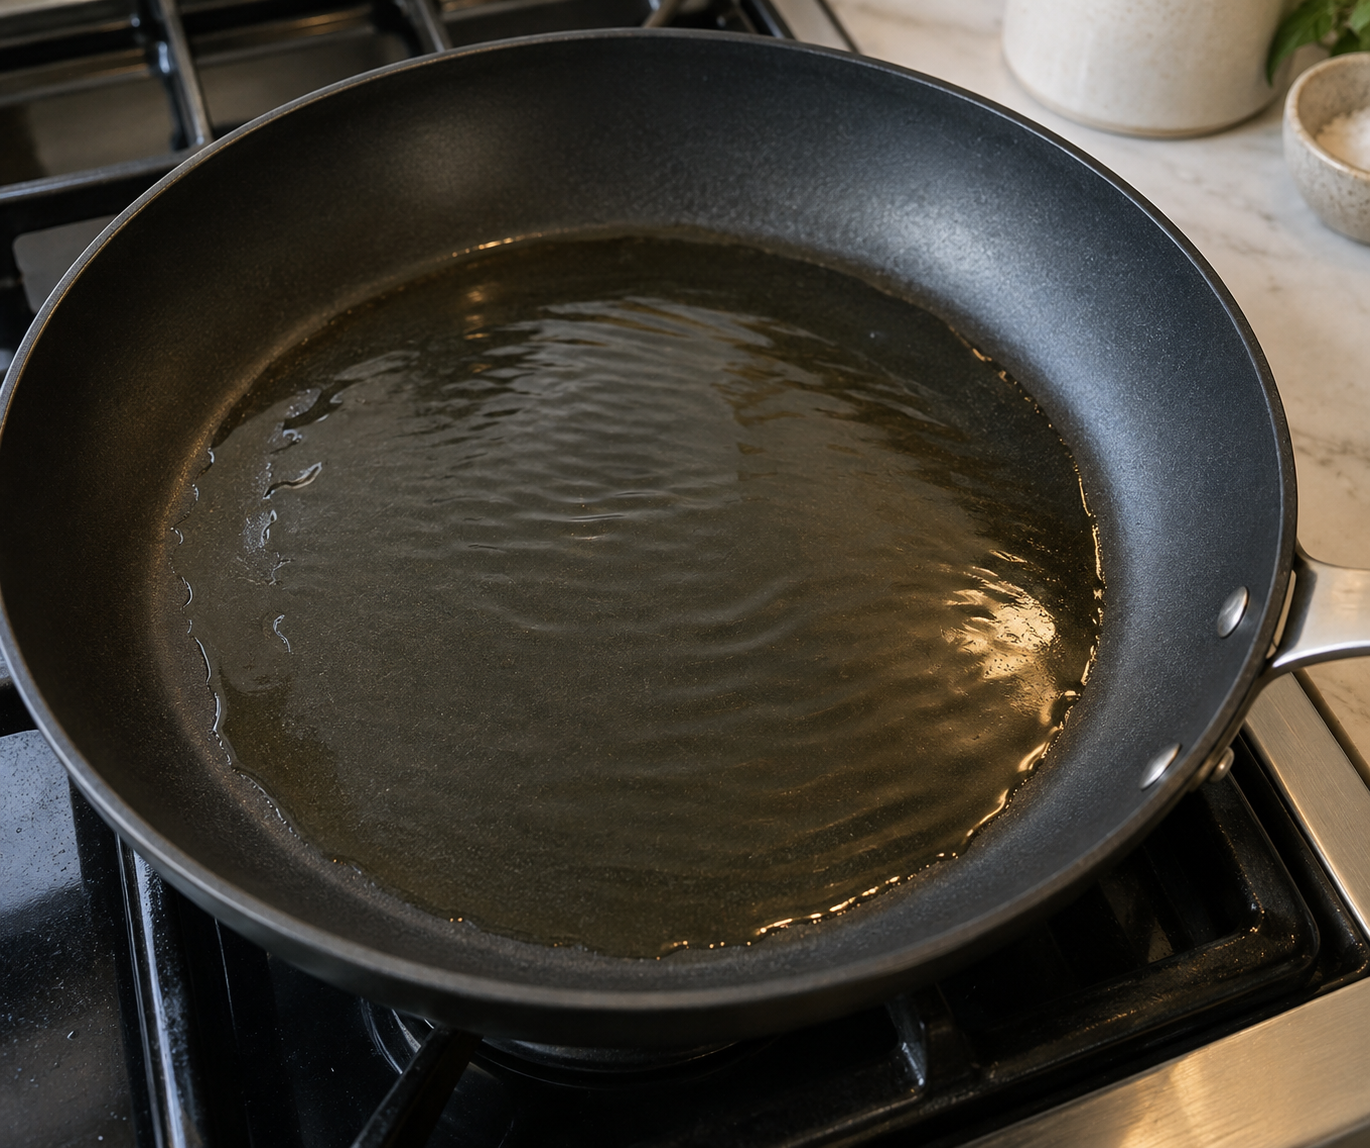
Shimmer is a changing reflective pattern in warm oil. Smoke is a stop signal, not the temperature target. Different fats and surfaces show these cues differently: you do not have to see shimmer to soften an onion, and a still photograph cannot tell you oil temperature.
This is shallow cooking with a measured thin film, not deep frying. Read the whole smoke and fire response before switching on. Do not use water drops, a finger or a hand held over the oil as a test.
Prepare a controlled first attempt
- How to use hob heat without guessingIdentify the ring, heat control and safe stopping position before cooking.
- How to soften onions without burning themPrepare the whole onion and read the same complete cooking sequence.
- Measuring accurately without stressUse scales, a jug and marked 5 ml and 15 ml measures, not eating spoons.
- Use one medium onion, prepared into 5 to 10 mm pieces by the full onion lesson, and 10 ml plain cooking oil suitable for the pan and job. These are the same quantities as that lesson, not half an onion with double the proportion of oil. Prepare every piece before heat.
- Set out the sound dry frying pan, coating-safe cooking spoon, marked 5 ml and 15 ml measures, small measuring jug, timer, dry oven gloves, full stable trivet, clean serving bowl and saucer, separate tasting fork and utensil rest. Have 30 ml drinking water measured separately for the onion method's optional food-filled-pan correction only. It is not an oil test or smoke remedy.
- Check hob and pan compatibility, heat limits, handle direction and a clear exit. Keep packaging, paper, cloths and the oil bottle away from the ring. Know how to switch this ring off without reaching across the pan.
Warm and use a thin oil layer
- How to soften onions without burning themFollow its tender-centre check and measured food-filled-pan correction.
- Storage and reheating basicsFollow the original cooking clock, shallow cooling and earliest ingredient deadline.
- Set the cool dry pan level on the ring, handle inward. Measure 10 ml oil as two level 5 ml spoonfuls into it. Use moderate-to-low heat and stay beside the pan. Warm briefly within the maker's limits, without an indefinite empty-pan wait for shimmer.
- Use the spoon to lower one small prepared onion piece close to the surface. A gentle sizzle is enough for this softening practice; no dramatic spitting is wanted. If there is little sound, add the rest and judge gradual softening rather than turning to maximum heat.
- If the test piece blackens almost at once or spits sharply, switch off and leave the pan stable in place. If there is smoke, use the separate smoke response below. Otherwise let pan and oil cool fully; discard the black piece and cold used oil by the disposal routine, wash and dry the pan and restart with a fresh 10 ml oil measure and the retained onion. Do not carry a smoking pan or add water to cool the oil.
- For the calm first attempt, add the remaining prepared onion carefully with the spoon and spread it out. Cook gently, stirring across the base about every minute. It often takes 8 to 12 minutes to turn soft and partly translucent; lower heat if edges darken while the centre stays firm.
- Only with onions already in the pan, a calm low heat and no smoke, flames or pool of deep oil, use 15 ml of the separately measured water if the onion is sticking. Add close to the food with the measure, hand and face away from steam, then stir gently. This is the complete onion lesson's food correction, not a method for making hot oil safe.
- Check a thicker onion piece on a clean saucer or in the serving bowl, cool it and taste with the separate fork. It should be soft through, without a hard centre. Switch off, land the pan on its full trivet using dry protection, and transfer the finished onion with the cooking spoon. Eat plain as practice or use a complete linked later dish. Start the full cooling routine for saved food.
If the oil smokes
Switch off only if you can reach the control safely. Leave the pan stable where it is, keep hands away and let it cool fully. Do not move a smoking pan, add food, pour in water or cover it by reaching over it. If there are flames or you are unsure whether you can stay safely, leave and follow the fire response below.
Once the non-burning pan is fully cool and safe to handle, discard the cold used fat appropriately, wash and dry the pan, and reassess the heat and oil suitability before a fresh attempt. Open ventilation only if that is safe and does not delay leaving a fire. Smoking oil is not salvaged by pouring in fresh oil.
Which fat suits the job?
- Butter, oil and finishing fatUse its measured cooked-food butter finish and separate utensil checks.
Choose the actual oil and pan instructions rather than a universal shimmer or smoke temperature. Butter contains milk solids that can brown and burn; mixing it with oil does not remove those solids. This first onion exercise uses plain oil to keep that extra cue out of the task.
For a later butter finish, use the fully described cooked broccoli or plain passata comparison in the linked fat lesson. Do not assume a finishing addition belongs in an empty pan heated until smoking.
Keep fire and disposal decisions simple
If a pan catches fire, do not tackle it and do not move it. Never put water on it. Switch off the heat only if safe without reaching through danger; get everyone out, close the door behind you where safe, and call 999 from safety. Do not return to try another remedy.
For ordinary used oil after it has cooled fully, support the pan on the worktop and spoon the fat into a suitable closed waste container according to local disposal rules. Do not pour it down the sink. Cool the pan before washing, and keep oily paper or cloths away from heat.
Hot starts and cold starts both have a place
- Storage and reheating basicsFollow the original cooking clock, shallow cooling and earliest ingredient deadline.
A hot start is useful in some browning methods; a cold start or gentler warming suits others. The method depends on the food, fat and pan, not an instruction to smoke oil before every task.
Record the ring and approximate gentle setting that softened your onion, the total time, and whether you needed the food correction. Next time repeat that calm setup, then adjust from the food cues. Save only correctly cooked food with a known storage history; this lesson does not make burnt or mishandled food safe.