
Charts And References
Air fryer conversion basics
How to think about oven-to-air-fryer conversions, spacing, checking early and avoiding dry or over-browned food.
Before you begin
- Air fryer first use: baskets, space and cooking checksFinish the complete first-use carrot task before changing a recipe.
An air fryer is a small fan-driven oven
An air fryer's compact fan-driven space can brown food sooner than a full-size oven. Basket design, amount, thickness, mode and the exact model affect the result. There is no universal temperature or percentage reduction that proves cooking is complete. Begin with a full method developed for your model or the food's own applicable air-fryer directions.
Finish the first-use lesson before this adaptation. It supplies cold assembly, loaded-drawer rehearsal, dry gloves, trivet, starting and restarting, testing, serving and cleanup. A conversion changes a method; it does not replace those actions.
Check before converting
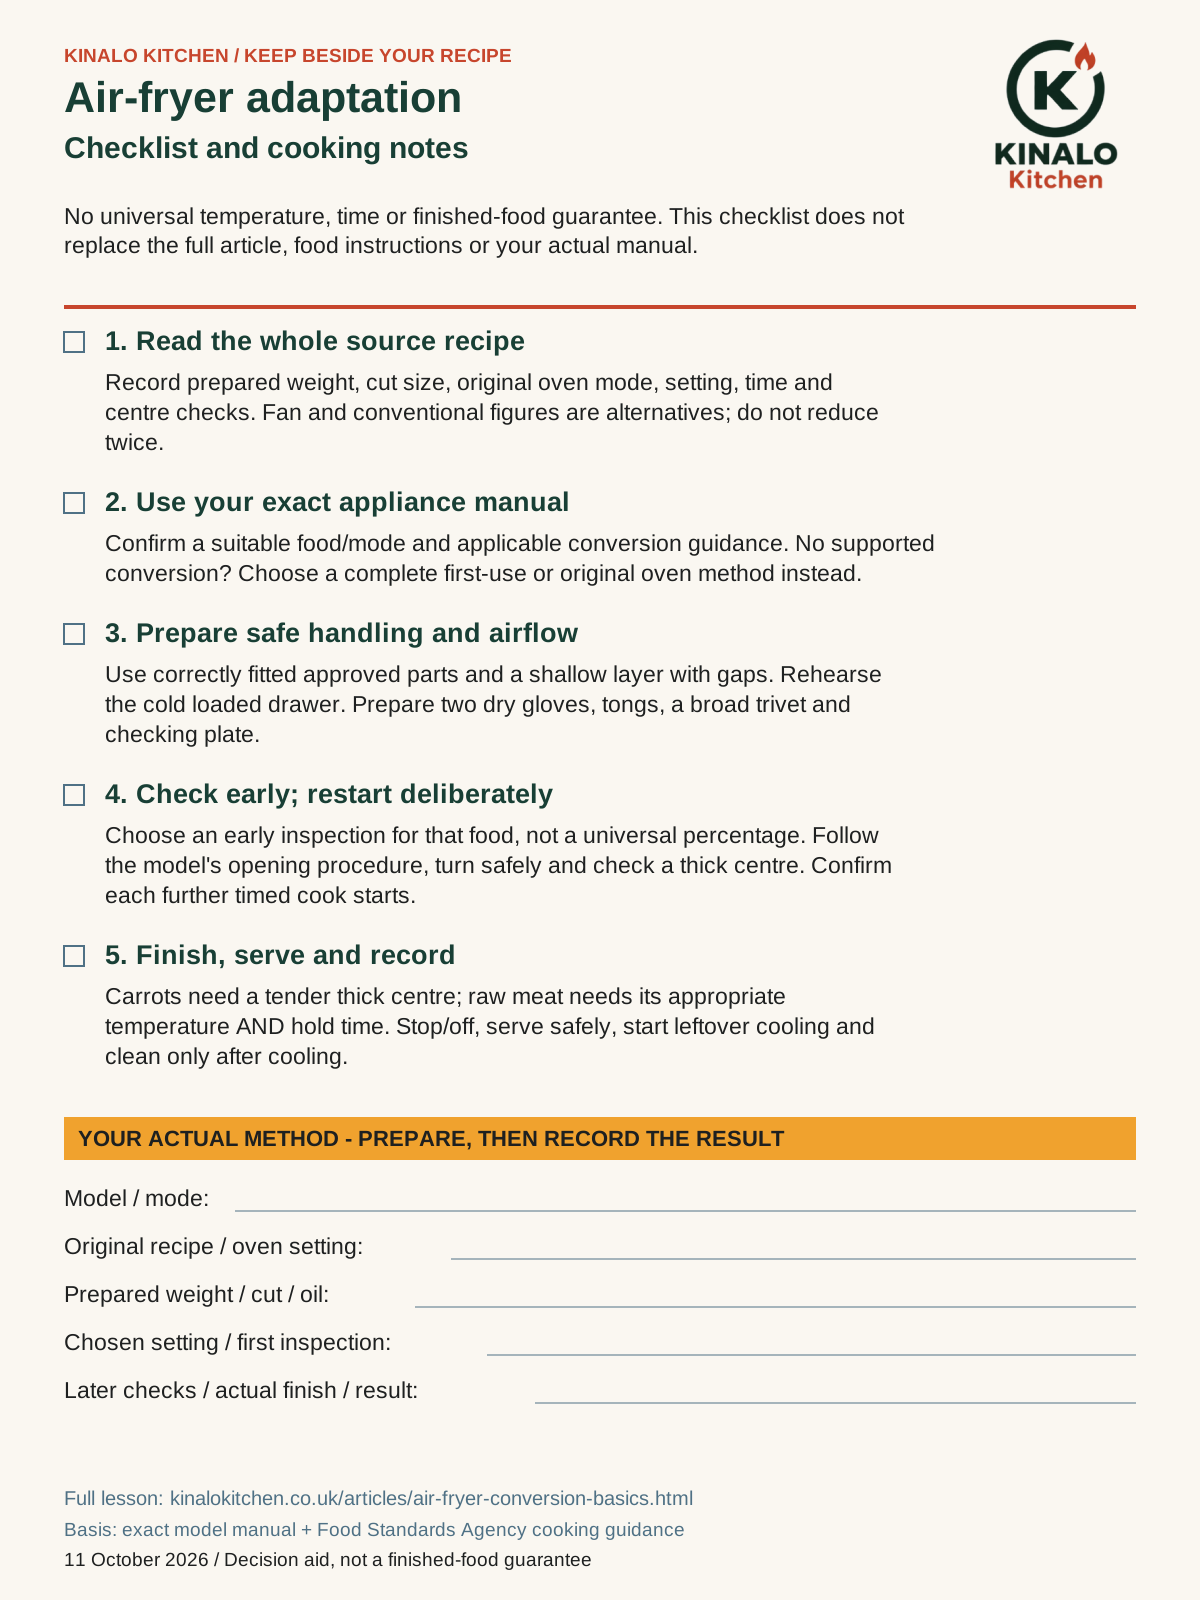
- Read the WHOLE source recipe: ingredients, prepared weight, cut size, original oven function, temperature, time and centre checks. Conventional and fan figures are alternatives, not two adjustments to apply in succession.
- Find the actual appliance model's suitable food/mode instructions and conversion guidance. Resolve uncertain mode names or restrictions before heating. A rule for another model is not permission for yours.
- Check whether the required food fits in a shallow layer with airflow, and whether the supplied basket/plate is correctly positioned. A full deep heap is not the small source batch.
- Check any dish or liner against BOTH the accessory and appliance permissions. For this first trial use only the supplied plate/basket, no paper, foil or extra dish.
- Choose a different complete method if the original food needs an unsupported liquid pot, loose batter, oversized joint or uncertain bake. If the manual does not support this conversion, finish the first-use carrot task instead, or use the original oven method unchanged.
Adapt a small vegetable batch first
- Roasted vegetables: spacing, oil and donenessRead the actual original quantities, larger cut and oven pair.
- Air fryer first use: baskets, space and cooking checksUse its full hot-drawer handling and restart checks.
- Washing vegetables and keeping prep cleanComplete the fresh-carrot preparation first.
- Read the complete roast-carrot lesson as the source: 400 g prepared carrots, 15 ml oil, pieces about 2 cm, 220 C conventional OR 200 C fan, an early turning check and a fork-tested centre. This trial CHANGES it to 250 g prepared carrots and two marked 5 ml teaspoons oil, 10 ml total. It is a smaller KINALO teaching variation, not a kitchen-tested reproduction or a claim that the original oven time transfers.
- Check your exact manual before preparing a hot batch. As a paper-only example, the AF180UK booklet suggests subtracting 10 C from a conventional-oven recipe, so 220 minus 10 gives 210 C for that model. Do not subtract it from the already converted 200 C fan figure. Use 210 for the trial ONLY on that model with its permitted AIR FRY setup, or use your own model's explicitly applicable setting. If unclear or unsupported, stop this conversion and choose the separate complete first-use or oven lesson.
- Wash, dry, trim and optionally peel fresh carrots, then make the roast lesson's stable bridge-held lengthwise halves and flat-face-down claw cuts about 2 cm long. Keep very thick pieces no more than about 2 cm thick by dividing a supported long half again before cross-cutting. Weigh 250 g after preparation using the tared bowl. This is NOT the 5 mm half-moon cut from first use. Park the knife and wash/dry hands before handling controls.
- Set out the first-use lesson's bowl and spoon, marked 5 ml measure, approved fitted drawer/plate, heat-safe tongs, checking fork/plate, separate serving plate, clean tasting fork, two dry gloves, broad trivet, timer and leftover containers. Stir and turn with the measured 10 ml oil for a thin coating; no deep oil pool. Rehearse the cold loaded drawer to the trivet. If it cannot fit without piling, use a smaller batch and record its actual amount rather than crowding.
- Follow the actual accessory and preheat procedure from first use. If preheating is required, keep the food in its bowl during the approved empty-parts preheat, then load the supported hot drawer with tools and dry gloves. Select the supported conversion mode and temperature, set 8 minutes for the first inspection and start/confirm the cooking indicator. This is an early check, not an 8-minute finished-food promise.
- At 8 minutes follow that model's opening procedure, wear dry gloves and land the drawer on the trivet. Turn with the tongs and transfer a thick carrot to the checking plate. Test the centre with a fork; a cooled small bite with the separate clean tasting fork can assess preferred tenderness. Keep mouth-used tools and tasted samples out of shared food. A browned edge alone is not the endpoint.
- If the thick centre remains hard, reinsert securely and set/start another 3 minutes, confirming cooking again after an ended timer. Repeat centre checks every 3 minutes. If edges darken too quickly, select a permitted setting about 10 to 20 C lower and continue checking. Remove bitter black pieces rather than treating them as a desirable colour. An unsupported temperature or persistent uneven result is a reason to use a suitable established method next time.
- When thick pieces are tender and the surface is browned to your preference, stop and turn off. With dry gloves land the drawer level on its trivet and lift carrots with the tongs onto the separate standing serving plate. Do not tip hot fat or a loose plate. Cool a bite before eating; this plain side portion finishes the task without another recipe.
- Record original and chosen settings, model, mode, cut, weight, oil, first check, later checks and actual total time. Cool untouched leftovers promptly using the full first-use/storage routine: refrigerate within 1 to 2 hours, use within 48 hours or earlier ingredient limits, reheat only once until steaming throughout. Keep the original cooking clock. Let the switched-off unplugged unit cool, then clean fitted parts, tools and worktop as the first-use lesson directs.
Why the 20 per cent idea is only a reminder
The arithmetic is straightforward: 25 minutes multiplied by 0.8 is 20 minutes. That is a paper calculation, not a universal safe first-check time or a finished-food instruction. Some food can scorch before 20 minutes. The small carrot trial above checks at 8 minutes instead of relying on the percentage.
Temperature adjustment and checking time are separate decisions. Do not apply this percentage to raw chicken, a stuffed joint, a chilled ready meal or a delicate bake in place of appropriate food/appliance instructions. A timer is a reminder to inspect, not a safety test.
Brown outside, underdone inside
- Meat temperatures: a practical UK cooking referenceChoose the appropriate food category and full holding time.
- Thermometer cleaning and careClean between undercooked and later checks.
For the plain carrot trial, a tender thick centre finishes the cooking check. For raw poultry, pork, minced, rolled and stuffed meat, use a suitable full method and the appropriate probe temperature AND holding time. The FSA gives 75 C for 30 seconds or 70 C for 2 minutes as examples of thorough cooking, not merely a quick reading.
Clean the probe between checks of undercooked and later food; keep raw-food tools separate from serving utensils. Lowering the heat may protect the surface, but it does not certify an uncertain centre. Never serve from a crust photograph or transfer carrot timing to meat.
Keep a useful appliance note
Use the one-page A4 checklist to record the actual model and original versus chosen method before heating. It is a decision aid, not a temperature table. Its blank check/finish fields deliberately have no universal completion time. Keep it on a clear worktop away from hot parts and vents.
After a successful trial, record the actual amount, cut, settings, checks and final result. Keep them similar for the next batch. A full basket or different cut needs its own judgement. If an adaptation repeatedly requires uncertain changes, use a suitable established method instead of treating your notes as a guarantee.